5.2 Creating and Viewing a Custom Property Page
It is possible to create custom property pages for individual elements in the hierarchy. Custom property pages display alongside the other property pages associated with an element. Access these pages by right-clicking an element in the Explorer pane, then selecting .
NOTE:Custom property pages apply only to the element for which they are created. If an existing property page is “added” to an element using > , a copy of the property page is created rather than linking the element to the metamodel property page definition. Any changes to the original property page definition in > > are not updated in any copied property pages assigned to the element using > . To assign an existing metamodel property page to an element or elements without making a custom copy, add a matching rule to a that then adds the . For more information about Behavior Models, see Section 4.3, Creating and Deleting Behavior Models.
Table 5-2 describes the operations that can be performed on custom property pages and fields.
Table 5-2 Custom Property Operations
|
Operation |
Button |
Description |
|---|---|---|
|
New Property Page |

|
Creates a property page. |
|
Browse |

|
Select a property page created under > > . Selecting a property page, makes a copy of the property page definition rather than linking the existing metamodel property page definition to the element. This new definition and any modifications to it, applies only to the selected element. For information on custom property pages, see Section 4.0, Defining Classes, Behavior Models, and Property Pages. |
|
Edit |

|
Enables editing either the highlighted property page or field. |
|
Copy |

|
Creates a copy of the highlighted property page or field. The copy has the same name as the original with a number in parenthese. For example: copy(1) |
|
Delete |

|
Deletes the highlighted property page or field. |
5.2.1 Creating a Custom Property Page
To create a custom property page:
-
In the Explorer pane, right-click an element in the hierarchy, then select to open its dialog box.
-
Click
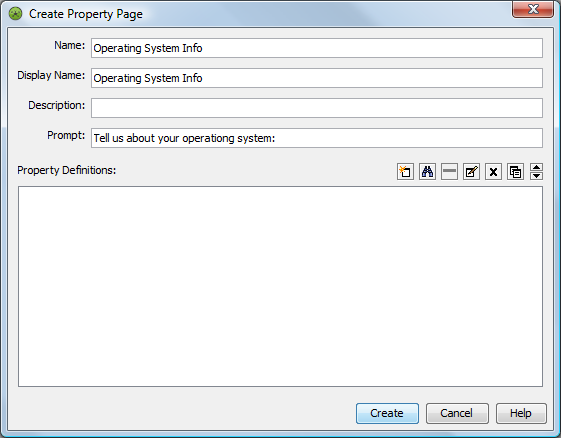
 () topen the Create Property Page dialog box:

-
In the field, specify the new property page name.
-
To add custom property fields to the page, click
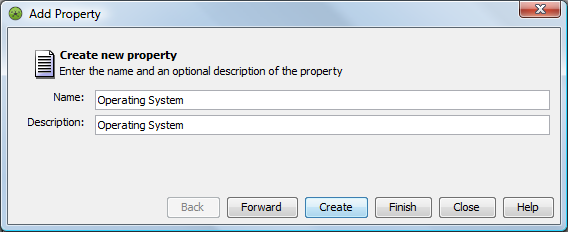
 () in the section to open the Add Property dialog box.
-
Specify the first property name and description, then click .
The remaining dialog boxes, which set up the property type, the default values, masks, required properties, and validation rules, are explained in Defining Properties for a Property Page.
Property names cannot include the space character or the following special characters:
<>#%"’{}()[]|\^`)
-
Click to add the property.
Add more properties as necessary.

-
Click when finished defining properties.
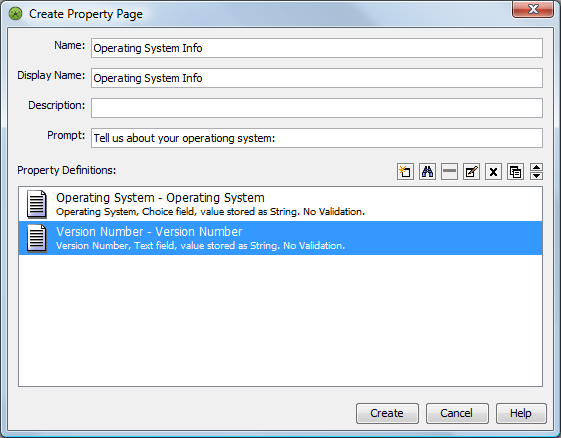
The Create Property Page dialog box displays the properties:

-
Click to create the custom property page.
5.2.2 Viewing Custom Property Pages
-
In the Explorer pane, right-click the element, then select to open the Status property page.
All custom property pages display at the bottom of the list on the left.
-
In the left pane, click the custom property page name to displya its page.
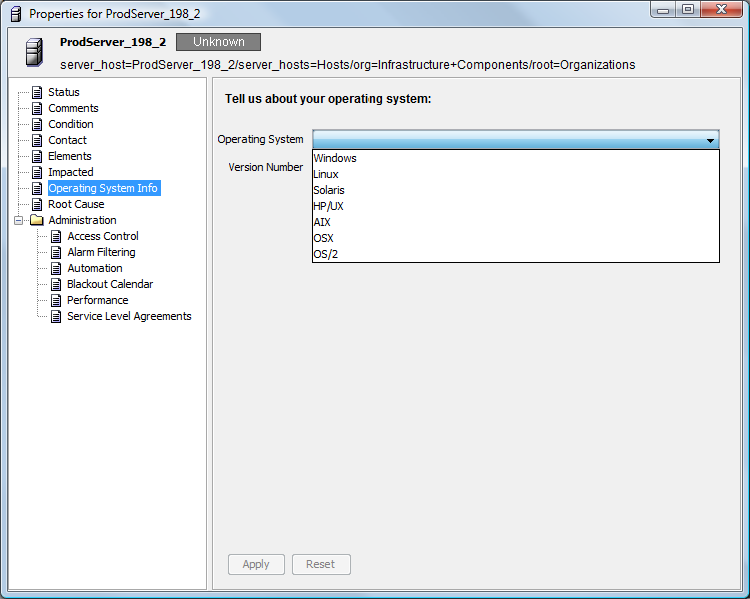
The following illustration shows a custom property page named BPA. The custom property Operating System displays a drop-down list of options.
