4.4 Managing User Accounts
Managing user accounts involves the following:
-
Creating users
-
Editing user settings including passwords
-
Deactivating and activating users
-
Deleting users
Administrators can create users for their entity in the corporate hierarchy. The Dashboard also has functionality to allow users to create their own accounts (such as self-service account creation).
User accounts created in the Dashboard are automatically added to the Operations Center server and assigned to the users group. The user account is restricted to accessing only to the Operations Center Dashboard.
If there are specific e‑mail addresses and/or user IDs that should not be used, identify them as reserved. These options can be found on the Control Panel under > .
NOTE:When you create or delete users or alter user settings, the action applies to user accounts in the Operations Center server. Deactivating and activating users impacts the user account only in the Dashboard and has no impact on the user account in Operations Center.
4.4.1 Self-Service User Account Creation, Authentication and Notification Settings
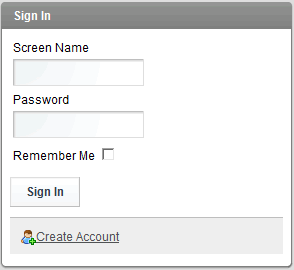
By default, the Dashboard home page contains a Sign In portlet allowing users to create new accounts. New users receive an e‑mail containing a password. If required, the user can be forced to create a new password on initial login.
Figure 4-1 Sign In Portlet
By default, the Dashboard uses the default local host for the IMAP and POP3 host to send e‑mail to new users, for password requests, and password change notifications. For more information, see Section 3.6, Configuring the Mail Server.
Disable various user account authentication-related features in the Control Panel in > including:
-
Automatic login.
-
Forgotten password request.
-
Self service user account creation with e-mail address.
-
E-mail verification on new accounts.
Configure e-mail notification functionality, including e-mail content, in the Control Panel in > .
Some of these features can be disabled by adding and editing the relevant properties to /OperationsCenter_Dashboard_install_path/server/webapps/ROOT/WEB-INF/classes portal-ext.custom.properties file.
For more information about user authentication or e-mail notification, see the Liferay 5.2 documentation at http://www.liferay.com/documentation/liferay-portal/5.2/getting-started. Liferay Password Policies settings for Password Lockout and Password Expiration are unsupported by the Dashboard.
For information about the portal-ext.custom.properties file, refer to Section 3.9, Understanding Portal Properties Files.
4.4.2 Default Associations for User Accounts
It is possible to select a default user groups, communities, and roles for all new users that are created in the dashboard.
To automatically assign all new users to one or more user groups, communities or roles:
-
Click and select .
-
Under , select .
-
Select .

Automatically assign new users to one or more user groups, communities or roles.
-
In the field, enter one or more community names, one per line.
-
In the field, enter one or more roles, one per line.
-
In the field, enter one or more user group names, one per line.
-
Click .
4.4.3 Creating User Accounts
Administrators can create and edit accounts for users through the Control Panel. By default, all new users are automatically active. Note that most users won’t be able to perform most of the operations or have access to the Control Panel. Only those with administrative can perform all of the functions.
Adding a User
To add a new user:
-
Click . The form displays.
-
Specify user details in the fields provided.
First name, last name, e‑mail address, and screen name are required.
-
Click to select any organizations and/or location for the user.
-
Click .
-
When the user ID is created, a password is automatically generated and an e-mail message with the password in it is sent to the user if the SMTP mail server connection was setup properly. Additional options are available through links on the right.
-
If you have not yet set up your mail server, click to change the default password for the user ID to something you can remember and send to the user.
Click after making changes.
NOTE:When a new user is added, the same user account is added to the Operations Center server and is automatically given access to the Operations Center Dashboard and is placed in the users group.
Configuring User Accounts
To configure a user account:
-
Click and select .
-
Under , select .
-
Click next to the user and select from the options to update and configure the user account.
-
Edit User: Modify the user account.
-
Permissions: Define which Roles have permissions to edit theuser.
-
Manage Pages: Edit any pages the user has.
-
-
Click .
Searching for Users
When you have a long list of users, you can search for a specific user.
To search for a user:
-
Enter search criteria in the Search field.
Click to define additional search criteria.
-
Click to find any users matching the criteria.
4.4.4 Activating, Deactivating, and Deleting Accounts
Using the Control Panel, you can deactivate accounts, which prevents a user from logging in to the Dashboard. You can also restore the account so it is active. These actions do not affect the user account in the Operations Center server.
After an account has been deactivated, you can permanently delete it. A user account deleted in the Dashboard is also deleted in the Operations Center server.
To activate, deactivate or delete a user account:
-
Do any of the following:
-
To deactivate a user account, click and select next to the user’s name.
-
To restore a user account that has been deactivated, click for the drop-down list in advanced search options, then click to view all deactivated users.
Click and select .
-
To delete a user account, first deactivate the account, then in the user list for accounts that are not active, click and select .
-