11.1 Customizing Icon Display
Elements originating from OpenView or NetView networks display with the standard icons used by the management system. Other elements display with icons from the Operations Center Icon Library based on the element’s class.
Customized icons can be assigned for any non-system object class to replace the default icon. Custom icons display anywhere the element is represented in the Operations Center console. This includes the column in the and views.
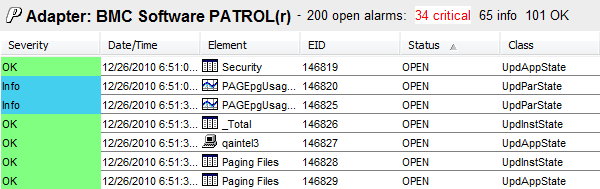
Figure 11-1 Element Icons Displayed in Alarms View
To customize the display of icons:
11.1.1 Assigning an Icon to the Class
To assign a new icon to a class of elements:
-
In the pane, expand > > > .
Open the section that contains the class for which you want to assign a new icon to update the pane.
-
Do one of the following:
-
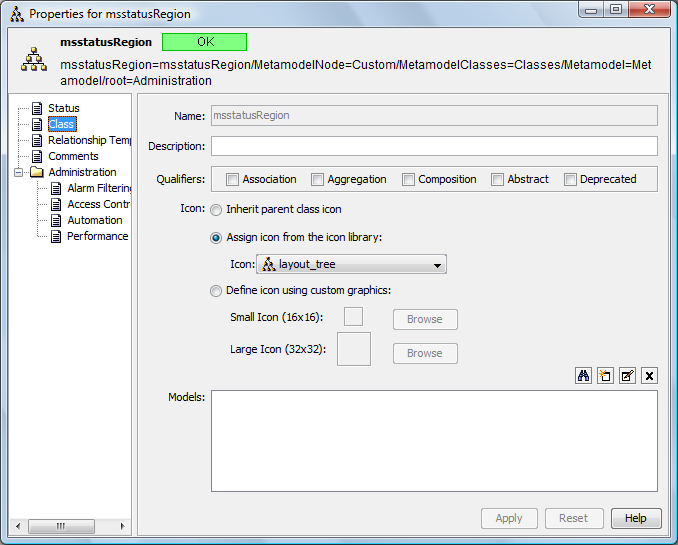
Right-click the class and select. When the Properties dialog opens, select the tab.
-
Select the class, then open the view. Click the
 for the box.
-
-
To assign a new icon, do one of the following:
-
Select the radio button, click the drop-down list, then select the existing icon to display for the class.
-
Select the radio button (Small Icon or Large Icon), click , navigate to the icon, then click .
The selected icon displays on the Create Class dialog box.
-
-
Click to display the new icon for the class.
11.1.2 Animating Element Icons
An animated icon can be created through the automation utility, or through a programmatic script, such as the Operations.ini file.
The icon must be in a .gif format. Only GIF images can be applied as animated icons.
To create and use a customized animated icon:
-
Determine the object’s class.
For more information, see Section 11.2, Determining an Element’s Class Name.
-
Move the /OperationsCenter_install_path/database/examples/Operations.ini file to the /OperationsCenter_install_path/database directory.
-
In a text editor, edit the Operations.ini as required. For example:
[Set Blinking]
description=Set to Blinky
target=dnamematch:.*/root=Organizations
context=element
type=serverscript
operation=\
// @debug off \n \
element.setGraphic( '/images/large/blinkit.gif' )
command=Blink

[Unset Blinking]
description=Set to non‑Blinky
target=dnamematch:.*/root=Organizations
context=element
type=serverscript
operation=\
// @debug off \n \
element.setGraphic( '/images/large/unblink.gif' )
command=UnBlink

[Clear Graphic]
description=Clear Graphic
target=dnamematch:.*/root=Organizations
context=element
type=serverscript
operation=\
// @debug off \n \
element.setGraphic( '' )
command=Clear
Elements of the specified class use the animated icon as specified.