14.3 Getting a Baseline of Business Logic
Now that all the of drivers are running, you can complete the last initialization step, which is to get a baseline of the business logic and export your user data by using the import/export drivers.
-
In iManager, select > .
If the iManager session timed out, you need to log in to iManager again.
-
Browse to and select the driverset1.idm.services.system driver set, then click .
-
Click the business-logic driver.
-
Select > .
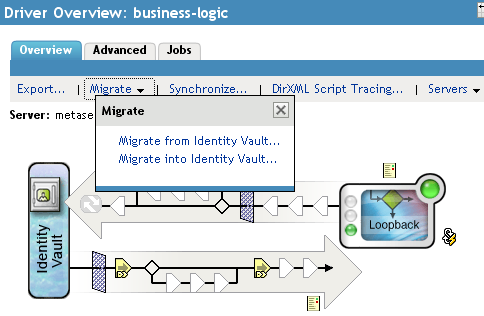
-
Click , then browse to and select the user.company.data container.
-
Click to add the container, then click to start the migration.
-
Click in the success message.
-
Click at the top of the screen to return to the Overview page.
-
Repeat Step 3 through Step 8 for the user-import-export driver, then continue with Step 10.
-
Check the /var/novell/idm/users/output directory for the <timestamp>.csv file.
This file contains all the users in the users.company.data container.
-
Modify this file and copy it to the /var/novell/idm/users/input folder to update the objects in the Identity Vault.
-
Repeat Step 1 through Step 8 for the image-import-export driver, then continue with Step 13.
-
Check the /var/novell/idm/users/output/images directory for workforceID.png files. These are all the employees' photos. Replace one of the photos with a different photo and copy it into the /var/novell/idm/users/input/images folder to update the photo for the user identified by the workforce ID in the Identity Vault.
-
Proceed to Section 15.0, Activating the Resource Kit.