10.2 Managing Teams
This section includes information about the following topics:
10.2.1 Creating a Team
To create a new provisioning team:
-
Launch the New Team wizard in any of these ways:
From Designer’s menus:
-
Select , then click .
From the Provisioning view:
Right-click , then select .
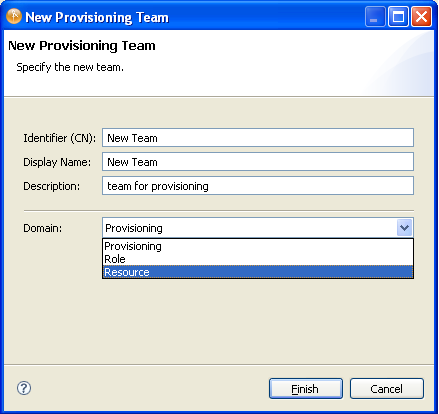
The New Provisioning Teams dialog box displays.
NOTE:When launched from the menu, the dialog box contains fields not displayed when launched from the Provisioning view.
-
-
Fill in the fields as follows:
-
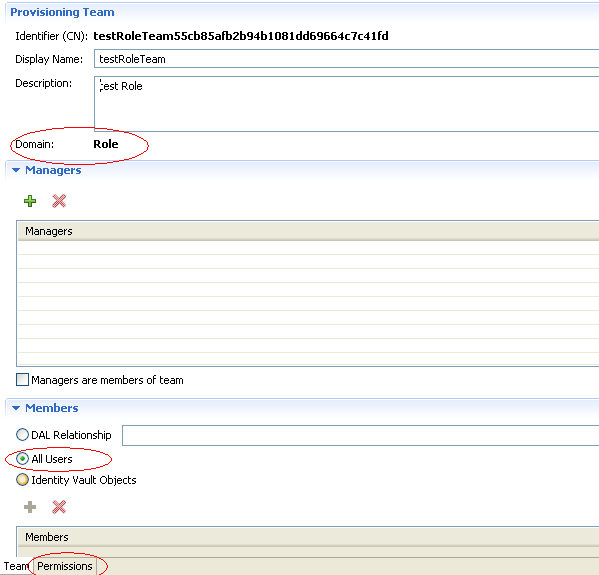
Click . The Team panel of the Provisioning Team editor displays.
-
Type a description.
-
To define the team’s members, do one of the following:
-
Click , then select the relationship that represents the team’s membership.
-
Click , means all users are members of this team.
-
Click . Click
 , then select the members from the Identity Vault. Members can be users, groups, containers, organizational units(OU), or organizations (O). Specifying an O or OU can impact the User Application’s runtime performance. The manager will need to search for the member using a select-pick list to reduce the performance impact.
-
-
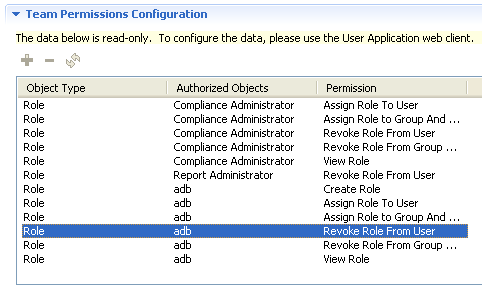
Click . The Team Permissions Configuration page displays.
-
Click .
NOTE:The Team Permissions Configuration page is read-only. The object information is populated from the User Application.
You must save the Provisioning Team for it to be available to the User Application. See Section 2.7, Deploying Provisioning Objects. A provisioning team creates one object (srvprvRbpmTeam) in the User Application driver Appconfig Teams node. The srvprvRbpmTeam contains the provisioning teams object.
IMPORTANT:The team and the team request objects represented a team in the User Application versions prior to 3.7. The team request object contained the request that could be accessed by the team. User Application 3.7 teams store the permissions on individual requests or request containers eliminating the need of two objects. For more information on team authorization, refer to the Configuring Provisioning Teams in the Identity Manager Roles Based Provisioning Module 3.7: User Application: Administration Guide.
10.2.2 Deleting a Provisioning Team
You delete the Provisioning Team object from the Provisioning view by selecting the team, right-clicking, then selecting . The Delete confirmation dialog box lets you specify whether to delete the object locally only, or from the Identity Vault during the next deploy of the parent object.
10.2.3 Creating a Team to Manage Direct Reports
Refer to the Configuring Provisioning Teams in the Identity Manager Roles Based Provisioning Module 3.7: User Application: Administration Guide.
Save and the team. For more information, see Section 2.7, Deploying Provisioning Objects.