4.2 Editing the Schema Mapping Policy
There are two different parts to editing a Schema Mapping policy. First, you edit the placement of the policies in the policy set. Second, you edit the policy itself through the Schema Map editor.
4.2.1 Placement of the Policies
-
In the Identity Manager Driver Overview page, click the Schema Mapping Policy to bring up the Schema Mapping Policies window.
For instructions on how to access the Identity Manager Driver Overview page, see Accessing the Identity Manager Driver Overview Page.

The options in this window allow you to position the policy you are currently working with. The following table explains each of the options:
Option
Description
Insert
Inserts a new or an existing policy into the policies listed.
Rename
Renames the selected policy.
Remove
Removes the selected policy without deleting the policy from the policy set.
Delete
Deletes the selected policy.
DirXML Script Tracing
Turns DirXML Script tracing or DirXML Rule tracing on or off.
Move Policy Up
Moves the selected policy up if there is more than one policy.
Move Policy Down
Moves the selected policy down if there is more than one policy.
Policy DN
Simultaneously selects all policies.
4.2.2 Schema Map Editor
The Schema Map editor is a complete graphical interface for creating and managing the schema mapping policies. The Schema Map editor creates a policy by using XML.
To access the Schema Map Editor:
-
On the Identity Manager Driver Overview page, click the Schema Mapping Policy set.
For instructions on how to access the Identity Manager Driver Overview page, see Accessing the Identity Manager Driver Overview Page.
-
Click the name of a policy.

The Schema Map editor has three tabs:
Identity Manager Policy
Contains the most information and is where you edit the policy through the GUI interface.
Table 4-1 Schema Map Editor Tasks
|
Removing Classes and Attributes |
Select the class or attribute you would like to remove, then click . |
|
Adding Classes |
Select the eDirectory class from the drop-down list, then select the Application class from the drop-down list. With the items selected, click , then click to save the change. |
|
Adding Attributes |
Select the class of the attribute you want to add, then click . Select the eDirectory attribute from the drop-down list, then select the Application attribute from the drop-down list. With the items selected, click, then click to save the changes. |
|
Listing Non Specific Class Attributes |
If there are attributes that are not associated with a class, click the icon and all of these attributes are listed. |
|
Refreshing Application Schema |
If the schema has changed for the application, click the icon. The wizard contacts the Connected System server to retrieve the new schema. After the schema has been updated, the schema is listed in the drop-down lists. |
|
eDirectory Schema Tools |
|
WARNING:Do not delete any classes or attributes that are being used in the Identity Vault. This can cause objects to become unknown.
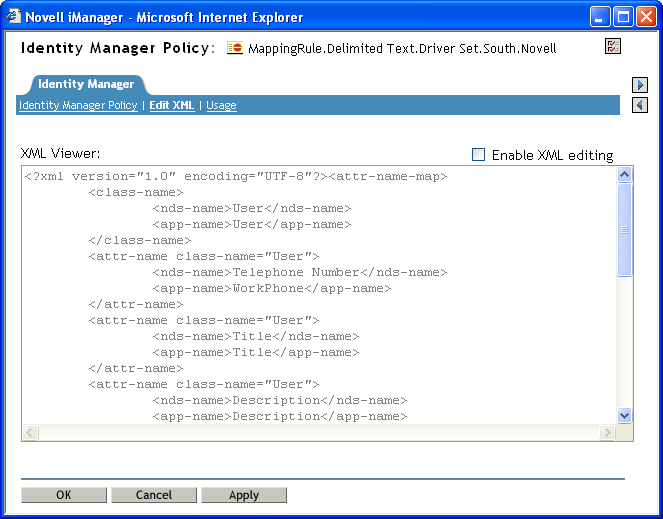
Edit XML
Select to edit the DirXML Script policy. Make the changes you desire to the DirXML Script, then click to save the changes.
Figure 4-1 Edit XML
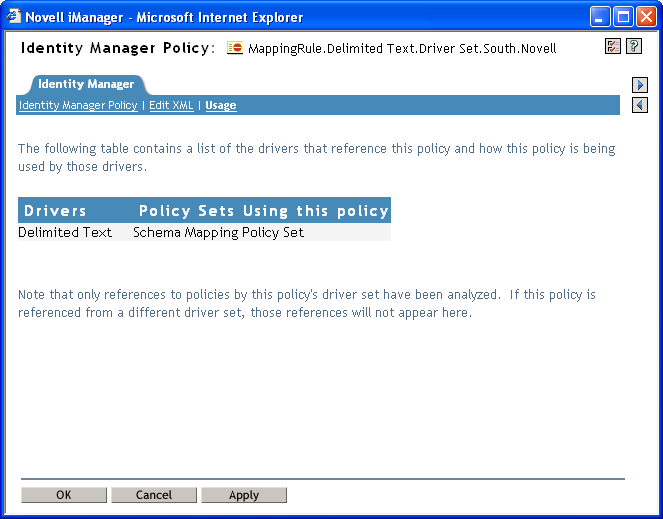
Usage
Shows you a list of the drivers that are currently referencing this policy. The list refers only to policies in this policy’s driver set. If this policy is referenced from a different driver set, those references do not appear here.
Figure 4-2 Usage