5.3 Creating Forms
This section describes how to create new forms and add controls to them. It includes these topics:
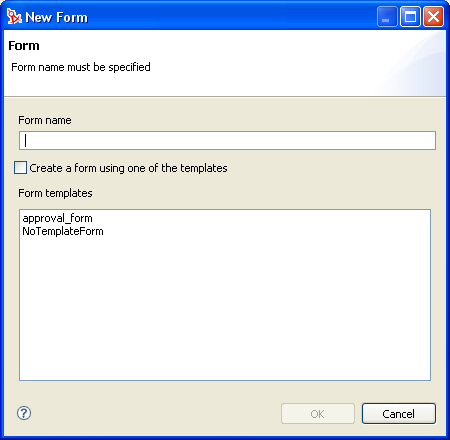
5.3.1 Creating New Forms
-
With the provisioning request definition editor open, click the tab.
-
In the section of the page, click to access the New Form Wizard.
-
Fill in the fields as follows:
Field
Description
Type the name of the form as you want it to appear in Designer.
If you want to base the new form on an existing template, select this option and select one of the forms from the Form templates list.
-
Click to save the form or click to exit without saving.
5.3.2 Adding Form Controls and Actions
Use the section to define the content and layout of the form.
NOTE:The Designer places form controls on the form from top to bottom and left to right. Use Linebreaks to force spacing between controls
To add a control to a form:
-
Click . Designer adds a control named Field to the bottom line of the form.
If you add more than one control of the same name to the form, Designer adds a unique number to the end of the control name.
-
Define the following properties for the control:
Field
Description
A unique name for the field. The name is used in several different locations:
-
The tab’s dialog box.
-
The dialog box.
-
An internal XML reference in the provisioning request definition file.
Consider the naming conventions you want to use for form fields, in order to avoid confusion in the Data Item Mapping and ECMA Expression Builder dialog boxes. For example, the request and approval forms might both contain a field called . To make it clear which field you are working with while performing data mappings, you can preface the field name with the name of the form where it is used. You might name one reason field and the other .
The field’s data type. The data type determines the valid control types and the type of validation performed.
The type of visual control used to display or edit the data. The selection list is filtered based on the selected data type.
Defines the number of lines you want inserted after the control.
Form field controls do not have Data Item Mappings or E-mail notifications property sheets.
-
-
For each control, specify its properties in the tab (available via ). For more information, see Section 5.5, Form Control Reference.
-
Click the tab to define what the user can do with the form. For example, you can add actions that allow the user to submit a form or cancel it.
A request form must have, at a minimum, a SubmitAction. Without a SubmitAction, the request does not process. Every form should have a CancelAction. Each approval form must have at least one action defined.
-
In the Actions page, click to add a new Action. Fill in the fields as follows:
Field
Description
Choose the location for the action buttons you add to the form.
. Places the action buttons on the bottom of the form. (Default.)
: Places the action buttons on the top of the form.
: Places the buttons at both the top and bottom of the form.
Choose an action for the button. For more information, see Section 5.4, Action Reference.
Defines the number of lines you want inserted after the action button.
-
Save the form.
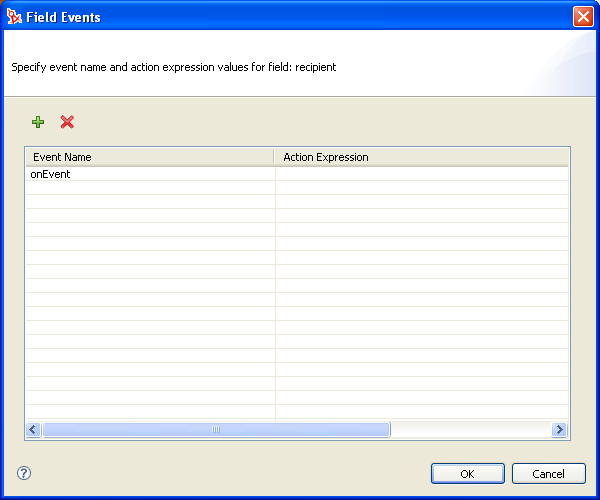
5.3.3 Defining Events
The scripts you attach to an event handler are scoped to the appropriate control, not the browser window.
Defining an Event
-
Select the form control where you want to define an event and open the property sheet.
-
Navigate to the Event property and add an event. Designer adds a row with the default event name .
-
Click the field and select the or event. For more information on adding other events, see Creating Custom Events.
-
Click the field. You can type the script directly in this field, or click the button to access the .
-
Define the action script, check the syntax, then click . Repeat this procedure to add more events to this control.
For more information on the onChange and onLoad events, see the events property description in Section 5.5.4, General Form Control Properties.
Creating Custom Events
You can create your own events to notify other controls of conditions or user actions on the form. You create the event using the property. You can give the event any name. You must explicitly fire the event by using the fireEvent() method and passing in the name of the event.
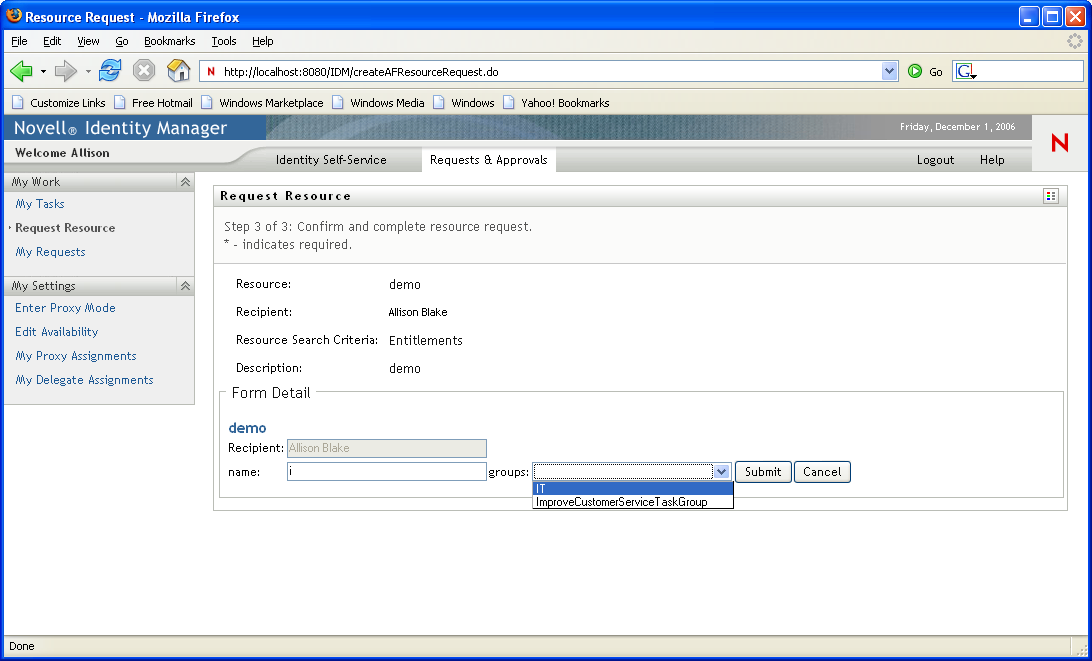
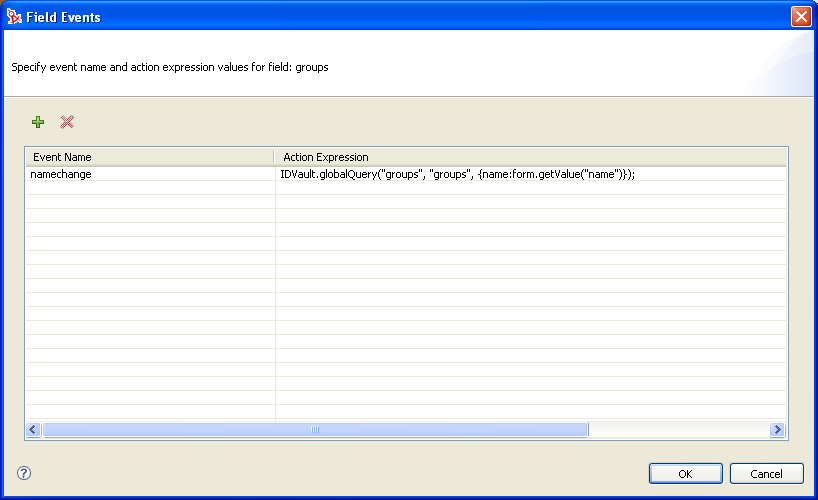
You might want to perform a query on the Groups container that returns only the groups that match the values entered by a user. In the example shown in Figure 5-7, the user types a value in the name field, When the user tabs to the next field, the contents of the drop-down list are populated from a query launched by the custom event.
Figure 5-7 User Application Runtime Custom Event Sample
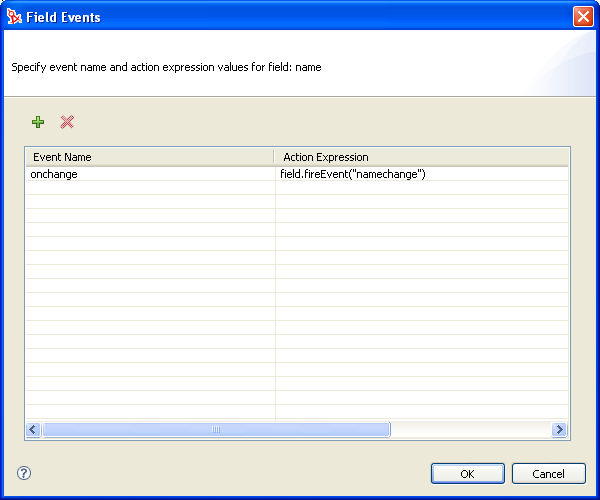
The field defines an property that fires the event on an event. The definition is shown in Figure 5-8.
Figure 5-8 Sample field.FireEvent() Method
The event contains an expression that executes a query called .
Figure 5-9 Custom Event Definition Example
For more information on using queries, see Section 5.7, Using DAL Queries in Forms.
5.3.4 Using the Scripts Tab
Use the tab to define a script that has a page-level scope. A page-level scope means that the script loads at page load time and is available through the life of the form. You can supply the script in one of the ways described in Table 5-2.
Table 5-2 Script Types
|
Script Type |
Description |
|---|---|
|
|
The script is incorporated into the page by reference, using the supplied URL. The script block will look something like this: <script type="test/javascript" scr="http://some.server/custom.js”></script>. The custom.js file is imported at form load. |
|
|
The script is inserted directly into the form in a <script> block. |
Because these scripts are loaded at page load, the form controls and any of their associated event handler scripts are not in scope when the page is loaded. Avoid coding dependencies between page-level scripts and event-level scripts; however, you can call page-level scripts from within an event-level script.
To add a link to an external JavaScript file:
-
With the Scripts tab open, click
 .
.
-
Complete the fields as follows:
Field
Description
Specify a meaningful name. This value displays in the Event Action Expression Builder.
Select .
Click within the field so that the button displays to the right, then click the button to display the editor as a dialog box.
Type the URL to the .js file in the field, then click . The script is fetched and displays in read-only mode. You can inspect the script, but you cannot change it.
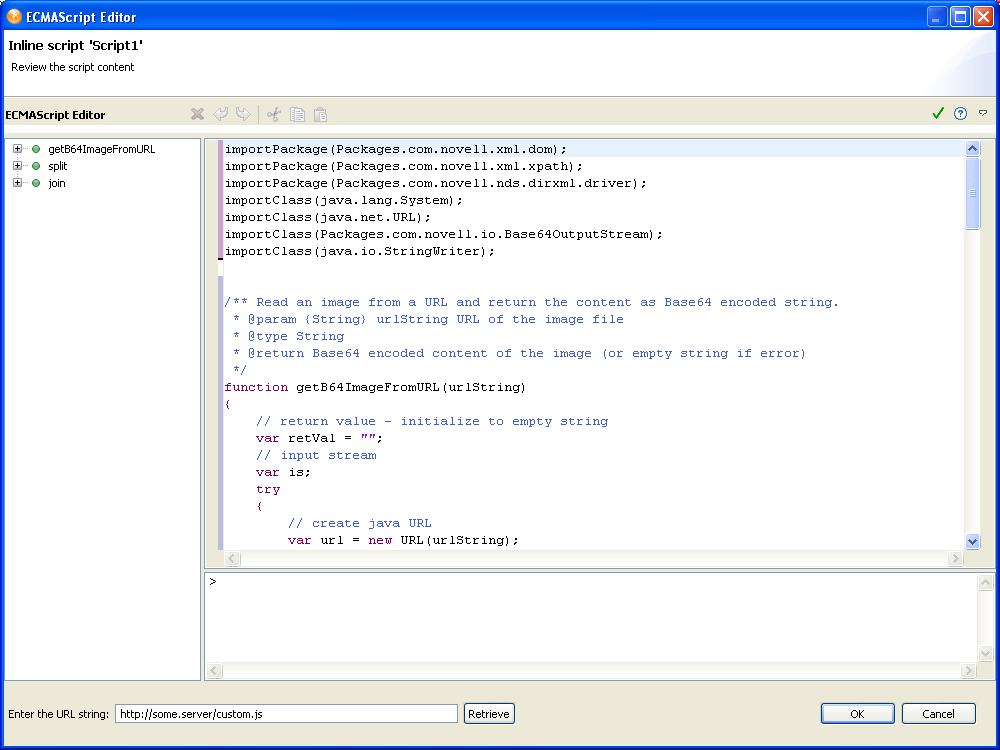
When you add an external link to a form, only the link is stored and deployed, for example:
<script src="someURL.com/script.js"/>
HINT:Designer cannot validate this external reference. You must ensure that it is accessible at runtime.
To create an inline script:
-
With the tab open, click
.
-
Complete the fields as follows:
Field
Description
Specify a meaningful name. This value displays in the Event Action Expression Builder.
Select .
Click within the field so that the button displays to the right, then click the button to display the editor as a dialog box.
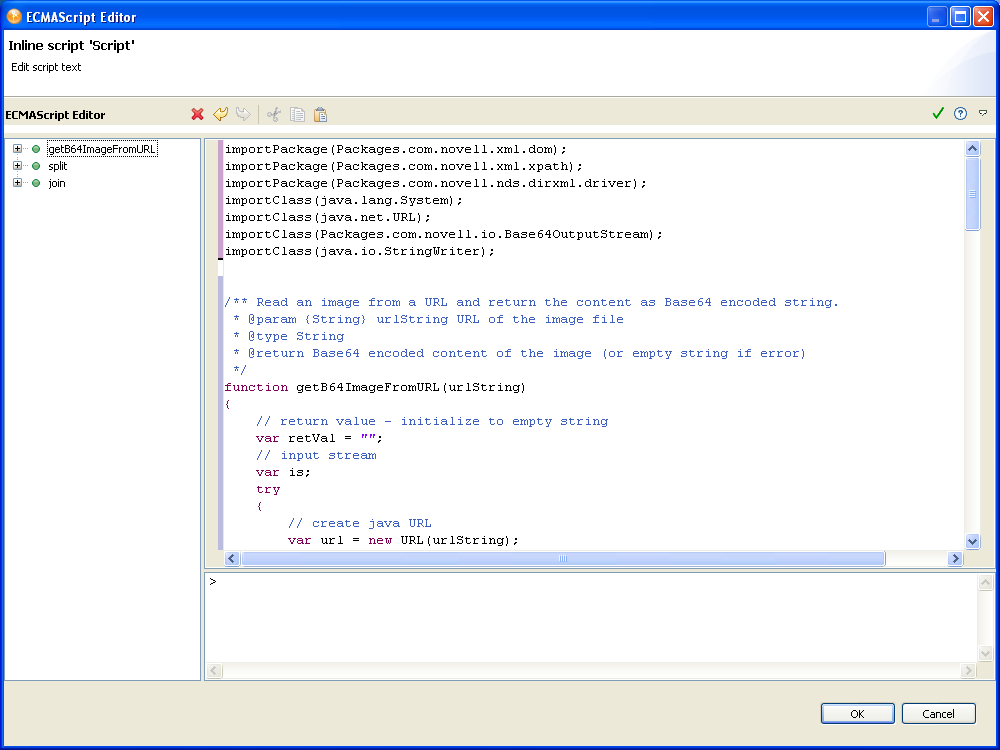
You add your JavaScript by using this ECMAScript Editor. To learn more about using the editor, click the editor’s help button.
For inline scripts, the following is inserted in the page:
<script>whatever you type</script>
Both inline and external scripts are executed at page load but before the page loads the controls. In addition, they are also executed when specifically called on a form control event.