9.1 The Dataflow View
The Dataflow view displays a toolbar in the upper right corner of the view. For information on the icons in this toolbar, see The Dataflow View
in Understanding Designer for Identity Manager.
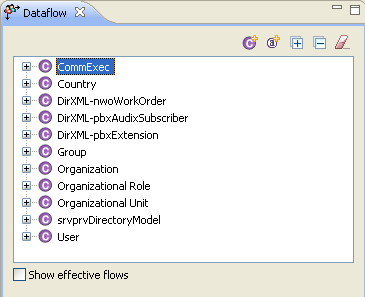
The following figure illustrates the Dataflow view. You can use it to control the flow of data between the Identity Vault and managed systems. The Modeler displays the dataflow.
Figure 9-1 The Dataflow View
9.1.1 Accessing the Dataflow View
If you have closed the Dataflow view, you can access it by selecting > > .
Figure 9-2 Selecting the Dataflow View

If the Dataflow view is blank and no project is displayed in the Modeler:
-
Expand a project in the Project view.
-
Open the project by double-clicking .
Objects and icons appear in the Dataflow view.
If you want to change how the data flows from the Modeler:
-
Right-click a driver or application in the Modeler.

-
Select , then select how you want the data flow to change.
9.1.2 Flow Arrows in the Modeler
When the Dataflow view opens, it automatically reads the filters and shows the classes and attributes. If a filter with classes and attributes doesn’t exist, you can create one.
Figure 9-3 Flow Arrows in the Modeler
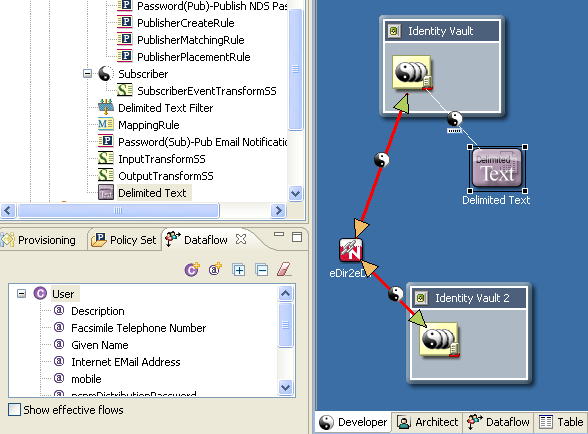
As you select a class or attribute in the Dataflow list, the appropriate driver lines are highlighted in red in the Modeler. Icons enable you to see Sync, Notify, Reset, and Ignore filter settings all at the same time.
Table 9-1 Dataflow Icons
|
Icon |
Description |
|---|---|
|
|
Green arrow: the Publisher channel is synchronized. |
|
|
Orange arrow: the Subscriber channel is synchronized. |
|
|
Bell: the attribute is set to Notify. |
|
|
Reset arrow: the attribute is set to Reset. |
|
No icon |
The attribute is set to Ignore. |
The color coding matches the Dataflow icons in the Filter editor and the Dataflow editor.
9.1.3 Viewing How Attributes Are Synchronized
Figure 9-4 Show Effective Flows
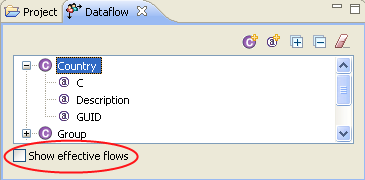
To view whether attributes are synchronized or whether they will be notified, select . When you select this check box, the synchronize arrows don’t show if the parent class isn’t set to synchronize. Therefore, you view an accurate diagram of actual flows.
However, if you want to view how attributes are configured to synchronize, regardless of the parent class, deselect . The synchronize arrows indicate which items are synchronized.
If you select an attribute that can't synchronize (whether or not is selected), you see a warning in the upper left. This warning indicates that this attribute can’t be synchronized or notified because the parent class isn’t synchronized.
Figure 9-5 The Text and Icon
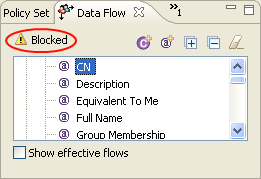
To view an explanation, mouse over the icon.
9.1.4 Changing the Data Flow
You can change how the data flows for classes and attributes from the Dataflow view.
To change the flow for a class:
-
Select a class in the Dataflow view.

-
Right-click a driver line in the Modeler.
-
Select .
-
Select the option to change the data flow for the class.
To change the flow for an attribute:
-
Select an attribute in the Dataflow view.

-
Right-click a driver line in the Modeler.
-
Select .
-
Select the option to change the data flow for the attribute.