11.6 Setting the Report Definition Parameters
Reports support runtime parameters that allow users to specify values when they run a report. This section provides instructions for defining runtime parameters.
11.6.1 Defining the Parameter XML File
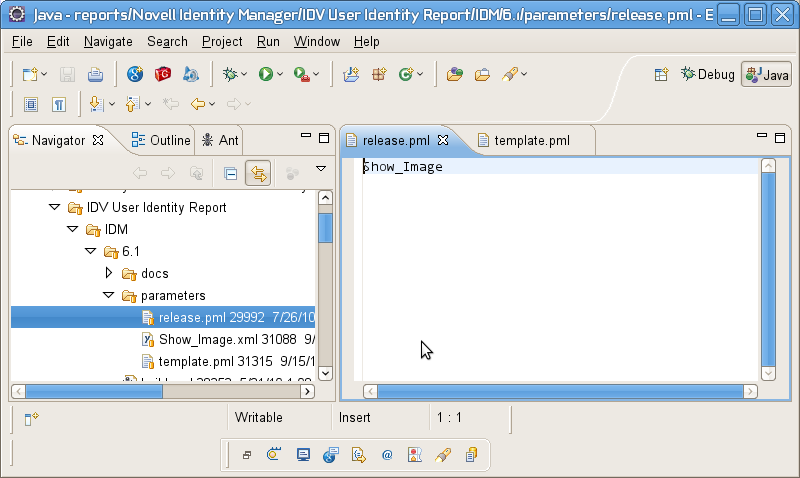
Parameters specific to your report are located in the 6.1/parameters directory for your report. Each parameter is in its own XML file. Each of these XML files must be referenced in the release.pml file in the order in which you want them to appear. The release.pml file lists the parameters by name (without the file extension), as shown below:
Figure 11-1 Release.pml file
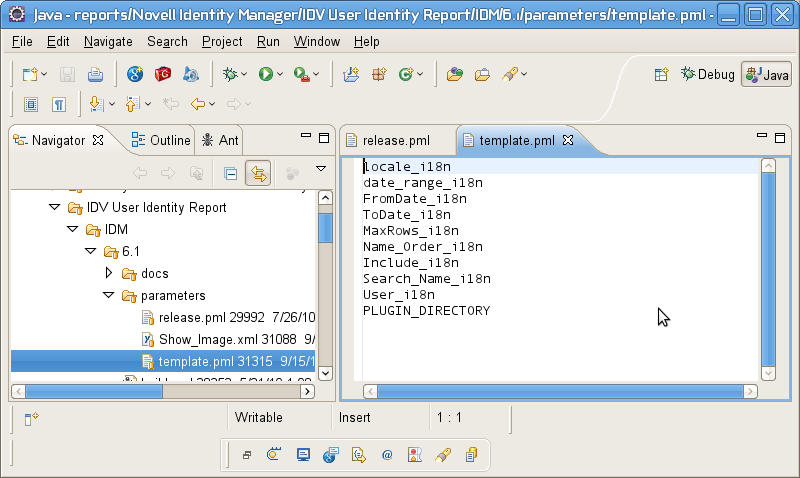
The template.pml file lists commonly shared parameters:
Figure 11-2 Template.pml file
11.6.2 Defining the Type for a Parameter
The reporting module supports the following values for <Type>:
-
String
-
Date
-
Integer
-
Boolean
The user interface shows a specific control for each data type:
Table 11-1 Controls for Parameter Data Types
|
Data Type |
Control |
|---|---|
|
String |
TextBox |
|
String with Options |
ListBox |
|
String with OptionQuery |
Autocompleter |
|
Date |
DatePicker |
|
Integer |
IntegerTextBox |
|
Boolean |
Checkbox |
All of the parameters need to have this setting:
<IsForPrompting>1</IsForPrompting>
If you know that your report cannot run without a particular value specified, you can mark a parameter as required with the following setting:
<Required>1</Required>
To make an Options parameter or OptionQuery parameter allow for multiple values, you should include these two settings:
<OptionMultivalue>1</OptionMultivalue>
<OptionMultivalueDelimiter>;</OptionMultivalueDelimiter>
11.6.3 Defining an OptionQuery Parameter
Suppose you want to generate a report that shows role information, and you want to allow the role as a parameter, so that the definition can be scoped at runtime. In this case, you can use an OptionQuery so that the reporting module shows you a list and allows for typeahead automatic completion, based on the roles that are stored in the database on which to report. To provide support for this capability, you need to follow a specific syntax that uses cascaded parameters. The syntax ##parameter_name## within the OptionQuery references another parameter definition. Novell provides shared common parameters that serve this purpose already, Role_i18n.xml and Search_Role_i18n.xml. They can be reused by specifying them in the template.pml or copied into your local parameters folder and modified to suit your needs.
The User_i18n.xml and Search_Name_i18n.xml are the respective parameters for allowing Identity Vault user to be a parameter. The User_i18n.xml parameter also demonstrates the ability to include a special cascaded parameter, ##NAME_ORDER##. This allows you to localize the Name Order of a name (Given-name Surname vs. Surname Given-name), or allow for a Middle Initial in the name. If you would like your OptionQuery to make use of this feature, follow the name order example shown below.
Here’s what the User_i18n.xml file looks like:
Figure 11-3 User_i18n.xml file
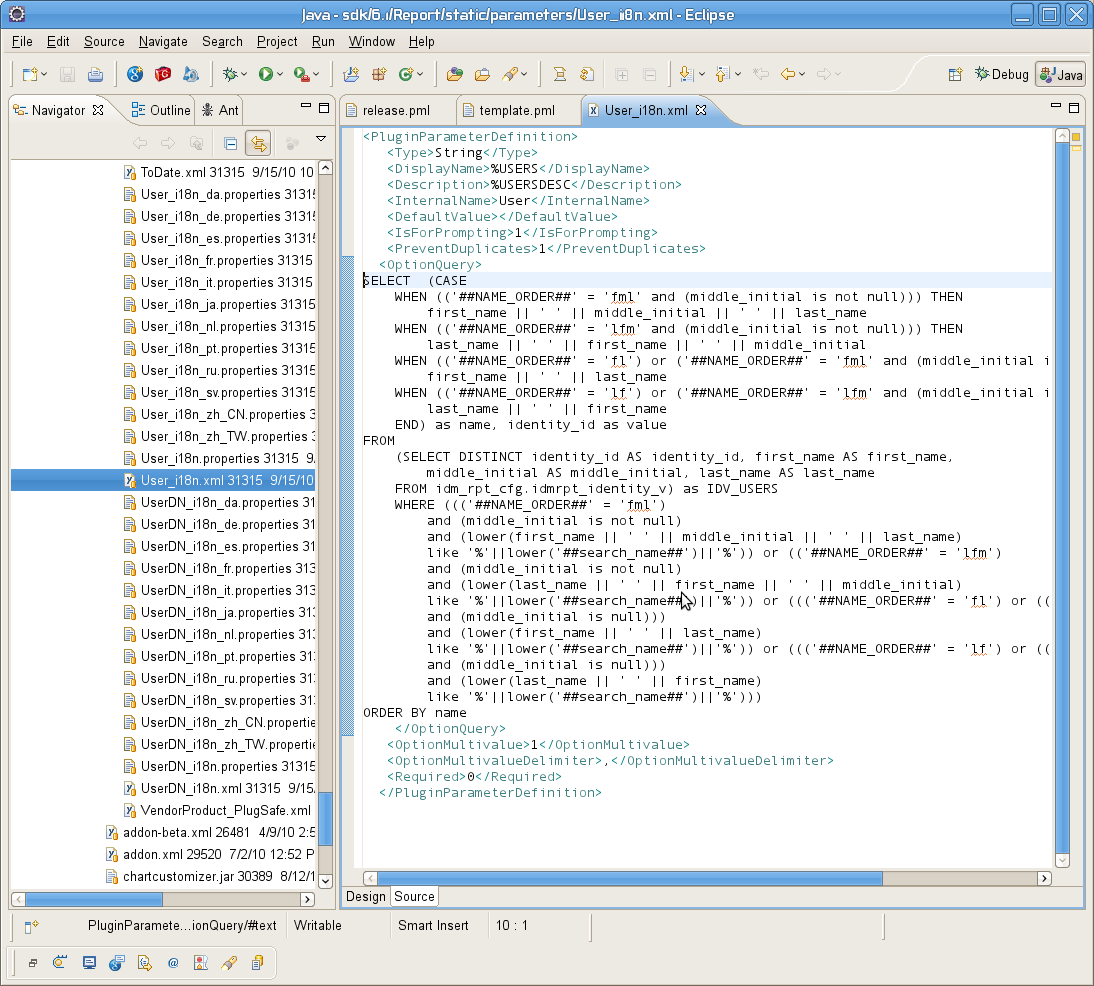
For this example to work properly, the ##NAME_ORDER## cascaded parameter must match the <InternalName>NAME_ORDER</InternalName> of the name order parameter.
All OptionQuery parameters must have a cascaded parameter such as a search_name, where the OptionQuery SQL is using it as its WHERE clause. Its internal name does not matter, as long as it is unique and is used in the SQL appropriately. It should have these settings:
<DefaultValue></DefaultValue>
<IsForPrompting>0</IsForPrompting>