2.1 Setting Up a Provisioning Project
The Provisioning view is only available for Designer projects that contain a User Application driver. After you set up an Identity Manager project and configure an Identity Vault and driver set for the project, you add and configure a User Application driver.
To use Designer to configure the tab of the User Application, you must additionally add a Role Service driver to your project. See Section 2.1.2, Creating a Role Service Driver after completing Section 2.1.1, Creating a User Application Driver.
2.1.1 Creating a User Application Driver
-
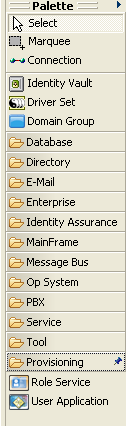
In an open Designer project, create a new driver by using one of these medoths:
-
Click in the , then drag a icon onto the canvas.
-
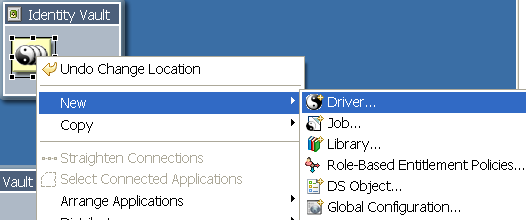
Right-click the driver set for your project, then select .
-
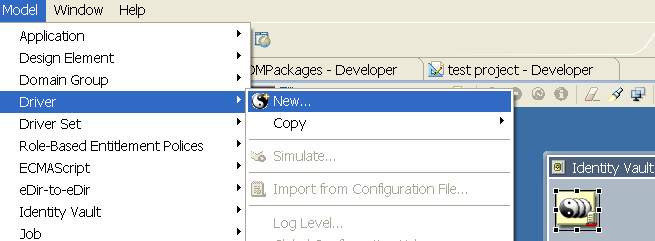
Click the driver set for your project, then select.
-
-
Select from the list of driver base packages in the Driver Configuration Wizard, then click .
-
Use the following information to configure the driver:
-
Click .
-
Click .
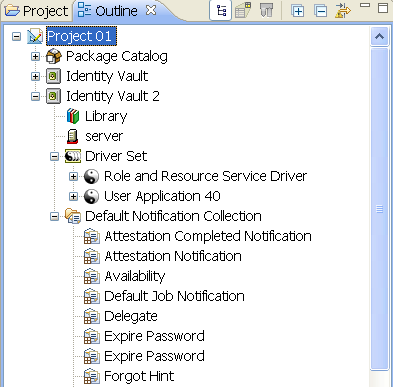
NOTE:When you create a User Application driver, e-mail templates for the User Application are added to the Default Notification Collection. You must explicitly deploy them. They are not deployed by default when you deploy the User Application driver.
2.1.2 Creating a Role Service Driver
-
In the same project where you created a User Application driver, click in the , then drag and drop icon onto the Modeler.
-
Select from the list of driver base packages in the Driver Configuration Wizard, then click .
-
Click .
2.1.3 Modifying the Role Service Driver Properties
After creating the Role Service driver, you can optionally modify some of the driver configuration settings and modify the additional settings described in Table 2-1. To customize the additional settings:
-
From the Outline view, select the Role Service driver, then right-click and select .
-
Select (in the left pane).
-
Click the tab.
-
Click the tab. You can modify the driver’s properties that you specified when you created the driver as well as the properties described in Table 2-1.
-
Click to save the changes.
Table 2-1 Additional Settings for Customizing the Role Service Driver
2.1.4 About E-Mail Notification Templates
Identity Manager includes a standard set of e-mail notification templates, (see Working with E-Mail Templates
in the User Application: Administration Guide). When you create a User Application driver, any e-mail notification templates that are missing from the standard set are replaced. However, existing e-mail notification templates, which might come from an earlier version of Identity Manager, are not updated. To replace existing templates with new templates:
-
Expand the Outline view.
-
In the Default Notification Collection, delete the e-mail notification templates that you want to replace.
-
Right-click and select or .
You can also use this command at any time to update e-mail notification templates without creating a new User Application driver.
-
To deploy the e-mail notification templates to the Identity Vault, right-click and select .