10.0 Enabling Staging of Projects
Using Identity Manager can involve two or more stages, such as development, the test environment, and the production environment. In an Identity Manager environment, the drivers are the most crucial components. When an Identity Manager project is moved from one stage to another, moving drivers becomes critical. Staging provides users the flexibility to validate the appropriate resources in real time, which ensures uniformity across all stages.
Figure 10-1 Staging Identity Manager Projects
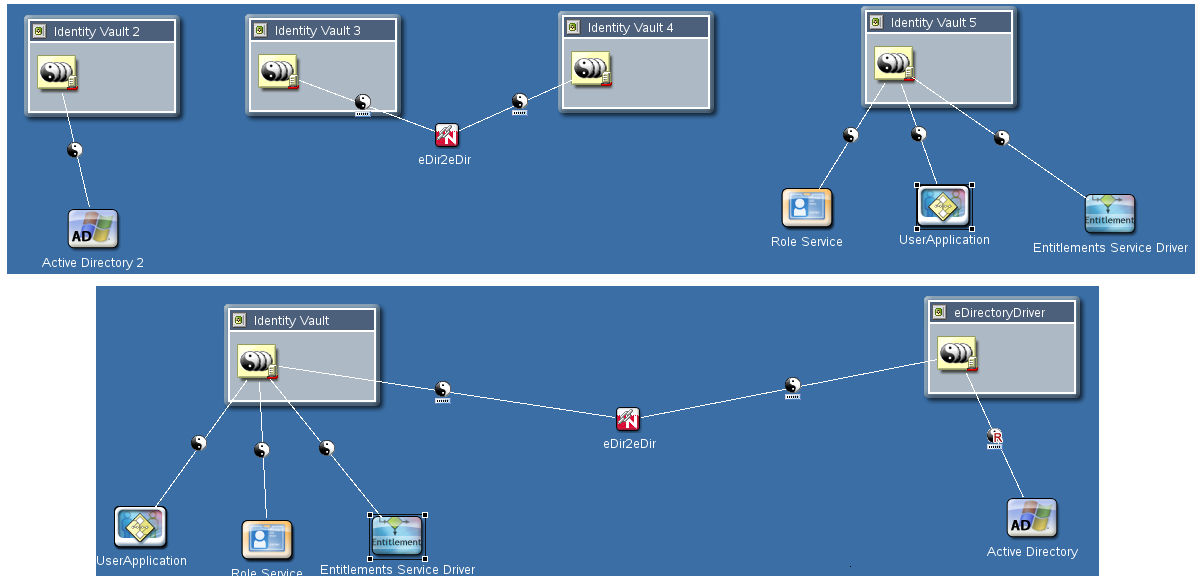
Figure 10-1 shows a basic representation of the movement of Identity Manager projects across different stages. Three projects are developed and tested in three separate setups and then connected in the subsequent stages. The scale of projects grows with stages, but not necessarily the scale of an individual driver.
Staging Identity Manager projects is discussed in the following sections:
10.1 Prerequisites
Ensure that the following prerequisites are met before attempting to stage Identity Manager projects:
-
All the stages should have the same version of eDirectory, Identity Manager, and Identity Manager drivers.
-
Designer 3.5 or later is present.
-
All the applications and drivers are fully developed and tested in one stage before moving them to the next stage.
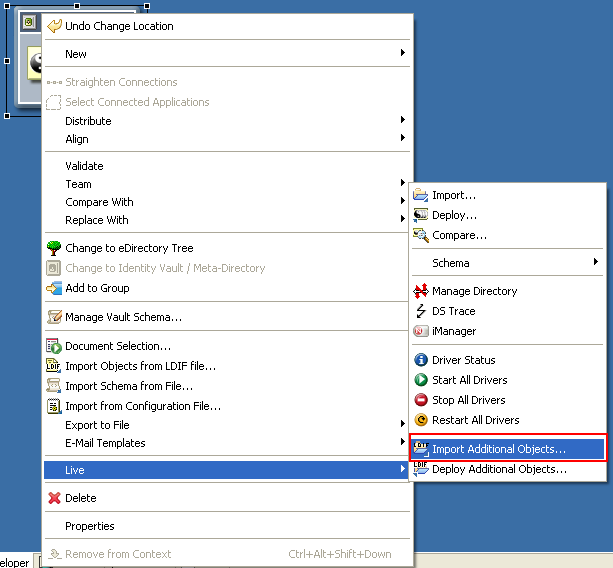
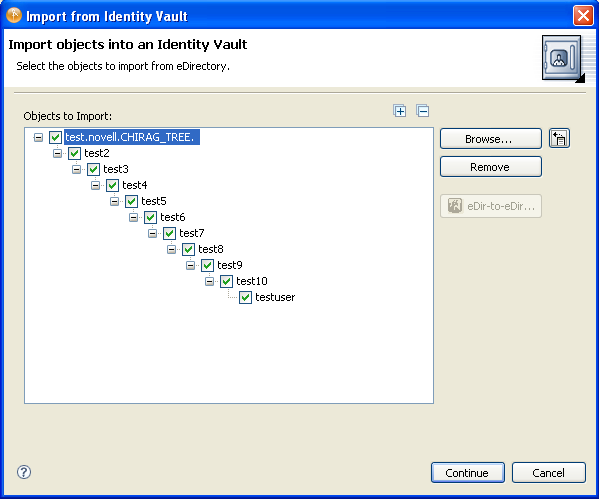
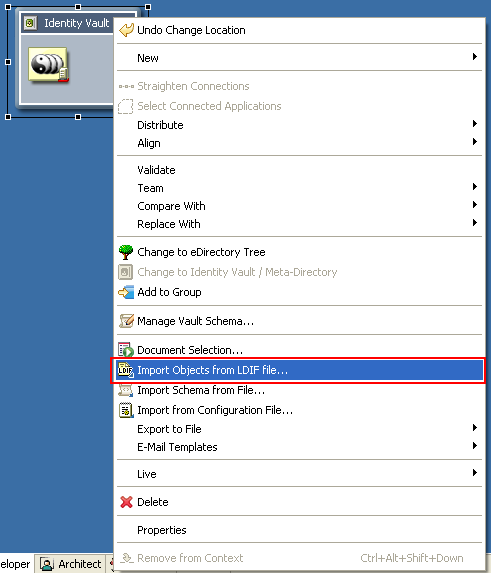
10.2 Importing Additional Objects from eDirectory
Designer provides the functionality to store additional objects (objects that are not modeled in the Designer). These objects are stored in an LDIF container under the Identity Vault. By default, there is no LDIF container. An LDIF container is created when the or option is selected.
-
In the Modeler, select .
-
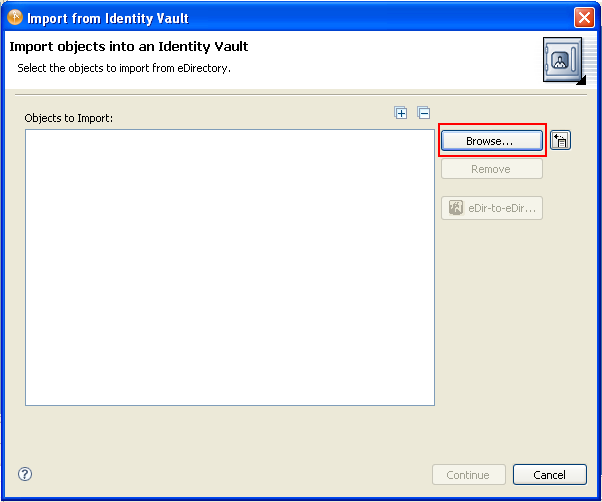
In the Import Additional Objects page, click to open the eDirectory Browser.
-
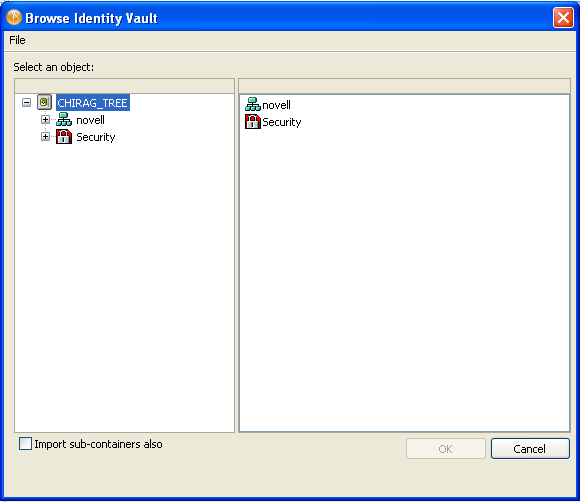
In the eDirectory browser page, select the objects that should be directly imported, then click .
or
Select the objects, select , then click .
The selected objects are displayed in the Import Objects dialog box.
-
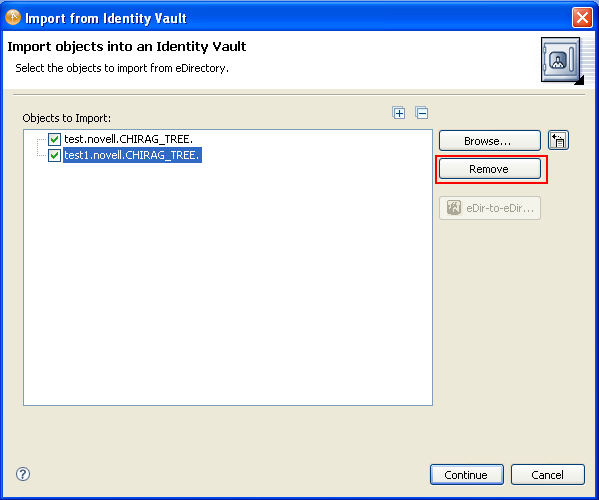
If you do not want to import a given object, either deselect it and continue or select it and click .
-
Click to import the selected objects. These objects are stored in the LDIF container.
These objects are retrieved by an LDAP channel. If you are running the LDAP service on non-default ports, see Section 10.9, Changing the LDAP Properties for more information. The objects in the LDIF container are overwritten. To keep a record of the objects stored in the LDIF container, export the information of the LDIF container into an LDIF file. For more information, see Section 10.4, Exporting LDIF Container Objects to an LDIF File.
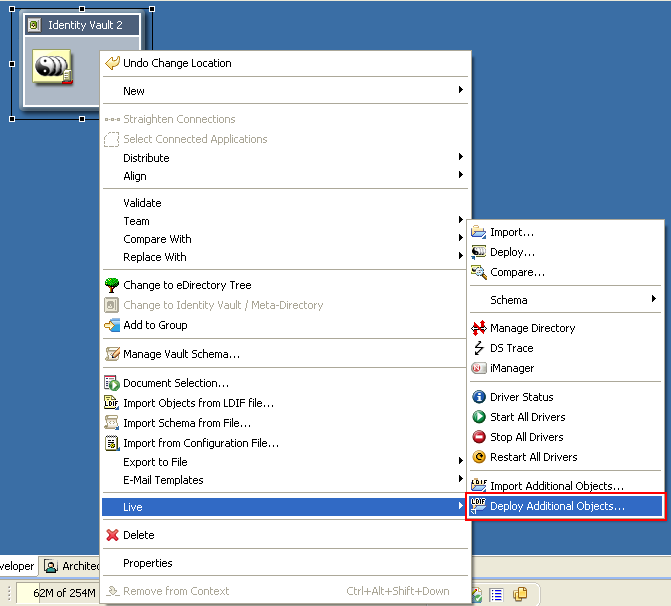
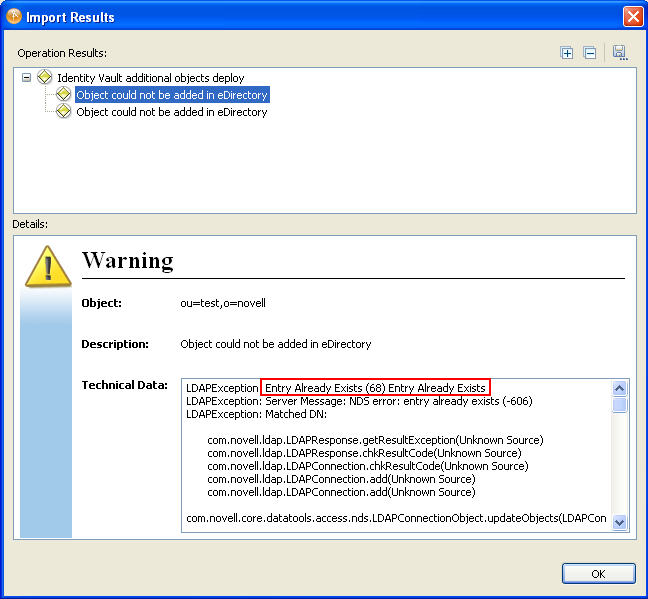
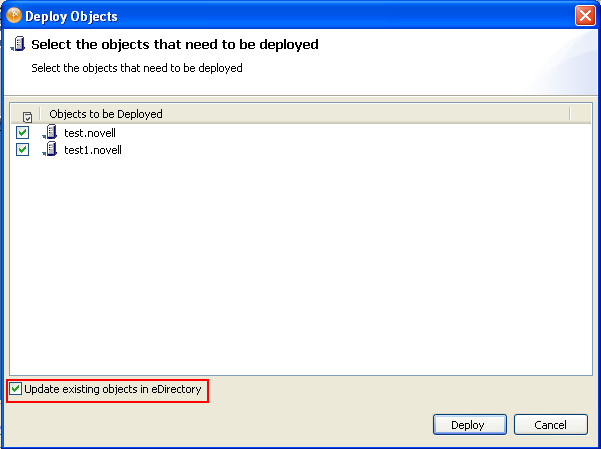
10.3 Deploying Additional Objects into eDirectory
Designer allows you to update objects that are already present in eDirectory. The current functionality does not support the deployment of objects containing references to objects in eDirectory. To deploy these objects, you can either manually create the objects in eDirectory or remove the references (see Section 10.7, Editing the LDIF Container Data by Using an Editor). Designer allows you to update objects that are in eDirectory.
-
In the Modeler, select .
-
Select or deselect the objects by clicking , then click .
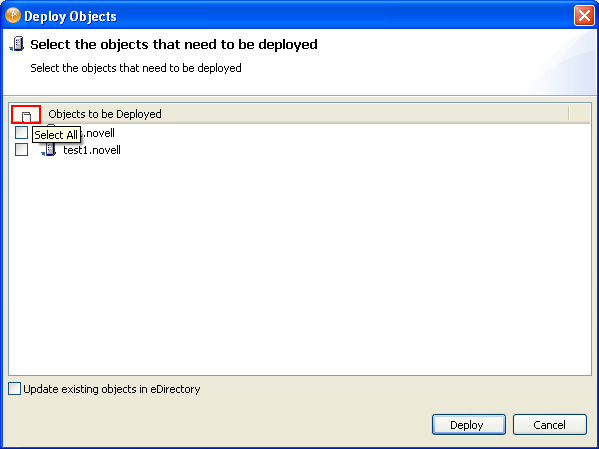
If the objects are already present in eDirectory, a warning is displayed.
-
If the objects are already in eDirectory, click to update them, click , then click
If there are no objects or the information is not in a proper format in the LDIF container, a warning is displayed.
10.4 Exporting LDIF Container Objects to an LDIF File
You can export objects from the LDIF container and store them in the LDIF file.
-
In the Modeler, select .

-
From the file browser that displays, specify the name of the file into which objects stored in the LDIF container should be exported, then click .

If there is no information in the LDIF container, a warning is displayed.
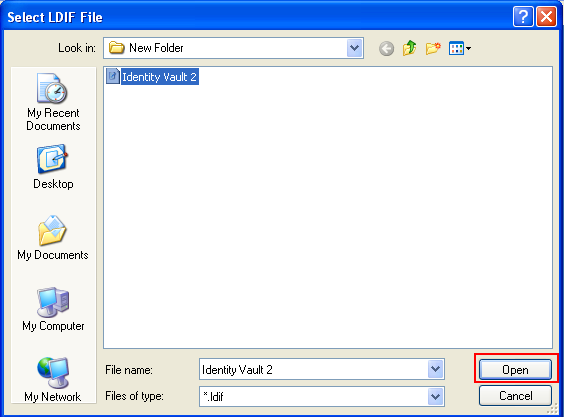
10.5 Importing Objects from an LDIF File into an LDIF Container
You can export objects from an LDIF file to an LDIF container. This overwrites the existing objects in the LDIF container.
-
In the Modeler, right-click the and select .
-
From the file browser that displays, select the file from which the LDIF object should be imported, then click .
10.6 Setting up Driver Security Equivalences
Designer allows you to define and deploy the Security Equivalences objects for the drivers in eDirectory.
To set Security Equivalences for a driver:
-
Right-click a driver and select .
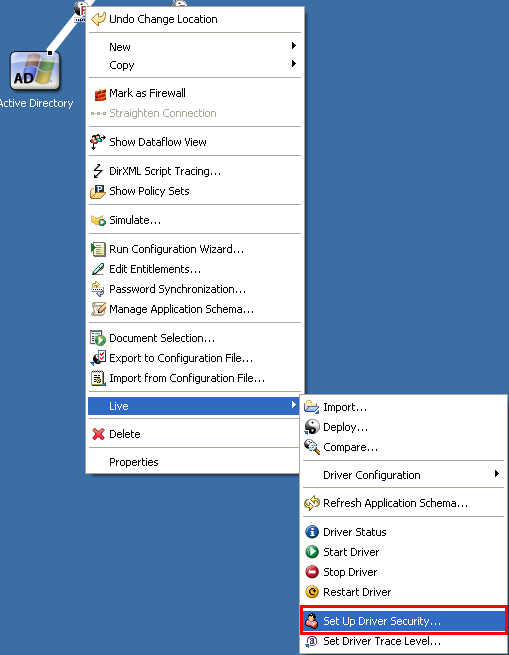
-
On the Driver Security Equivalences/Exclusions page, click .
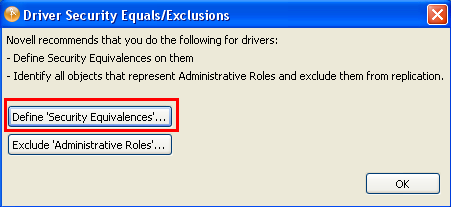
-
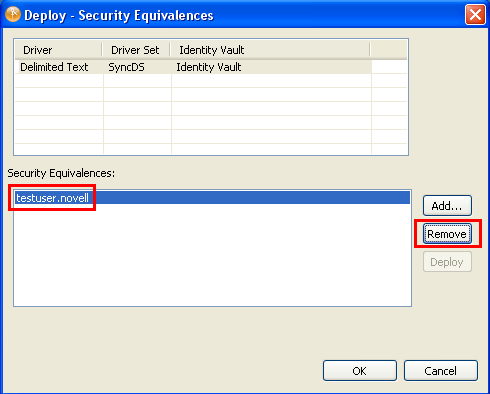
On the Deploy Security Equivalences page, select the Security Equivalences object from the list, click , then click .
For example, testuser.novell is not in eDirectory but is in the LDIF container. The Deploy operation picks testuser.novell from the LDIF container and adds it to eDirectory.

You can remove the existing Security Equivalences object and define new Security Equivalences objects for the Driver.
-
Select the Security Equivalences object, then click .
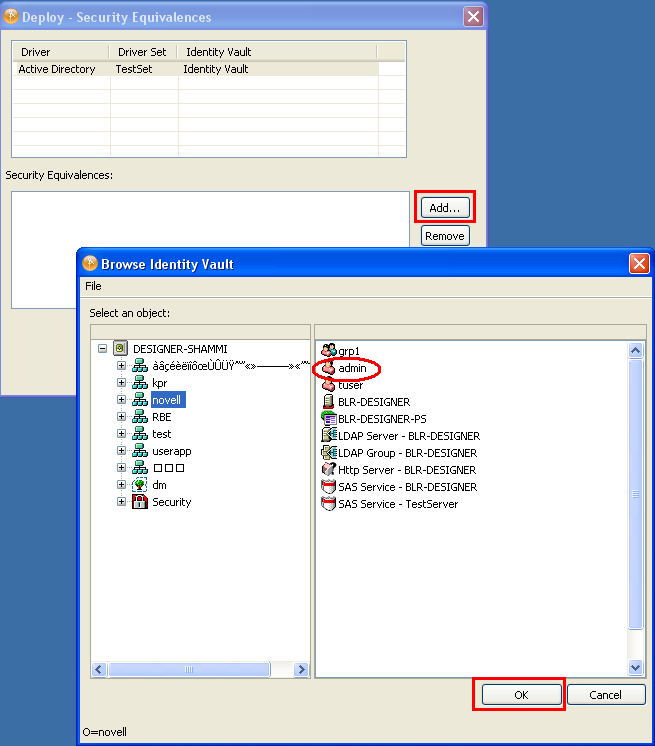
-
To add a new object, click , select the object, then click .
10.7 Editing the LDIF Container Data by Using an Editor
Designer allows you to modify the LDIF objects by using different editors. Under the ID Vault, right-click the LDIF Container, then click. Or, double-click the LDIF container to open it.

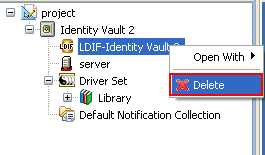
10.8 Deleting the LDIF Container
Designer allows you to delete the LDIF container. Under the ID Vault, right-click the LDIF container, then click .
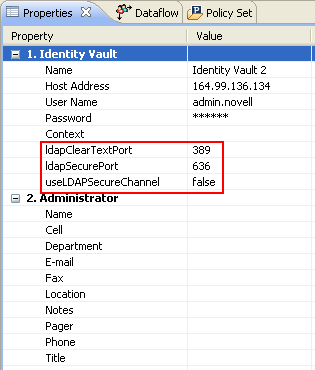
10.9 Changing the LDAP Properties
You can modify non-default LDAP properties by using the Properties view of the Identity Vault. This is used for importing and deploying objects.
-
Under the Properties view, click , then specify the LDAP clear text port and LDAP secure port numbers.
-
Save the project.