7.1 Using the Filter Editor
The Filter editor allows you to edit filter policies. This section includes the following topics:
7.1.1 Accessing the Filter Editor
The Filter editor allows you to edit the filter. There are three different ways to access the Filter editor:
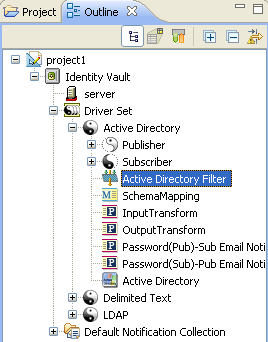
Model Outline View
-
In the Outline view, select the Show Model Outline icon
 .
.
-
In the Model Outline, open the driver for which you want to manage a filter.

-
Double-click the Filter object (or right-click it and select ) to launch the Filter editor.
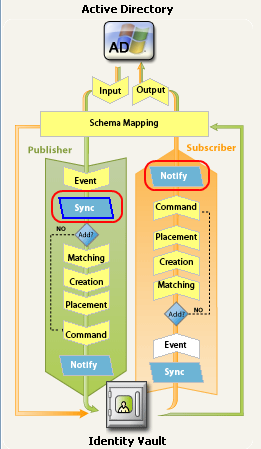
Policy Flow View
-
In the Outline view, select the icon.


-
In the Policy Flow, double-click the icon or the objects (or Right-click and select ) to launch the Filter editor.
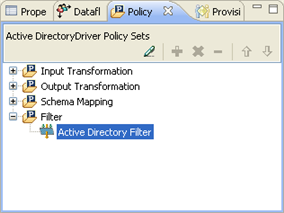
Policy Set View
-
Double-click the filter object in the Policy Set view.

7.1.3 Understanding the Filter Editor Toolbar
The Filter editor includes a toolbar that provides access to the following features. Each of these features, along with options to Undo ![]() and Redo
and Redo ![]() recent actions, is also available from a drop-down menu by right-clicking in the Filter Editor.
recent actions, is also available from a drop-down menu by right-clicking in the Filter Editor.
|
Tool |
Description |
|---|---|
|
|
Add Attributes opens the Schema Browser so you can select attributes from the selected class to add to the filter policy. For more information, see Adding an Attribute. |
|
|
Add Classes opens the Schema Browser so you can select classes from the Identity Vault schema to add to the filter policy. For more information, see Adding a Class. |
|
|
deletes the selected attributes and classes from the filter policy. |
|
|
lets you define default values for all attributes added to the filter policy. For more information, see Section 7.2.4, Setting Default Values for Attributes. |
|
|
lets you copy the filter policy from another Designer object. For more information, see Section 7.2.3, Copying an Existing Filter. |
|
|
imports an existing filter policy from a previously saved XML file. For more information, see Section 7.4.2, Importing a Filter File. |
|
|
saves the current filter policy to an XML file. For more information, see Section 7.4.1, Exporting a Filter File. |
|
|
deploys the filter policy to a live Identity Manager environment. For more information, see Section 7.7, Deploying the Filter. |
|
|
expands all Class/Attribute groups in the filter policy. |
|
|
collapses all Class/Attribute groups in the filter policy. |
|
|
deletes all class and attribute entries from the filter policy. |
|
|
launches the Policy Simulator. For more information, see Section 9.0, Testing Policies with the Policy Simulator. |
|
|
launches the context-sensitive help for the Filter editor. |