2.7 Editing a Policy
The Policy Builder allows you to create and edit policies. You can drag and drop rules, conditions and actions. For additional operations, access the Policy Builder toolbar. To display a context menu, right-click an item.
2.7.1 Actions and Menu Items in the Policy Builder
The table contains a list of the different actions and menu items in the Policy Builder.
Table 2-4 Policy Builder Actions and Menu Items
|
Operation |
Description |
|---|---|
|
|
Collapses all expanded rules. |
|
|
Compares the policy in the Policy Builder to an existing policy in the Identity Vault. |
|
|
Copies the selected item to the Clipboard. |
|
Copy and drop |
Select the item, press Ctrl, then drag the item. |
|
|
Cuts the selected item and copies it to the Clipboard. |
|
|
Deletes the selected item. |
|
|
Deploys the policy into the Identity Vault. |
|
|
Displays a rule, condition, or action as disabled. |
|
|
Disables trace on the rule. |
|
|
Enables DirXML Script Tracing on the policy. |
|
Drag and drop |
Enables you to select an item, then relocate it. Select the item, then drag it to the new location. |
|
|
Enables you to edit the selected item. To open the Rule Builder, select a rule, then click Edit. |
|
|
Displays a rule, condition, or action as enabled. |
|
|
Enables tracing on the rule. |
|
|
Expands all the rules so that you can view the conditions and actions of each rule. |
|
|
Imports a policy from the file system and appends it to the policy, or replaces all the rules of the policy. |
|
|
Launches the Policy Simulator. |
|
Move and drop |
Enables you to select and move an item. Select the item, then drag it. |
|
|
Moves the item down in the list of policies. |
|
|
Moves the item up in the list of policies. |
|
New > Append Condition Group |
Creates a new condition group after a selected item. |
|
New > Include > Insert Include Before or Insert Include After |
Creates a new Include before or after the selected item. |
|
New > Predefined Rule > Insert Predefined Rule Before or Insert Predefined Rule After |
Inserts a predefined rule before or after the selected item. |
|
New > Rule > Insert Rule Before or Insert Rule After |
Creates a new rule before or after the selected item. |
|
|
Pastes the contents of the Clipboard after the selected item. |
|
|
Enables you to change how the information is displayed. |
|
|
Redoes the previous action. |
|
Select |
Click any item to select it. |
|
|
Undoes the previous action. |
2.7.2 Keyboard Support
You can move through the Policy Builder with keystrokes as well as using the mouse. The supported keystrokes are listed below.
Table 2-5 Keyboard Support in the Policy Builder
|
Keystroke |
Description |
|---|---|
|
Ctrl+C |
Copies the selected item into the Clipboard. |
|
Ctrl+X |
Cuts the selected item and adds it to the Clipboard. |
|
Ctrl+V |
Pastes the contents of the Clipboard after the selected item. |
|
Delete |
Deletes the selected Item. |
|
Left-arrow |
Collapses a rule node. |
|
Right-arrow |
Expands a rule node. |
|
Up-arrow |
Navigates up. |
|
Down-arrow |
Navigates down. |
|
Ctrl+Z |
Undo |
|
Ctrl+Y |
Redo |
2.7.3 Renaming a Policy
-
In the Outline view, select the policy you want to rename.
-
Right-click and select Properties.
-
Change the name of the policy in the Policy Name field.

-
Click OK.
2.7.4 Saving Your Work
Do one of the following:
-
From the main menu, click File > Save (or Save All).
-
Close the editor by clicking the X in the editor’s tab.
-
Select Close from the main menu’s file menu.
-
Press Ctrl+S.
2.7.5 Policy Description
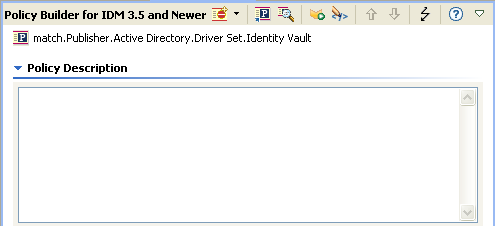
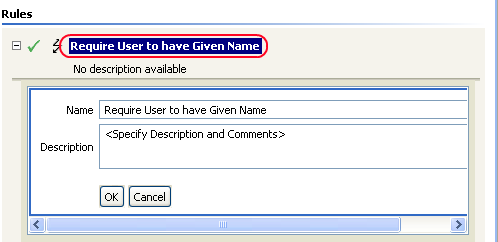
The description fields provide a place to add notes about the functionality of the policy. You can add a description for the policy and you can add a description for the rule.
-
In the Policy Builder, click Policy Description.

-
Provide a description of the policy.
-
Save the policy by pressing Ctrl+S.
To add a description to a rule:
-
Double-click the name of the rule.

-
Specify a description of the rule in the Description field.
-
Save the rule by pressing Ctrl+S.