2.13 Advanced Synchronization of Worker Photos from the Workday Portal
The photo synchronization between Workday and the driver happens once in every 24-hours. If any Organization has a large number of worker base, the driver takes longer than usual to fetch all the worker’s photo. Sometimes in such cases, the process might fail due to timeout.
IMPORTANT:It is highly recommended to use the photo change business process to fetch worker photos from Workday. The following procedure to synchronize worker photos from the Workday is not recommended as this functionality might be deprecated in the near future.
The Workday system stores the date/time value of each change in worker’s photo. These date/time values can be used via calculated fields and custom reports (created using the calculated fields) to improve driver’s performance while performing photo synchronization. The Workday driver uses this custom report to compare the photo related details based on the last date/time value of the worker’s photo since the previous polling.
NOTE:The following configuration is not mandatory and only recommended to improve the driver’s performance.
Perform the following steps to create calculated fields and custom report in the Workday portal:
-
Create the following calculated fields using the option in the Workday portal:
-
Create a calculated field. For example, we’ve created a field named .

-
Create another calculated field using the field created in the previous step as a . For example, we’ve created the second field with the name .
-
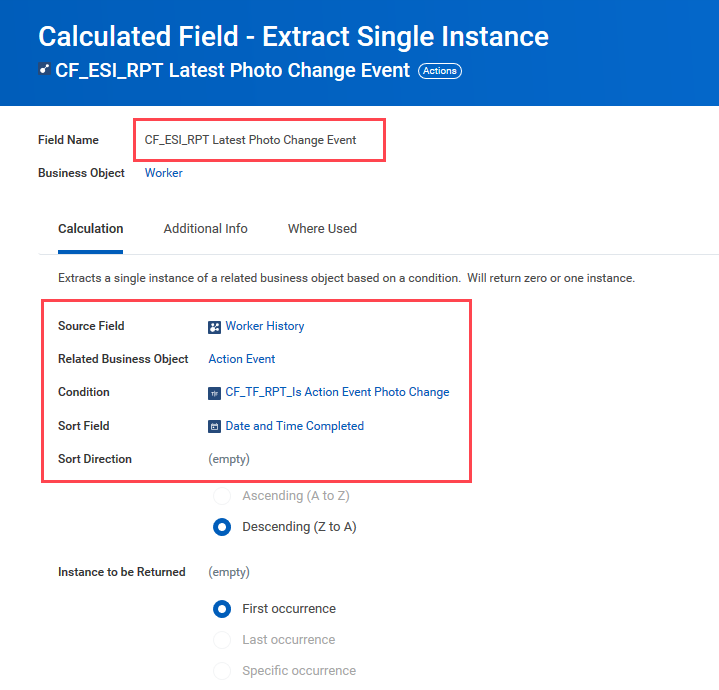
Create a third calculated field using the field created in previous step as a . For example, we have created the field named .

-
-
Create a custom report using the option in Workday portal. You must ensure that the integration user has access to this report or the report is created as an integration user.
Create a custom report with the following mandatory fields:
-
Employee ID
-
Worker is Contingent Worker
-
The calculated field created () in Step 1.c.
Note down the calculated field name appearing under as shown in the below image and specify the same in the in Designer while configuring the driver.
NOTE:You can add additional fields as per your requirement.

-
-
Click on the tab to enable for the newly created custom report based on alphabetical descending order. This helps to display the latest changes at the top of the report.

-
Create prompts for the report under the tab.
Provide default values for as and . This will ensure that both types of Workers are included in the report.

-
Enable the report as Web Service under the tab.
NOTE:Note down the value and specify the same in the field in Designer while configuring the driver.

-
Click on > > to get the Web Service URL of the report.

-
Copy the URL for > option and save it. You need to specify this URL in the field in Designer while configuring the driver.
