3.2 Certificate Based Authentication support for Identity Manager Exchange Service
3.2.1 Creating Client Certificate for IDM Exchange Service
-
Create the client key using the below command.
openssl genrsa -out client.key.pem 2048
-
Create the CSR executing the below command.
openssl req -new -key client.key.pem -out client.csr
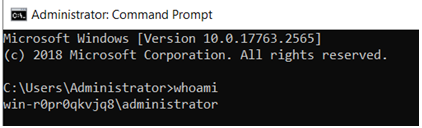
Once the user executes the above command, it is mandatory to input “Common Name” as parameter. The value for the Common Name can be obtained from the Server running Identity Manager Exchange Service by running whoami command in the command prompt as shown below:
Figure 3-3
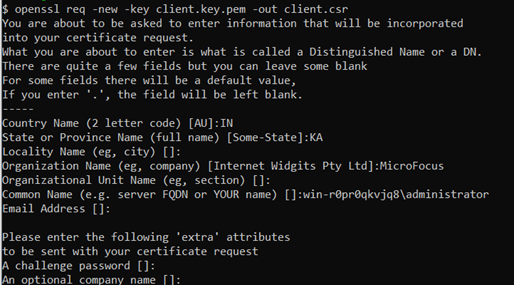
Use the whoami value to enter into the Certificate CSR “Common Name” parameter as shown below:
Figure 3-4
Once done, import this CSR in eDirectory under -> and then click until you get an option to choose base64 format and download the base64 certificate.
Generating the Client pfx file
After downloading the Client Certificate in base64 format, execute the below command to generate the Client Certificate in pfx format.
openssl pkcs12 -export -out client.pfx -inkey client.key.pem -in client.b64
NOTE:Once you execute the above command, you will be prompted to provide the password. This password is required during the driver configuration.
Create a directory in IDM and add the above generated Client Certificate in the IDM directory. Use this directory path in the iManager as given below -
- > -> -> (Certificate Based Authentication) ->