3.3 Creating the Driver in Designer
The Scripting Driver supports Designer 4 Package features, which allows you to create a driver by selecting which packages to install. After you create and configure the driver, you need to deploy it to the Identity Vault and start it.
Topics in this section include
3.3.1 Importing the Current Driver Packages
Driver packages can be updated at any time and are stored in the Package Catalog. Packages are initially imported into the Package Catalog when you create a project, import a project, or convert a project. It is important to verify you have the latest packages imported into the Package Catalog before you install the driver.
To verify you have the latest packages imported into the Package Catalog:
-
Open Designer.
-
In the toolbar, click > .
-
Click if there are no package updates
or
Click to import the package updates.
-
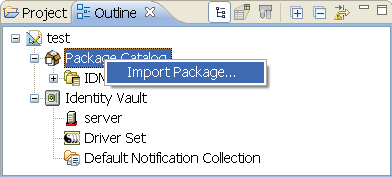
In the Outline view, right-click the .
-
Click .
Figure 3-1
-
Select the Scripting Packages
or
Click to import all of the packages displayed, then click .
NOTE:By default, only the base packages are displayed. Deselect to display all packages.
-
Click to import the selected packages, then click in the successfully imported packages message.
-
After the current packages are imported, continue to the next section, Installing the Driver Packages.
3.3.3 Configuring the Driver
There are many settings that can help you customize and optimize the driver. The settings are divided into categories such as Driver Configuration, Engine Control Values, and Global Configuration Values (GCVs). Although it is important for you to understand all of the settings, your first priority should be to review the Driver Parameters located on the Driver Configuration page and the Global Configuration Values. These settings must be configured properly for the driver to start and function correctly.
To access the Driver Properties page:
-
Open your project.
-
In the Modeler, right-click the driver icon
 or the driver line, then select .
 -
Modify the driver settings as necessary.
IMPORTANT:In addition to the driver settings, you should review the set of default policies and rules provided by the basic driver configuration. Although these policies and rules are suitable for synchronizing with Scripting*, your synchronization requirements for the driver might differ from the default policies. If this is the case, you need to change them to carry out the policies you want. The default policies and rules are discussed in Configuration Overview.
-
Continue with the next section, Deploying the Driver.
3.3.4 Deploying the Driver
After a driver is created in Designer, it must be deployed into the Identity Vault:
-
In Designer, open your project.
-
In the Modeler, right-click the driver icon
or the driver line, then select > . -
If you are authenticated to the Identity Vault, skip to Step 5; otherwise, specify the following information:
Host: Specify the IP address or DNS name of the server hosting the Identity Vault.
Username: Specify the DN of the user object used to authenticate to the Identity Vault.
Password: Specify the user’s password.
-
Click .
-
Read through the deployment summary, then click .
-
Read the successful message, then click .
-
Click to assign rights to the driver.
The driver requires rights to objects within the Identity Vault. The Admin user object is most often used to supply these rights. However, you might want to create a DriversUser (for example) and assign security equivalence to that user. Whatever rights that the driver needs to have on the server, the DriversUser object must have the same security rights:
-
Click , then browse to and select the object with the correct rights.
-
Click twice.
-
-
Click to exclude users that should not be synchronized.
You should exclude any administrative User objects (for example, Admin and DriversUser) from synchronization:
-
Click .
3.3.5 Starting the Driver
When a driver is created, it is stopped by default. To make the driver work, you must start the driver and cause events to occur. Identity Manager is an event-driven system, so after the driver is started, it won’t do anything until an event occurs.
To start the driver:
-
In Designer, open your project.
-
In the Modeler, right-click the driver icon
or the driver line, then select > .