-
In Designer, open your project.
-
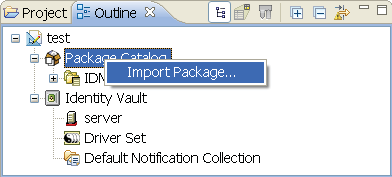
In the Modeler, right-click the driver set where you want to create the driver, then select > .
-
Select from the list of base packages, then click .
-
Select the optional features to install for the Top Secret driver. The options are:
Default Configuration: This package contains the default configuration information for the Top Secret driver. Always leave this option selected.
Entitlements: This package contains configuration information for synchronizing Top Secret accounts and policies that enable account creation and auditing for the Top Secret driver. To enable account creation and auditing, verify that this option is selected. For more information, see the Identity Manager 4.8 Entitlements Guide.
Password Synchronization: This package contains the policies that enable the Top Secret driver to synchronize passwords. To synchronize passwords, verify that this option is selected. For more information, see the Identity Manager 4.8 Password Management Guide.
Data Collection: This package contains the policies that enable the driver to collect data for reports. If you are using the Identity Reporting Module, verify that this option is selected. For more information, see the Identity Reporting Module Guide.
Account Tracking: This package contains the policies that enable you to track accounts for reports. If you are using the Identity Reporting Module, verify that this option is selected. For more information, see the Identity Reporting Module Guide.
-
After selecting the optional packages, click .
-
(Conditional) If the packages you selected to install have package dependencies, you must also install them to install the selected package. Click to install the listed package dependencies.
-
(Conditional) If more than one type of package dependency must be installed, you are presented with these packages separately. Continue to click to install any additional package dependencies.
-
(Conditional) The Common Settings page is displayed only if the Common Settings package is installed as a dependency. On the Install Common Settings page, fill in the following fields:
User Container: Select the Identity Vault container where Top Secret users will be added if they don’t already exist in the vault. This value becomes the default for all drivers in the driver set.
If you want a unique location for this driver, set the value for all drivers on this page. After the driver is created, change the value on the driver’s Global Configuration Values page.
Group Container: Since the Top Secret driver does not synchronize Group objects, this setting can be ignored.
-
(Conditional) If not already configured, fill in the following fields on the Common Settings Advanced Edition page, then click :
User Application Provisioning Services URL: specify the User Application Identity Manager Provisioning URL.
User Application Provisioning Services Administrator: Specify the DN of the User Application Administrator user. This user should have the rights for creating and assigning resources. For more information, see “Setting Up Administrative Accounts” in the NetIQ Identity Manager 4.8 Common Driver Administration Guide.
-
On the Driver Information page, fill in the following field:
Driver Name: Specify a name for the driver that is unique within the driver set.
-
On the Install Top Secret Base page, fill in the following fields to connect to the Remote Loader and click :
Connect to Remote Loader: By default, the driver is configured to connect using the Remote Loader. You must select for this option.
Host Name: Specify the port number where the Remote Loader is installed and is running for this driver. The default port number is 8090.
Port: Specify the Remote Loader’s password as defined on the Remote Loader. The Metadirectory server (or Remote Loader shim) requires this password to authenticate to the Remote Loader.
Remote Password: Specify the Remote Loader’s password as defined on the Remote Loader. The Metadirectory server (or Remote Loader shim) requires this password to authenticate to the Remote Loader.
Driver Password: Specify the driver object password that is defined in the Remote Loader service. The Remote Loader requires this password to authenticate to the Metadirectory server.
-
On the Install Top Secret Base page, fill in the following fields for the driver parameters:
Connected System or Driver Name: The name of the connected system, application or Identity Manager driver. This value is used by the e-mail notification templates.
Synchronize Top Secret Passwords to Identity Vault: Specifies whether password changes in Top Secret should be synchronized with the Identity Vault password.
Publish TSO Commands: Specifies whether the original TSO commands on the publisher channel should be published as status documents (for logging purposes).
-
(Conditional) This page is displayed only if you selected to install the Managed System Information packages. On the Install Top Secret Managed System Information page, fill in the following fields, then click :
Classification: Select the classification of the Top Secret system. This information is displayed in the reports. Options include:
If you select , you must specify a custom classification for the Top Secret system.
Environment: Select the type of environment the Top Secret system provides. Options include:
If you select , you must specify a custom classification for the Top Secret system.
This page is displayed only if you installed the Managed System package.
-
(Conditional) On the System Ownership page, fill in the following fields to define the ownership of the Top Secret system, then click :
Business Owner: Select a user object in the Identity Vault that is the business owner of the Top Secret system. This can only be a user object, not a role, group, or container.
Application Owner: Select a user object in the Identity Vault that is the application owner of the Top Secret system. This can only be a user object, not a role, group, or container.
-
(Conditional) On the General Information page, fill in the following fields to define your Top Secret system, then click :
Name: Specify a descriptive name for this Top Secret system. The name is displayed in reports.
Description: Specify a brief description for this Top Secret system. The description is displayed in reports.
Location: Specify the physical location for this Top Secret system. The location is displayed in reports.
Vendor: Leave CA as the vendor of Top Secret. This information is displayed in reports.
Version: Specify the version of this Top Secret system. The version is displayed in reports.
-
(Conditional) On the Top Secret Entitlements page, review the default values for Top Secret entitlement options. Change any, if necessary, and click .
-
(Conditional) On the Account Tracking page, review the default values for Top Secret Account Tracking options. Change any, if necessary, and click :
-
(Conditional) On the Entitlements Name to CSV File Mappings page, click the icon to populate the page with the entitlement configuration options. Identity Manager uses the CSV file to map Top Secret entitlements into corresponding resources in the Identity Manager catalog.
Entitlement Name: Specify a descriptive name for the entitlement to map it to the CSV file that contains the Top Secret entitlement details.
Entitlement Name is the name of the entitlement. This parameter corresponds to the Entitlement Assignment Attribute in Top Secret. For example, you could define an entitlement called ParkingPass.
Entitlement Assignment Attribute: Specify a descriptive name for the assignment attribute for an entitlement.
Entitlement Assignment Attribute holds the entitlement values in Top Secret. For example, you could have an attribute called Parking.
You must add this parameter to in the Driver Parameters page or modify it in driver settings after creating the driver.
CSV File: Specify the location of the CSV file. This file must be located on the same server as the driver. This file contains the values for the application entitlements.
Multi-valued: Set the value of this parameter to if you want to assign resources and entitlements multiple times with different values to the same user. Otherwise, set it to .
-
(Conditional) On the Driver Parameters page, fill in the following fields, then click :
Create Users with (USING): Specifies a User to be used as a model for creating new Users in Top Secret.
Default Department: Enter a default Department for new Accounts in Top Secret.
User Default Group: Enter a default group for new Users in Top Secret.
-
Review the summary of tasks that will be completed to create the driver, then click .
 or the driver line, then select .