A.2 Sample Cluster Deployment on SLES 12 SP2
A.2.2 Installation Procedure
This section explains the procedure to install and configure the following to set up the cluster environment. For more information about configuring the SLES High Availability Extension, see the SUSE Linux Enterprise High Availability Extension guide.
Configuring the iSCSI Server
An iSCSI target is a device that is configured as a common storage for all nodes in a cluster. It is a virtual disk that is created on the Linux server to allow remote access over an Ethernet connection by an iSCSI initiator.An iSCSI initiator is any node in the cluster that is configured to contact the target (iSCSI) for services. The iSCSI target should be always up and running so that any host acting as an initiator can contact the target. Before installing iSCSI target on the iSCSI server, ensure that the iSCSI target has sufficient space for a common storage.Install the iSCSI initiator packages on the other two nodes after installing SLES 12 SP2.
During the SLES 12 SP2 installation:
-
Create a separate partition and specify the partition path as the iSCSI shared storage partition.
-
Install the iSCSI target packages.
To configure the iSCSI server:
-
Create a block device on the target server.
-
Type the yast2 disk command in terminal.
-
Create a new Linux partition, and select .
-
Select .
-
Specify the partition size.
-
Type the yast2 iscsi-server or yast2 iscsi-lio-server command in terminal.
-
Click the tab, then select in the option.
-
In the tab, click to enter the partition path (as created during the SLES installation).
-
In the page, specify iSCSI client initiator host names for the target server and then click .
For example, iqn.sles12sp2node1.com and iqn.sles12sp2node2.com.
-
Click .
-
Run the cat /proc/net/iet/volume command in the terminal to verify if the iSCSI target is installed
Configuring the iSCSI initiator on all Nodes
You must configure the iSCSI initiator on all cluster nodes to connect to the iSCSI target.
To configure the iSCSI initiator:
-
Install the iSCSI initiator packages.
-
Run the yast2 iscsi-client in terminal.
-
Click the tab and select in the option.
-
Click the tab, and click to enter the IP address of the iSCSI target server.
-
Select .
-
Click , then click .
-
Click to change the start-up option from manual to automatic, then click .
-
Click , then click .
-
To check the status of the connected initiator on the target server, run the cat /proc/net/iet/session command on the target server. The list of initiators that are connected to iSCSI server are displayed.
Partitioning the Shared Storage
Create two shared storage partitions: one for SBD and the other for Cluster File System.
To partition the shared storage:
-
Run the yast2 disk command in terminal.
-
In the dialog box, select the shared volume. In our example, select sdb from the dialog box.
-
Click , select option, and click .
-
Select , and click . In our example, the custom size is 10 MB.
-
Under , select . In our example, the File system ID is 0x83 Linux.
-
Under , select , then click .
-
Click , then select .
-
Click , then select , and click .
-
In , select . In our example, specify the File system ID as 0x83 Linux.
-
In , select , then click .
Installing the HA Extension
To install the HA extension:
-
Go to the SUSE Downloads website.
SUSE Linux Enterprise High Availability Extension (SLE HA) is available for download for each available platform as two ISO images. Media 1 contains the binary packages and Media 2 contains the source code.
NOTE:Select and install the appropriate HA extension ISO file based on your system architecture.
-
Download the Media 1 ISO file on each server.
-
Open dialog box, click .
-
Click and select the DVD or local ISO image, then click .
-
In the tab, select under .
Ensure that all the components under high availability are installed.
-
Click .
Setting up Softdog Watchdog
In SLES HA Extension, the Watchdog support in the kernel is enabled by default. It is shipped with a number of different kernel modules that provide hardware-specific watchdog drivers. The appropriate watchdog driver for your hardware is automatically loaded during system boot.
-
Enable the softdog watchdog:
echo softdog > /etc/modules-load.d/watchdog.conf
systemctl restart systemd-modules-load
-
Test if the softdog module is loaded correctly:
lsmod | grep dog
Configuring the HA Cluster
This example assumes that you are configuring two nodes in a cluster.
Setting up the first node:
-
Log in as root to the physical or virtual machine you want to use as cluster node.
-
Run the following command:
ha-cluster-init
The command checks for NTP configuration and a hardware watchdog service. It generates the public and private SSH keys used for SSH access and Csync2 synchronization and starts the respective services.
-
Configure the cluster communication layer:
-
Enter a network address to bind to.
-
Enter a multicast address. The script proposes a random address that you can use as default.
-
Enter a multicast port. By default, the port is 5405.
-
-
Set up SBD as the node fencing mechanism:
-
Press y to use SBD.
-
Enter a persistent path to the partition of your block device that you want to use for SBD. The path must be consistent for both the nodes in the cluster.
-
-
Configure a virtual IP address for cluster administration:
-
Press y to configure a virtual IP address.
-
Enter an unused IP address that you want to use as administration IP for SUSE Hawk GUI. For example, 192.168.1.3.
Instead of logging in to an individual cluster node, you can connect to the virtual IP address.
-
Once the first node is up and running, add the second cluster node using the ha-cluster-join command.
Setting up the second node:
-
Log in as root to the physical or virtual machine through which you want to connect to the cluster.
-
Run the following command:
ha-cluster-join
If NTP is not configured, a message appears. The command checks for a hardware watchdog device and notifies if it is not present.
-
Enter the IP address of the first node.
-
Enter the root password of the first node.
-
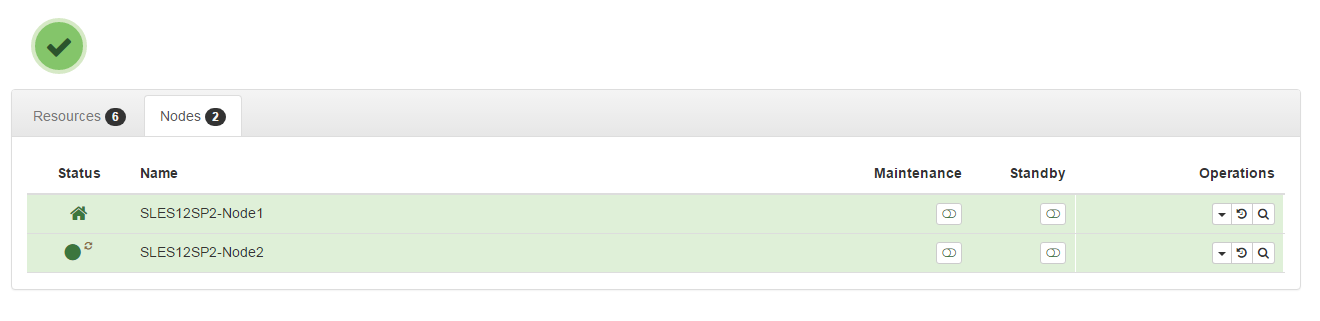
Log in to SUSE Hawk GUI and then click > . For example, https://192.168.1.3:7630/cib/live.
Installing and Configuring eDirectory and Identity Manager on Cluster Nodes
-
Install eDirectory on cluster nodes:
Install a supported version of eDirectory. For step-by-step instructions to configure eDirectory on a HA cluster, see “Deploying eDirectory on High Availability Clusters” in the eDirectory Installation Guide.
IMPORTANT:Ensure that the virtual IP is configured on the Node1 before you install eDirectory on Node1.
-
Install Identity Manager on Node 1 using the Metadirectory Server option.
-
Install Identity Manager engine on Node 2 Server using the DCLUSTER_INSTALL option.
Run the ./install.bin -DCLUSTER_INSTALL="true" command in the terminal.
The installer installs the Identity Manager files are installed without any interaction with eDirectory.
Configuring the eDirectory Resource
-
Log in to SUSE Hawk GUI.
-
Click and create a new group.
-
Click
 next to the .
-
Specify a group ID. For example, Group-1.
Ensure that the following child resources are selected when you create a group:
-
stonith-sbd
-
admin_addr (Cluster IP address)
-
-
-
In the tab, set the field to Started and field to Yes.
-
Click and then click
 next to the group you created in Step 2.
-
In the field, add the following child resources:
-
shared-storage
-
eDirectory-resource
For example, the resources should be added in the following order within the group:
-
stonith-sbd
-
admin_addr (Cluster IP address)
-
shared-storage
-
eDirectory-resource
You can change the resource names if necessary. Every resource has a set of parameters that you need to define. For information about examples for shared-storage and eDirectory resources, see Primitives for eDirectory and Shared Storage Child Resources.
-
Primitives for eDirectory and Shared Storage Child Resources
The stonith-sbd and admin_addr resources are configured by HA Cluster commands by default when initializing the cluster node.
Table A-1 Example for shared-storage
|
Resource ID |
Name of the shared storage resource |
|
Class |
ocf |
|
Provider |
heartbeat |
|
Type |
Filesystem |
|
device |
/dev/sdc1 |
|
directory |
/shared |
|
fstype |
xfs |
|
operations |
|
|
is-managed |
Yes |
|
resource-stickiness |
100 |
|
target-role |
Started |
Table A-2 Example for eDirectory-resource
|
Resource ID |
Name of the eDirectory resource |
|
Class |
systemd |
|
Type |
ndsdtmpl-shared-conf-nds.conf@-shared-conf-env |
|
operations |
|
|
target-role |
Started |
|
is-managed |
Yes |
|
resource-stickiness |
100 |
|
failure-timeout |
125 |
|
migration-threshold |
0 |
Change the location constraint score to 0.
-
Log in to SUSE Hawk GUI.
-
Click .
-
In the tab, click
next to the node 1 of your cluster.
-
In the tab, set the score to 0.
-
Click .
Ensure that you set the score to 0 for all the nodes in your cluster.
NOTE:When you migrate the resources from one node to another from the SUSE Hawk GUI using the > > option, the location constraint score will change to Infinity or -Infintity. This will give preference to only one of the nodes in the cluster and will result in delays in eDirectory operations.