35.2 Configuration of RAC
The RAC Configuration provides complete control over RAC objects. It is a central place for managing and configuring RAC objects. You can list and modify RAC objects. The configuration also provides useful information, such as searching and displaying the selected modules from the list. The Roles section lists the Associated Tasks for each role.
On the NetIQ Identity Console home page, select to open the RAC Configuration page.
The page includes two tabs:
Displays current RAC Configurations.
Displays a list of roles from all the Configurations.
Identity Console displays Configurations that you own and includes the following information on each Configuration:
Indicates the number of modules on the selected RAC Configuration.
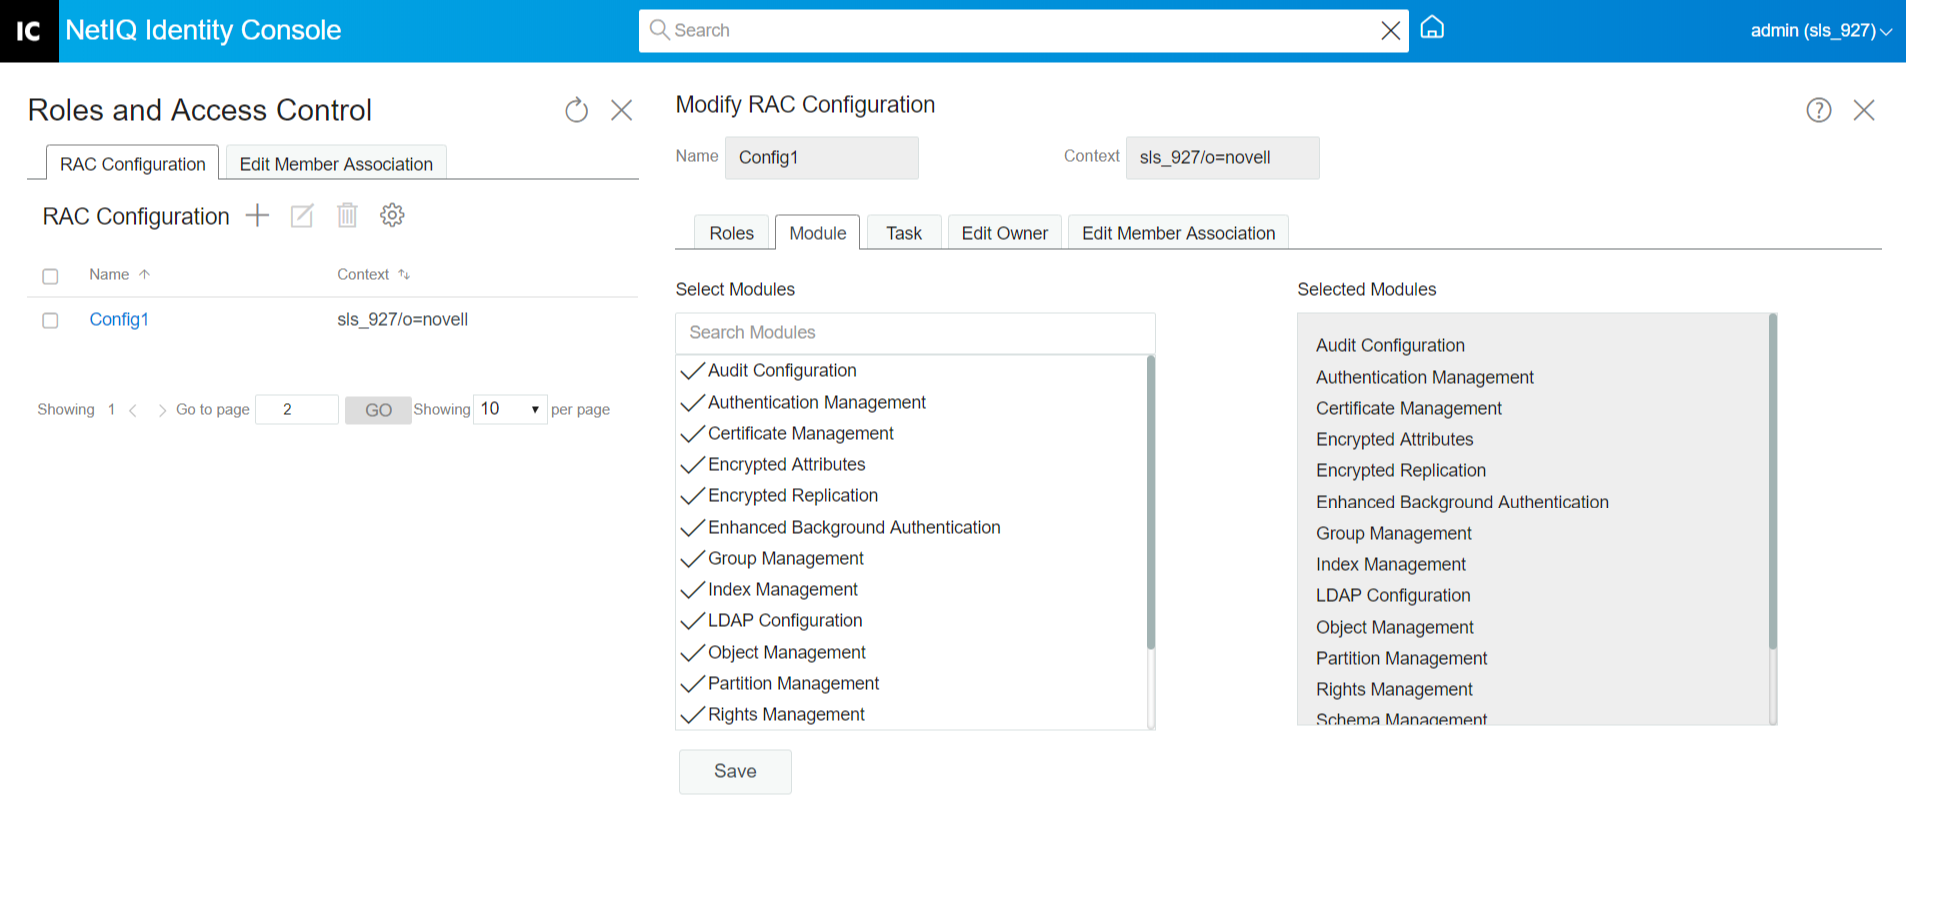
To work with a particular Configuration, select it from the list. This opens a configuration-specific view, as shown in figure:
NOTE:For the administrator to access all the modules, it is advisable to create a separate RAC Configuration for the administrator with all the Modules selected.
Figure 35-1 Indicates the Selected Modules
The remainder of this section describes the various tabs on the RAC Configuration page.
35.2.1 Setting up RAC Configuration
At the tab, you can see the list of configurations for the specific user. To create a new RAC Configuration, follow the steps:
-
On the tab, Click
 .
. -
Enter a .
-
In the Context field, Click
 and select the required Container.
 -
Assign a role to the user or group of users, by selecting the module from the list.
-
Select a required .
-
(Optional) Provide a .
-
Select the required check box, to specify how you want the rights that are related to this role to be assigned to the member.
Assign Rights: Instructs eDirectory to automatically grant the member rights necessary to perform the assigned role. When not selected, the member is assigned the role but might not have rights to perform all tasks associated with the role. The member’s rights assignments are handled separately.
Inheritable: Select to indicate that the member’s scope includes all sub-containers in the specified context. Select to indicate that the member can perform the role only in the specified container.
-
Click .
The RAC Configuration is created.
Figure 35-2 RAC Configuration
35.2.2 Managing RAC Roles
The RAC Configuration tab allows you to manage the RAC roles in the configuration. On the tab, you can see the list of Roles that were selected while creating the Configuration. From this tab you can perform the following:
Creating a New Role
This wizard steps you through naming or customizing the role, assigning tasks and categories to the role, and assigning role members and scopes to the role.
In the tab, you can view the modules that are assigned at the menu. If you click on the module, you can see the appropriate task assigned to that role at the menu.
To create a new role in the Configuration:
-
In the s tab, click
 .
. -
On the window, click
, and select a .-
Enter the .
-
Select the or the group of members that you want to associate with the Role.
-
-
From the menu, select the tasks that need to be assigned to the Role.
-
Click .
A new Role is created. Close the window and open the Configuration again to view the changes.
Figure 35-3 Create New Role
Removing a Role
To remove a role in the Configuration:
NOTE:When deleted, the custom created roles cannot be imported again. Be careful before deleting them.
-
In the s tab, select the role that you want to delete, and click
 .
. -
Click .
A Role is removed. Close the window and open the Configuration again to view the changes
Figure 35-4 Remove Role
Importing the Removed Role
To import a removed Role in the Configuration:
-
In the tab, click
 .
.The list appears.
-
Select the Role that needs to be imported.
The role is imported and visible on the menu.
-
Click .
A new Role is imported. Close the window and open the Configuration again to view the changes
Figure 35-5 Import the Removed Role

Adding Task to Selected Role
To add additional tasks to a particular Role, at the menu click .
Figure 35-6 Add Task to Selected Role
35.2.5 Editing Configuration Owner
On this screen, you can see the list of owners of a specified Configuration. You can add the Configuration owners or delete the existing Configuration owners. To add a Configuration owner, follow the procedure:
-
Click
. -
On the window, select the user, then click .
By using the box, you can search for a user or the objects.
Figure 35-7 Edit Configuration Owner
35.2.6 Editing Member Association for Configuration
The tab helps to associate a member to a role by selecting the member.
To add a member to an existing role:
-
Click
.The Context Browser window opens. On the Context Browser window, you have the option to select user, group, organization unit, or organization.
-
On the Context Browser window, select the user as per your requirement.
The list of associations that the user is already part of are displayed.
-
Click
 .
. -
On the window, select the role that is required.
-
: Specify, or use the Object Selector to find the desired object to be a role member.
-
: Specify, or use the Object Selector to find the scope within which this member can perform the role.
-
-
Click .
The roles are added successfully. Close the window and open the Configuration again to view the changes
Figure 35-8 Edit Member Association