C.0 Upgrading the Identity Assurance Solution from 3.0.1 to 3.0.2
Identity Assurance Solution 3.0.1 was updated to 3.0.2 in February, 2008. Use the following procedure to update from version 3.0.1 to 3.0.2:
-
Start with a working 3.0.1 system.
-
Make sure that iManager and User Application ports do not conflict.
-
Make sure that jdk1.5.0_14 is the JDK* installed in the
C:\Program files\java\jdk1.5.0_14 directory.
For more information, see the J2SE Development Kit 5.0 Update 14.
-
Upgrade from Identity Manager 3.5.0 to 3.5.1 by following the procedures described in the Identity Manager 3.5.1 User Application: Migration Guide.
-
Select the specific components that you need, or use the defaults.
-
-
Upgrade the Identity Manager User Application 3.5 to Novell IDM Roles Based Provisioning Module 3.6:
-
Set up the Prerequisites to Installation required for your application.
-
Follow the migration steps outlined in the Novell IDM User Application: Migration Guide.
After you upgrade the User Application, you can upgrade IAS 3.0.1 to 3.0.2.
-
-
From the IDMDriver folder located on the IASModules_302 ISO, run iasSignerApplet.exe.

-
When prompted, select .
IMPORTANT:Do not select .

-
Rerun the iasSignerApplet.exe.
-
From the IDMDriver folder located on the IASModules_302 ISO, run the PIV Life Cycle Driver.exe .

-
Save the configuration information on the driver.
-
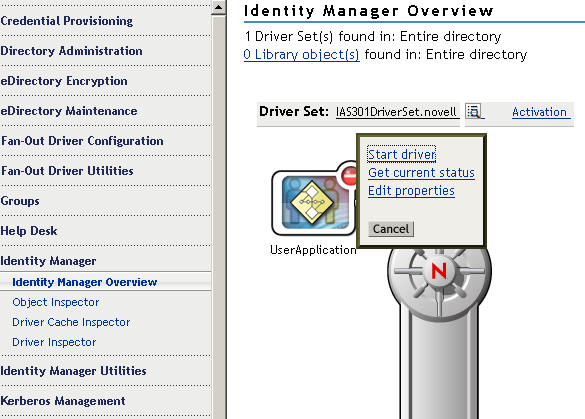
In iManager, select > > on the User Application driver.
-
Write down and save the values associated with this driver. You need these values when installing the new User Application driver.


-
Delete the User Application driver.

Make sure PIV Life Cycle Driver is up and running before adding the new User Application driver.
-
Add the driver by selecting , then select IAS PIVWorkflow-IDM3_5_0-V2.xml.
Enter the values saved in Step 12 in the required fields.
-
Verify that the PIV Life Cycle driver is running by ensuring that the circle in the upper-right corner of the driver icon is green.
-
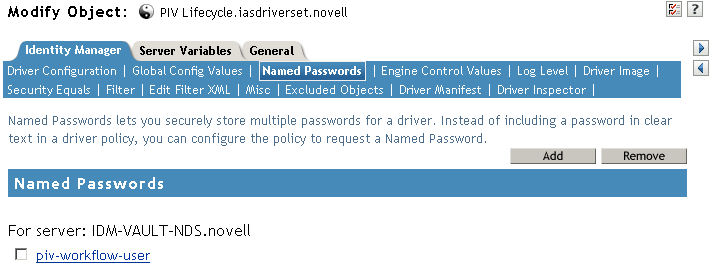
Select the PIV Life Cycle driver and edit its properties:
-
Select
-
Add and > .
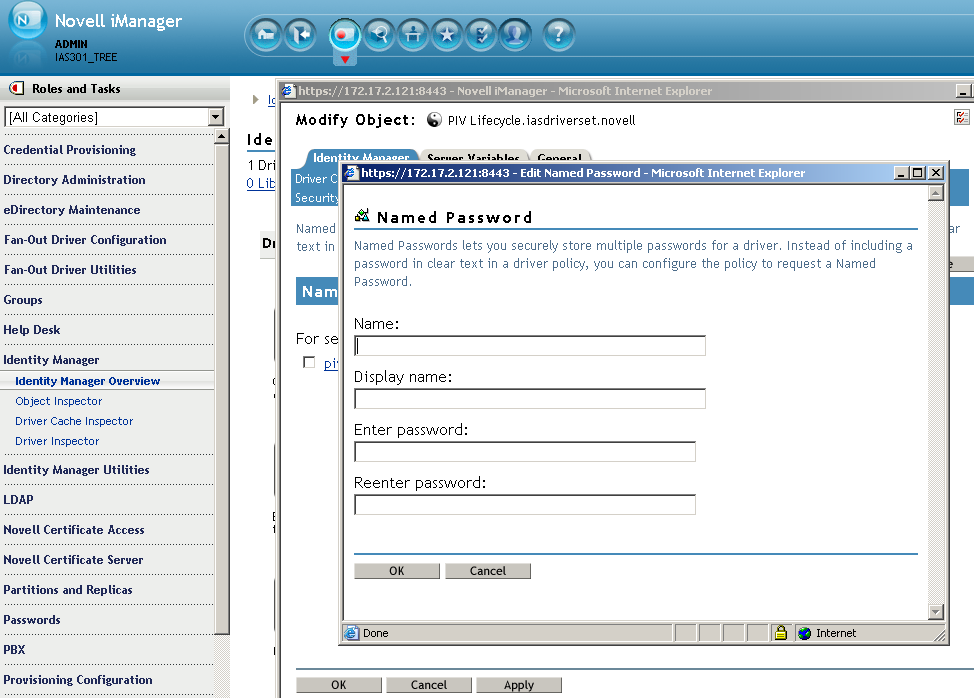
The password value for the Named Password is the password for the PIV Workflow user. This is the admin user who is specified in the field during the configuration of the User Application Driver object. For information on the field, see User Application Admin DN. It is also the same user who is indicated in the Global Settings of the Driver Set under the name .
-
-
Run Designer 2.1.1.

For more help about updating to Designer 2.1.1, refer to the Identity Manager Roles Based Provisioning Module 3.6 Migration Guide.
-
Follow the migration steps outlined in the Migration Guide.
-
Import the User Application driver from the driver set:

-
Import the fips.sch schema file.
-
Import the fips.sch schema file a second time.
The fips.sch file is in the c:\novell\nds directory.
Disregard any schema errors and warnings during import.
-
Select the option to migrate the User Application driver.
-
Deploy the User Application driver.
Ignore the errors and warnings during deployment.
-
-
Configure and run configupdat.bat (located in c:\novell).
-
Verify that your values are correct, then click .
For more information, see the Post-Installation Tasks in the IDM Roles Based Provisioning Module 3.6 User Application: Installation Guide.
-
Start the User Application (follow the steps in “Testing the Installation on the JBoss Application Server”).
-
In your browser, enter the following URL to run the IAS Single Sign-on configuration:
http://<User App Server IP Address>:<User App Server Port>/IDM/jsps/IASSignerConfig.jsp
-
Log in as cn=admin,o=novell
-
Select the option.
-
Save the configuration, then click .
IAS should now be operational.