10.9 Shared Storage for Disk Images
The Orchestration Server can discover disk files (such as ISOs) inside storage represented by a Repository Grid object, making it easier to specify a disk file that you want to attach to a VM.
This section includes the following information:
10.9.1 Setting Disk Discovery Facts
Before the Orchestration Server can discover disks, you need to set two facts in the Repository object. These facts are listed in the table below.
Table 10-5 Required Facts for ISO Disk Discovery
|
Fact Name |
Purpose |
|---|---|
|
repository.disks.paths |
The directories to search for disk image files |
|
repository.disks.patterns |
The patterns used to discover disk image files (the default pattern is *.iso). |
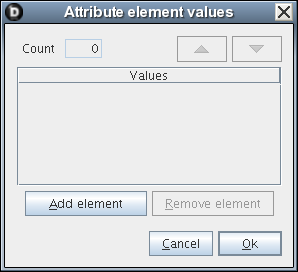
You can use the built-in array editor in the Orchestration Console to modify these facts. For example, to modify the repository.disks.paths fact,
-
In the Orchestration Console, select a Repository object that represents your shared storage.
-
Select the tab to open page in the admin view.
-
In the field, click the array editor button
 to open the dialog box.
-
On the dialog box, click to open the editor where you can add a string value to the repository.disks.paths fact. For example, you could enter /data/isos as a possible search directory for disk image files.
-
Click the icon on the main toolbar to save your fact changes.
A similar array editor is available for changing the values in the repository.disks.patterns fact found in the field of the Repository page of the Orchestration Console.
10.9.2 Running the Discovery
The action is included in the right-click menu of a Repository Grid object and in the main menu of the Orchestration Console. The right-click action lets you discover disks on a single repository, while the action under the menu lets you select multiple repositories for disk discovery.
When you select this action, a provisioning adapter function runs to search for and retrieve ISO disk filenames stored on the selected repository or repositories. If the selected provisioning adapter does not support the action, the option is dimmed in the menu.
NOTE:The Orchestration Server can discover any disk, but its default is to search for filenames with a .iso suffix.
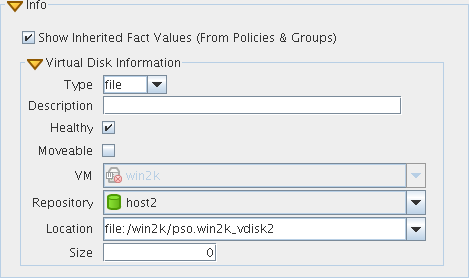
After discovery, the disk filenames are stored in the repository.disks fact of the Repository object, located in the field of the Repository’s page in the admin view.
Figure 10-1 The Disk Discovery Portion of the Info/Groups Page for the Repository Object

This is an array of disks, each of which is a valid value for the vdisk.location vDisk fact and stored in this repository. You can edit the filenames of these disks or add new filenames as values in the array.
10.9.3 Sharing Disks Between VMs
To share ISOs between VMs, you would need to store the ISOs in a shared location that is accessible on all VM hosts where those VMs are to run. In such a scenario, you would set up a directory on all VM hosts where /data/isos/ is a mount point to some SAN or NFS storage of ISO files. For example, an ISO file might have this path: /data/isos/SLES-11-SP1-DVD-x86_64-DVD1.iso.
10.9.4 Attaching a Discovered Disk to a VM
You can attach a discovered disk to a VM.
-
In the Orchestration Console, select the VM to which you want to attach a disk, then right-click to display the available actions for the VM.
-
Select to create a new disk. The Info/Groups page for the disk is displayed in the admin view.
The drop-down menu lists the ISO file names that were previously discovered in the Repository associated to this vDisk.
-
In the field (that is, the vdisk.location fact), select the disk that you want to attach to the VM. You can also manually edit the filename of the disk you want to attach.
-
Click the icon on the main toolbar to save your changes.
-
Commit the changes to the VM configuration.
-
(If the VM is running) In the Explorer tree, right-click the VM object, select
-
(If the VM is not running) In the Explorer tree, right-click the VM object, select .
If the VM state or the provisioning adapter do not support either of these actions, the options are dimmed.
-
10.9.5 Using Attached Disks in the Guest OS
After the disk is attached to a VM, you might need to take additional steps for the disk to be usable.
Linux Guest OS: Use the mount command to make the disk visible to the guest OS. Use the umount command to unmount the disk prior to changing or deleting the underlying PSO vDisk object.
Windows Guest OS: If the disk is not immediately visible, you need to reboot your guest OS. In general, the you can assume that disk is visible if it is replacing an already-mounted disk that is visible in a CD-ROM device.