13.2 Walkthrough: Scheduling a System Job
This section demonstrates how you can use the Orchestration Console to deploy and schedule an existing system job named auditCleaner.job. This example job is included in the examples directory of your Orchestration Server installation.
This section includes the following information:
13.2.1 Deploying a Sample System Job
Before a job can run, the Orchestration Server administrator must deploy it, which involves moving it from a developed package state to a state where it is ready and available for users. Only the administrator has the necessary rights to deploy a job.
There are four methods you can use to deploy a job:
-
Deploy it from the Orchestration Console by right-clicking the container in the Explorer panel.
-
Deploy it from the Orchestration Console by selecting the menu in the console.
-
Deploy it from the zosadmin command line (zosadmin deploy path_to_job).
-
Copy the deployable component to the “hot” deployment directory under the Orchestration Server instance directory. Typically, this directory is located at /var/opt/novell/zenworks/zos/server/deploy. Using this method, deployment proceeds within a few seconds. The server monitors this directory.
A runnable job can also be scheduled, which means that the schedule for running the job and the trigger or triggers that initiate or “fire” the schedule (or both) are configured and packaged with the job.
For this walkthrough, you deploy one of several system jobs (auditCleaner.job) developed for Cloud Manager Orchestration Server administrators to demonstrate how system jobs are deployed and run. This job package, which is actually a .jar archive, includes only a .policy component and a .jdl component. It does not have a .sched component. You can use the Job Scheduler in the Orchestration Console to add the .sched component separately.
NOTE:A job developer can create and package jobs that include a .jdl file, a .policy file, a .trig file (trigger), and a .sched file (schedule). The presence of the .sched file in the job package is also typical of the predeployed discovery jobs installed with the Orchestration Server, which run without intervention when the criteria for firing the schedule are satisfied. Such jobs are visible in the Job Scheduler because they already include the .sched components.
Although this walkthrough demonstrates only the first method listed above for deploying, the other methods are relatively simple, so no further examples are provided to illustrate them.
-
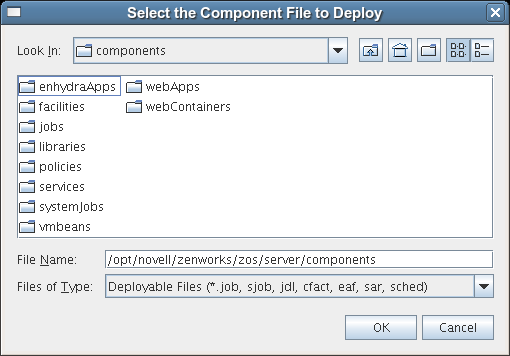
In the Explorer panel of the Orchestration Console, right-click the container, then click to open the Select the Component File to Deploy dialog box.
-
Open the drop-down list, then navigate to the location of the job you want to deploy.
Although a job developer can store jobs at any location on the network, the sample jobs shipped with the Orchestration Server are limited to the directories where the product is installed. For this walkthrough, navigate to the /opt/novell/zenworks/zos/server/components/systemJobs directory.
-
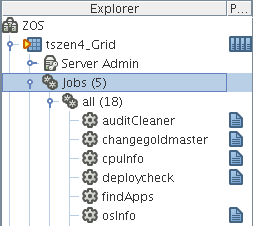
Select , then click to deploy the job to the container.
The job appears in the container and in the container in the tree.
13.2.2 Creating a New Schedule for the Job
When a job has been deployed, you can create a schedule to specify when you want it to run. In this walkthrough, you create a schedule for the auditCleaner job by using the Scheduler tool in the Orchestration Console.
-
In the toolbar in the Orchestration Console, click the Job Scheduler button
 to open the Job Scheduler view.
-
In the Job Scheduler view, click to open the Enter Unique Schedule Name dialog box.
-
Specify a name for the schedule you want to create for this job. For this walkthrough, specify the name cleaner in the field, then click to return to the Job Scheduler view.

The new schedule is highlighted in the Job Schedules Table and is flagged with a pencil icon, signifying that the schedule has not been committed yet. Continue with Section 13.2.3, Defining the New Schedule to define this new schedule by adding the specific information you want.
13.2.3 Defining the New Schedule
Defining a new job schedule consists of selecting its general properties, its specific properties, and the triggers you want to be associated with it.
Choosing General Properties for a New Schedule
After you have created a new job schedule, its name cannot be changed, but you can add properties to it that help to identify and classify it in a general way. Use the following steps to add these properties:
-
In the Job Schedule Editor panel of the Scheduler view, select the drop-down list.
-
From the list of available jobs, select as the job to which this schedule applies.
-
In the Job Schedule Editor, select the drop-down list.
-
From the list of available users, select as the user who runs this job.
The zos user is the built-in user that is always present. It is commonly used for routine jobs like this example.
-
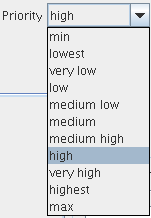
In the Job Schedule Editor, select the drop-down list.
-
From the list of available priorities, select as the priority for this job schedule.
The maximum selectable priority is dependent on an attribute associated with the selected user.
-
Click the button
 on the toolbar of the Orchestration Console to save the general properties you have selected for the new schedule.
The schedule is now committed, and the attribute columns in the Job Schedules Table are populated with the name of the job that the schedule will run, the user it will run as, the priority at which it will run, and its current status. Because the schedule has not been activated yet, it remains in a state.
When you have chosen the general properties of the new schedule, you can either continue with Adding Specific Parameters to the New Schedule or proceed directly to Creating and Assigning a Time Trigger for the New Schedule.
Creating and Assigning a Time Trigger for the New Schedule
A job already defined in a schedule can be triggered with two main themes: the occurrence of an event or the arrival of a point in time. In this walkthrough, you define a time trigger for the cleaner schedule.
In this example, there are no defined time triggers in the Job Scheduler, so you use the following steps to define a time trigger.
-
In the Job Schedule view, click to display the Triggers dialog box.
Time triggers are shareable across schedules. After a time trigger is defined, it is added to a list of triggers in this dialog box. You can select a predefined trigger from this list when you create a new schedule, or you can create a new time trigger, as the next steps demonstrate.
-
In the Triggers dialog box, click to clear and activate the fields in the dialog box for the creation of a unique time trigger.
-
In the Enter Unique Trigger Name dialog box, specify 24 hour as the unique name of this time trigger, then click .
-
In the field, specify Runs every 24 hours at noon as the description for this time trigger.
-
Click to activate the fields for defining a cron expression.

-
Click the drop-down list of sample cron expressions, then select the default cron expression, 0 0 12 * * ?, which is listed first.
The sample expressions in the drop-down list show cron strings with accompanying descriptions to remind you how a cron string is constructed. The examples are selectable and editable and can be used in the schedule, just as you have done in this step.
NOTE:For detailed information about cron syntax, see Understanding Cron Syntax in the Job Scheduler.
-
Click to save the trigger you just created, then click to return to the Job Scheduler view.
-
From the Job Scheduler view, make sure that the schedule is selected, then click to display the Choose Triggers dialog box.
-
In the Choose Triggers dialog box, select (the name of the trigger you created), click to move the trigger definition to the list, then click to return to the Job Scheduler view.
NOTE:You can select and combine as many time triggers as you want to apply to a given schedule. You can also combine time triggers with event triggers on a given schedule.
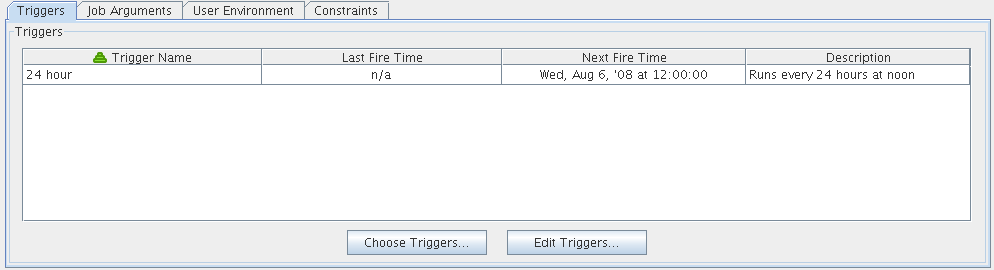
In the list of the Job Scheduler view, the trigger is now associated with the new schedule.
-
Click the button
to update the Orchestration Server with the new schedule/trigger association.
Adding Specific Parameters to the New Schedule
If necessary, you can now add specific parameters to the schedule to edit its job arguments, to choose whether you want to pass the user environment variables to the schedule, or to specify policy constraints to further focus the purpose of this schedule when it fires.
For the purpose of this walkthrough, none of these specific parameters is modified, although a general overview of how to do so is explained.
The following specific parameters can be managed in the Job Scheduler Editor:
Job Arguments
As explained in Section 13.1.2, Creating or Modifying a Job Schedule, a job argument defines the values that can be passed in to the process when a job is invoked. These values let you statically define and control job behavior. The job arguments that appear in the tab of the Schedule Editor depend on the job. The job might have no arguments.
By default, the auditCleaner job lists only one job argument, .
Figure 13-9 The Job Arguments Tab of the Job Schedule Editor
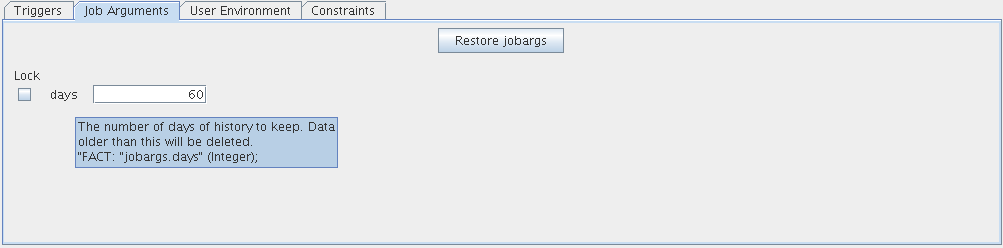
According to the tooltip text, this argument is the number of days of job history to keep, so this job cleans up the history of the job in the Orchestration Server audit database after the job reaches the age of 60 days. Data older than 60 days is to be deleted. If you want to, you can change this parameter, or any other parameter in a job argument.
If the default value for a job argument parameter is missing, the job might fail, so you should inspect these parameters carefully.
User Environment
As explained in Section 13.1.2, Creating or Modifying a Job Schedule, a user’s environment variables are available in the Job Scheduler only if that user utilizes the zos command line tool and elects to pass those environment variables to the server at login time or when he or she runs a job (running the job creates the environment variables as facts in the job). The zos run command passes the environment for that particular job run only.
In this walkthrough, the zosSystem user shows no user environment variables.
Figure 13-10 The User Environment Tab of the Job Scheduler Editor, No User Environment Variables Available
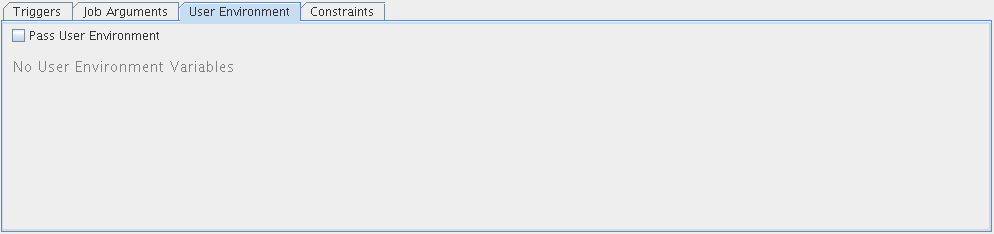
Because there are no environment variables listed, there are none to pass to the schedule, so it is not necessary to select the check box. By default, this check box is not selected, even if environment variables are present for a user specified to run the job.
Sometimes a job is written to work from a user’s environment variables. In this case, if a user has not logged in or has not run the job from the zos command line using the necessary environment option, the schedule must pass those variables to the job when it is invoked.
If you associate a user who has user environment variables with this schedule, you would see a list of those environment variables as they would be passed to the job.
Figure 13-11 The User Environment Tab of the Job Schedule Editor, User Environment Variables Available
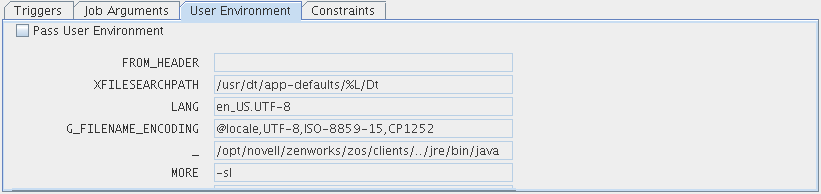
Selecting the check box in this scenario would create these variables as facts used for this job invocation.
Constraints
As explained in Section 13.1.2, Creating or Modifying a Job Schedule, the tab displays a constraint editor that you can use to create additional constraints for the job being scheduled.
Any other constraints associated with the context of this job invocation (including but not limited to this job), with the user you’ve selected, with that user’s group, with the jobs group, with the resources that the job uses, or with the resource groups that the job uses, run in spite of the policy that you define here. These additional constraints usually restrict or refine what the job does when this schedule fires.
These constraints are passed to the job only when this schedule is invoked. For example, you could add a start constraint to delay the start of a job, a resource constraint to run on only one of three named machines, or a continue constraint to automatically time out the job if it takes too long to run. Anything you can do with a regular job policy constraint, you can add as a special constraint here for this particular schedule invocation.
Click the button ![]() to update the Orchestration Server with the new schedule.
to update the Orchestration Server with the new schedule.
13.2.4 Activating the New Schedule
When the new schedule has been created and its triggers defined, you need to take it from the disabled state to an active state where it is ready to run.
-
In the Job Scheduler view, select the newly created job. The job shows that it is in a state.

-
Click to enable the schedule.

The schedule is now enabled, but has not run yet.
13.2.5 Running the New Schedule Immediately
You can trigger the schedule immediately, rather than waiting for the triggers to fire.
-
In the Job Schedules Table of the Job Scheduler view, select (the name of the schedule you want to run), click , then click the job monitor button on the toolbar () to open the Job Monitor view.
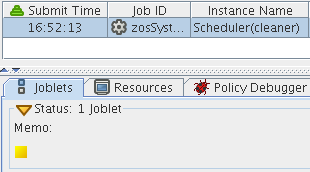
The joblet icon shows that the job is running.
-
Click the Job Scheduler button
on the toolbar to open the Job Scheduler view.

The cleaner schedule is listed as an active job. This indicates that the schedule has started the job as anticipated.
If you click the button
 , you can see that the job now has a Job ID.

If the job invocation fails, as in this example, a red exclamation icon is also displayed.