B.1 Using the Orchestration Console to Create a Resource Account
Use the following steps to create a resource object in the Orchestration Console.
-
Make sure that the check box on the grid object’s page is not selected (see Step 2).
-
(Optional) Create a new resource from the Explorer panel in the Orchestration Console:
-
In the Explorer panel in the Orchestration Console, right-click , then click to display the Create a new Resource dialog box.
-
Specify the name of the new resource you want to create in the field, then click .
-
-
(Optional) Create a new resource from the Main Menu in the Orchestration Console.
-
In the Orchestration Console, click > click to display the an expanded version of the Create a new Resource dialog box.
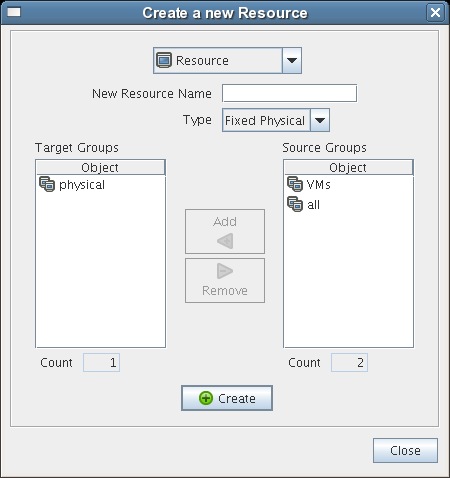
This dialog box includes a method for designating the resource as a fixed physical type or a virtual machine type. It also includes a method for including the resource in various resource groups. In this walkthrough, we will install an Orchestration Agent on a fixed physical resource and include it in the resource group.
The Virtual Machine resource type is not available if you installed the High Performance Computing license only for Orchestrate.
-
Make sure is selected in the drop-down box, specify the new resource name in the field, click , then click .
The resource account is created, but is offline
 , as indicated by its object icon in the Explorer panel or in the Information view of each resource group to which it belongs. The resource is not online until an Orchestration Agent matching the resource is installed.
-