2.1 SLES 11 Standard Installation
The steps for installing Cloud Manager Orchestration components on a SLES 11 server, including the Orchestration Server, Orchestration Agent, the Orchestration Console (accompanied by other Orchestration clients), and the Cloud Manager Monitoring Server and Monitoring Agent are included in this section.
You should have already decided which SLES file packages you want to install, and on which machines. If not, the information in Choosing the Installation Packages and Where to Install Them
in the NetIQ Cloud Manager 2.1.5 Installation Planning Guide can help you make that decision.
-
Log in to the target SLES server as root, then open YaST or YaST2. You should install the Orchestration Server on a dedicated server for optimal performance.
-
Download the appropriate NetIQ Cloud Manager ISO to the SLES server.
or
Load the NetIQ Cloud Manager DVD on the SLES server.
-
Define the NetIQ Cloud Manager ISO or DVD as an add-on product:
-
In the YaST Control Center, click > then click .
-
Click Add, select or , then follow the prompts to add the product.
-
-
Read and accept the license agreement, then click to display the Software Selection and System Tasks dialog box.
-
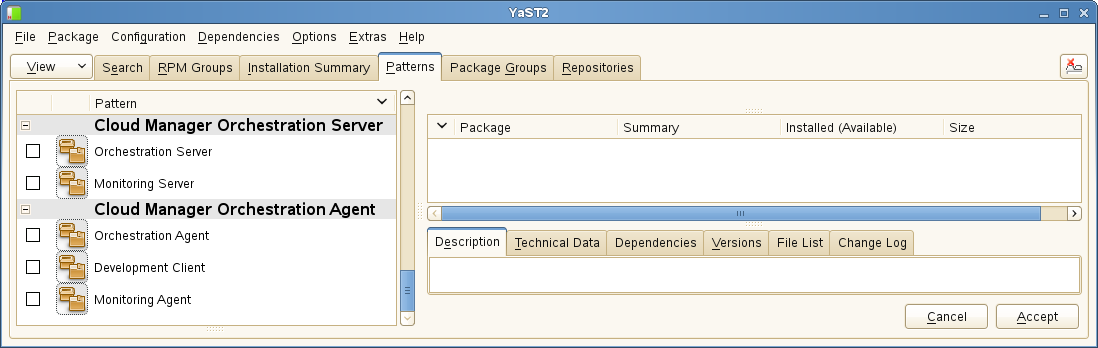
Select the installation pattern that contains the Orchestration component packages you want to install on this server.
You should have previously decided which packages to install. For more information, see
Choosing the Installation Packages and Where to Install Them
in the NetIQ Cloud Manager 2.1.5 Installation Planning Guide. -
Click to install the packages.
-
When package installation is complete, click to close the Installed Add-On Products dialog box.