1.2 Installing PlateSpin Orchestrate to a High Availability Environment
This section includes information to help you install PlateSpin Orchestrate Server components in a high availability environment. The sequence below is the supported method for configuring this environment.
-
Section 1.2.2, Installing the High Availability Pattern for SLES 10
-
Section 1.2.3, Configuring Nodes with Time Synchronization and Installing Heartbeat 2 to Each Node
-
Section 1.2.5, Installing and Configuring PlateSpin Orchestrate on the First Clustered Node
-
Section 1.2.6, Running the High Availability Configuration Script
-
Section 1.2.9, Testing the Failover of the PlateSpin Orchestrate Server in a Cluster
NOTE:Upgrading from earlier versions of PlateSpin Orchestrate (including an earlier installation of version 1.3) to a high availability environment is supported. For more information, see Upgrading a PlateSpin Orchestrate 2.5 High Availability Configuration
in the PlateSpin Orchestrate 2.6 Upgrade Guide.
If you plan to use the PlateSpin Orchestrate VM Client in a high availability environment, see Section 1.2.10, Installing and Configuring other PlateSpin Orchestrate Components to the High Availability Grid.
1.2.1 Meeting the Prerequisites
The environment where PlateSpin Orchestrate Server is installed must meet the hardware and software requirements for high availability. This section includes the following information to help you understand those requirements.
Hardware Requirements for Creating a High Availability Environment
The following hardware components are required for creating a high availability environment for PlateSpin Orchestrate:
-
A minimum of two SLES 10 SP3 (or greater) physical servers, each having dual network interface cards (NICs). These servers are the nodes of the cluster where the PlateSpin Orchestrate Server is installed and are a key part of the high availability infrastructure.
-
A Fibre Channel or ISCSI Storage Area Network (SAN) or network storage
-
A STONITH device, to provide node fencing. A STONITH device is a power switch that the cluster uses to reset nodes that are considered unresponsive. Resetting non-heartbeating nodes is the only reliable way to ensure that no data corruption is performed by nodes that hang and only appear to be dead. For more information about setting up STONITH, see, the
Configuring Stonith
section of the SLES 10 Heartbeat Guide.
Software Requirements for Creating a High Availability Environment
The following software components are required for creating a high availability environment for PlateSpin Orchestrate:
-
The high availability pattern on the SLES 10 SP3 RPM install source, which includes
-
Heartbeat 2 software package, which is a high availability resource manager that supports multinode failover. This should include all available online updates installed to all nodes that will be part of the Heartbeat 2 cluster.
-
Oracle Cluster File System 2 (OCFS2), a parallel cluster file system that offers concurrent access to a shared file system. See Section 1.2.4, Setting Up OCFS2 for more information.
SLES 10 SP3 integrates these open source storage technologies (Heartbeat 2 and OCFS) in a high availability installation pattern, which, when installed and configured, is known as the Novell High Availability Storage Infrastructure. This combined technology automatically shares cluster configuration and coordinates cluster-wide activities to ensure deterministic and predictable administration of storage resources for shared-disk-based clusters.
-
-
DNS installed on the nodes of the cluster for resolving the cluster hostname to the cluster IP.
-
PlateSpin Orchestrate Server installed on all nodes of the cluster (a two-node or three-node configuration is recommended).
-
(Optional) VM Builder installed on a non-clustered server (for more information, see Section 1.2.10, Installing and Configuring other PlateSpin Orchestrate Components to the High Availability Grid).
-
(Optional) Orchestrate Monitoring Server installed on a non-clustered server (for more information, see Section 1.2.10, Installing and Configuring other PlateSpin Orchestrate Components to the High Availability Grid).
1.2.2 Installing the High Availability Pattern for SLES 10
The high availability install pattern is included in the distribution of SLES 10 SP3. Use YaST2 (or the command line, if you prefer) to install the packages that are associated with the high availability pattern to each physical node that is to participate in the PlateSpin Orchestrate cluster.
NOTE:The high availability pattern is included on the SLES 10 SP3 install source, not the PlateSpin Orchestrate install source.
The packages associated with high availability include:
-
drbd (Distributed Replicated Block Device)
-
EVMS high availability utilities
-
The Heartbeat 2 subsystem for high availability on SLES
-
Heartbeat 2 CIM provider
-
A monitoring daemon for maintaining high availability resources that can be used by Heartbeat 2
-
A plug-in and interface loading library used by Heartbeat 2
-
An interface for the STONITH device
-
OCFS2 GUI tools
-
OCFS2 Core tools
For more information, see Installing and Removing Software
in the SLES 10 Installation and Administration Guide.
1.2.3 Configuring Nodes with Time Synchronization and Installing Heartbeat 2 to Each Node
When you have installed the high availability packages to each node of the cluster, you need to configure the Network Timing Protocol (NTP) and Heartbeat 2 clustering environment on each physical machine that participates in the cluster.
Configuring Time Synchronization
To configure time synchronization, you need to configure the nodes in the cluster to synchronize to a time server outside the cluster. The cluster nodes use the time server as their time synchronization source.
NTP is included as a network service in SLES 10 SP3. Use the time synchronization instructions in the SLES 10 Heartbeat Guide to help you configure each cluster node with NTP.
Configuring Heartbeat 2
Heartbeat 2 is an open source server clustering system that ensures high availability and manageability of critical network resources including data, applications, and services. It is a multinode clustering product for Linux that supports failover, failback, and migration (load balancing) of individually managed cluster resources.
Heartbeat 2 packages are installed with the high availability pattern on the SLES 10 SP3 install source. For detailed information about configuring Heartbeat 2, see the installation and setup instructions in the SLES 10 Heartbeat Guide.
An important value you need to specify in order for Heartbeat 2 to be enabled for high availability is configured in the field on the settings page of the Heartbeat 2 console (hb_gui).
Figure 1-2 The Main Settings Page in the Heartbeat 2 Graphical Interface
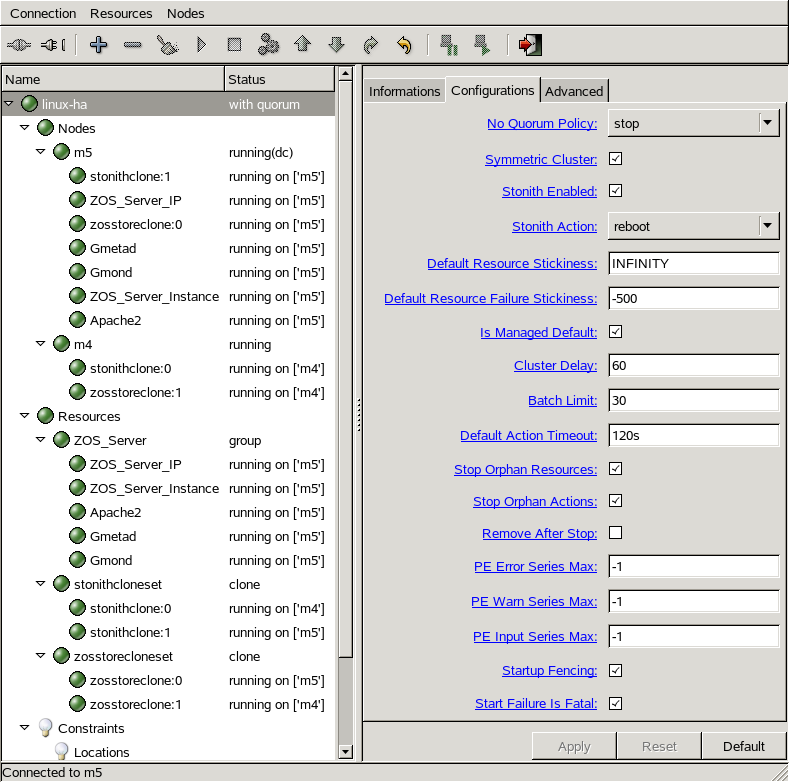
The value in this field controls how long Heartbeat 2 waits for services to start. The default value is 20 seconds. The PlateSpin Orchestrate Server requires more time than this to start. We recommend that you specify the value in this field at 120s. More time might be required if your PlateSpin Orchestrate grid is very large.
1.2.4 Setting Up OCFS2
OCFS2 is a general-purpose journaling file system that is fully integrated in the Linux 2.6 and later kernel that ships with SLES 10 SP3. OCFS2 allows you to store application binary files, data files, and databases on devices on devices using network storage. All nodes in a cluster have concurrent read and write access to the file system. A distributed lock manager helps prevent file access conflicts. OCFS2 supports up to 32,000 subdirectories and millions of files in each directory. The O2CB cluster service (a driver) runs on each node to manage the cluster.
To set up the high availability environment for PlateSpin Orchestrate, you need to first install the High Availability pattern in YaST (this includes the ocfs2-tools and ocfs2console software packages) and configure the Heartbeat 2 cluster management system on each physical machine that participates in the cluster, and then provide network storage with OCFS2 where the PlateSpin Orchestrate files can be stored. For information on setting up and configuring OCFS2, see the Oracle Cluster File System 2
section of the SLES 10 Administration Guide.
Shared Storage Requirements for Creating a High Availability Environment
If you want data to be highly available, we recommend that you set up a Fibre Channel Storage Area Network (SAN) to be used by your PlateSpin Orchestrate cluster.
SAN configuration is beyond the scope of this document. For information about setting up a SAN, see the Oracle Cluster File System 2 documentation in the SLES 10 Administration Guide.
IMPORTANT:PlateSpin Orchestrate requires a specific mount point for file storage on the SAN. Use /zos for this mount point.
1.2.5 Installing and Configuring PlateSpin Orchestrate on the First Clustered Node
This section includes information about installing the Orchestrate Server components, configuring those components using two possible methods, and then checking the configuration:
Installing the Orchestrate Server YaST Patterns on the Node
NOTE:As you prepare to install PlateSpin Orchestrate 2.6 and use it in a high availability environment, make sure that the requirements to do so are met. For more information, see Planning the Orchestrate Server Installation
in the PlateSpin Orchestrate 2.6 Installation and Configuration Guide.
The PlateSpin Orchestrate Server (Orchestrate Server) is supported on SUSE Linux Enterprise Server 10 Service Pack 3 (SLES 10 SP3) only.
To install the PlateSpin Orchestrate Server packages on the first node of the cluster,
-
Download the appropriate PlateSpin Orchestrate Server ISO (32-bit or 64-bit) to an accessible network location.
-
(Optional) Create a DVD ISO (32-bit or 64-bit) that you can take with you to the machine where you want to install it or use a network install source.
-
Install PlateSpin Orchestrate software:
-
Log in to the target SLES 10 SP3 server as root, then open YaST2.
-
In the YaST Control Center, click > , then click to display the Add-on Product Media dialog box.
-
In the Add-on Product Media dialog box, select the ISO media ( or ) to install.
-
(Conditional) If you are using a DVD, select , click , insert the DVD, then click .
-
(Conditional) If you are using a directory, select , click, select the check box, browse to ISO on the file system, then click .
-
-
Read and accept the license agreement, then click to display YaST2.
-
In the YaST2 drop-down menu, select to display the install patterns available on the PlateSpin Orchestrate ISO.
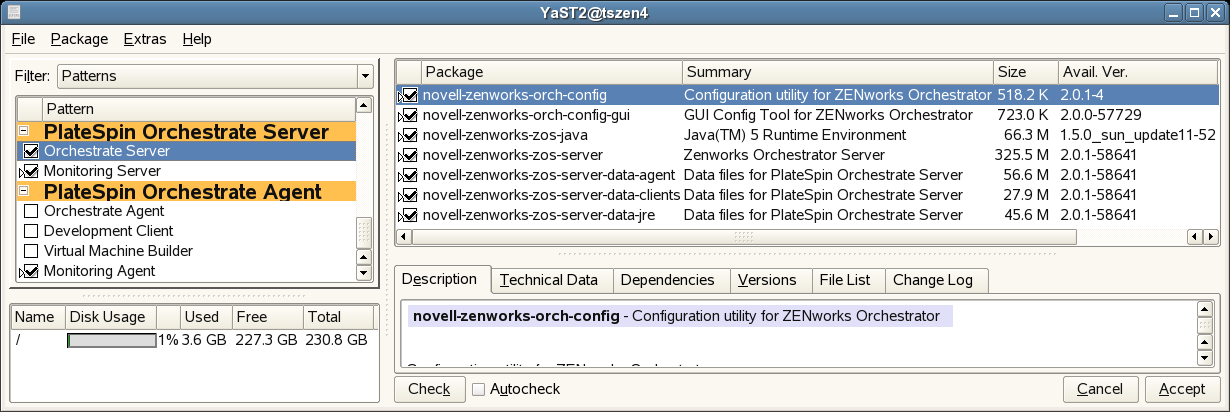
-
Select the PlateSpin Orchestrate Server installation pattern for installation on the first node. When you do so, the Monitoring Server installation pattern and the Monitoring Agent pattern are also selected. These patterns are the gateway between enterprise applications and resource servers. The Orchestrate Server manages computing nodes (resources) and the jobs that are submitted from applications to run on these resources.
HINT:If they are not already selected by default, you need to select the packages that are in the PlateSpin Orchestrate Server pattern, the Monitoring Server pattern, and the Monitoring Client pattern.
-
Click to install the packages.
-
-
Configure the PlateSpin Orchestrate Server components that you have installed. You can use one of two methods to perform the configuration:
-
The PlateSpin Orchestrate product (text-based) configuration script. If you use this method, continue with Running the PlateSpin Orchestrate Configuration Script.
-
The PlateSpin Orchestrate GUI Configuration Wizard, which might be more user-friendly. If you use this method, skip to Running the PlateSpin Orchestrate Configuration Wizard.
HINT:Although the text-based configuration process detects which RPM patterns are installed, the GUI Configuration Wizard requires that you specify which components are to be configured.
You can use the content in PlateSpin Orchestrate Configuration Information to help you understand what is needed during the configuration.
-
-
Finish the configuration by following the instructions in Checking the Configuration.
Running the PlateSpin Orchestrate Configuration Script
Use the following procedure to finish the initial installation and configuration script for the first node in the cluster.
HINT:You can use the content included in PlateSpin Orchestrate Configuration Information to help you complete the configuration.
-
Make sure you are logged in as root to run the configuration script.
-
Run the script, as follows:
/opt/novell/zenworks/orch/bin/config
When the script runs, the following information is initially displayed:
Welcome to Novell PlateSpin Orchestrate.

This program will configure Novell PlateSpin Orchestrate 2.6.0


Select whether this is a new install or an upgrade

i) install
u) upgrade
- - - - - -

Selection [install]:
-
Press Enter (or enter i) to accept a new installation and to display the next part of the script.
Select products to configure

 #   selected  Item
 1)    yes     PlateSpin Orchestrate Monitoring Service
 2)    yes     PlateSpin Orchestrate Server
 3)     no     PlateSpin Orchestrate Agent (not installed)
 4)     no     PlateSpin Orchestrate VM Builder (not installed)

Select from the following:
  1 - 4)  toggle selection status
       a)  all
       n)  none
       f)  finished making selections
       q)  quit -- exit the program
Selection [finish]:
Because you installed only the PlateSpin Orchestrate Server and the PlateSpin Orchestrate Monitoring Service, no other products need to be selected.
-
Press Enter (or enter f) to finish the default selection and to display the next part of the script.
Gathering information for PlateSpin Orchestrate Monitoring Service configuration. . .


You can configure this host to be the Monitoring Server or a monitored node

Configure this host as the Monitoring Server? (y/n) [y]:
-
Press Enter (or enter y) to configure this host as a Monitoring Server. This step of the configuration also configures the Monitoring Agent you installed previously.
-
Specify a name (or accept the default computer name) that describes this monitored computer’s location.
The next part of the configuration script is displayed:
Gathering information for PlateSpin Orchestrate Server configuration. . .

Select whether this is a standard or high-availability server configuration

s) standard
h) ha
- - - - - -

Selection [standard]:
-
Enter h to specify that this is a high availability server configuration and to display the next part of the script.
-
Specify the fully qualified cluster hostname or the IP address that is used for configuring the Orchestrate Server instance in a high availability cluster.
The configuration script binds the IP address of the cluster to this server.
-
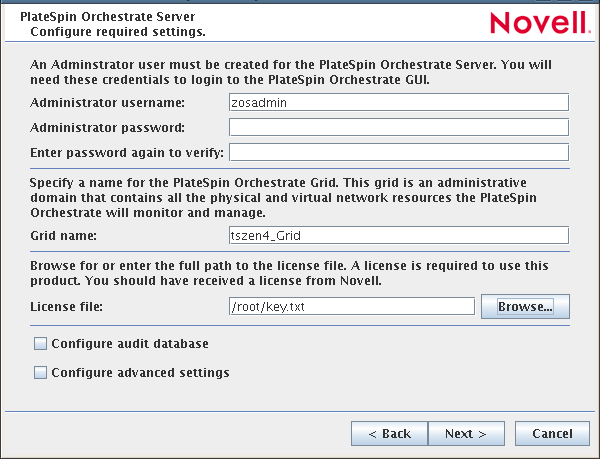
Specify a name for the PlateSpin Orchestrate grid.
This grid is an administrative domain container that contains all of the objects in your network or data center that PlateSpin Orchestrate monitors and manages, including users, resources, and jobs. The grid name is displayed at the root of the tree in the Explorer Panel of the Orchestrate Development Client.
-
Specify a name for the PlateSpin Orchestrate Administrator user.
This name is used to log in as the administrator of the PlateSpin Orchestrate Server and the objects it manages.
-
Specify a password for the PlateSpin Orchestrate Administrator user, then retype the password to validate it.
-
Choose whether to enable an audit database by entering either y or n.
PlateSpin Orchestrate can send audit information to a relational database (RDBMS). If you enable auditing, you need access to an RDBMS. If you use a PostgreSQL database, you can configure it for use with PlateSpin Orchestrate auditing at this time. If you use a different RDBMS, you must configure it separately for use with PlateSpin Orchestrate.
-
Specify the full path to file containing the license key you received from Novell.
Example: opt/novell/zenworks/zos/server/license/key.txt
-
Specify the port you want the Orchestrate Server to use for the Server Portal interface so users (also known as Job Managers) can access the PlateSpin Orchestrate Server to manage jobs.
NOTE:If you plan to use PlateSpin Orchestrate Monitoring outside your cluster, we recommend that you do not use the default port, 80.
-
Specify a port that you want to designate for the Administrator Information page.
This page includes links to product documentation, agent and client installers, and product tools to help you understand and use the product. The default port is 8001.
-
Specify a port to be used for communication between the Orchestrate Server and the Orchestrate Agent. The default port is 8100.
-
Specify (yes or no) whether you want the Orchestrate Server to generate a PEM-encoded TLS certificate for secure communication between the server and the agent. If you choose not to generate a certificate, you need to provide the location of an existing certificate and key.
-
Specify whether to view (yes or no) or change (yes or no) the information you have supplied in the configuration script.
If you choose to not change the script, the configuration process launches.
If you decide to change the information, the following choices are presented in the script:
Select the component that you want to change

1) PlateSpin Orchestrate Server
- - - - - - - - - - - - - - - -
d) Display Summary
f) Finish and Install
-
Specify 1 if you want to reconfigure the server.
-
Specify d if you want to review the configuration summary again.
-
Specify f if you are satisfied with the configuration and want to install using the specifications as they are.
-
-
Continue with Checking the Configuration.
Running the PlateSpin Orchestrate Configuration Wizard
Use the following steps to run the PlateSpin Orchestrate Configuration Wizard.
-
Run the script for the PlateSpin Orchestrate Configuration Wizard as follows:
/opt/novell/zenworks/orch/bin/guiconfig
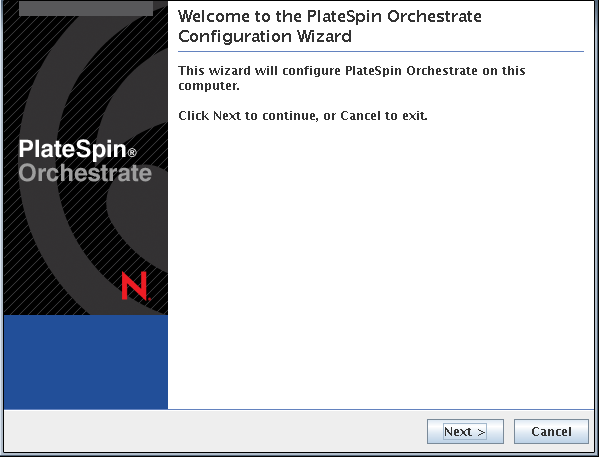
The Configuration Wizard launches.
IMPORTANT:If you only have a keyboard to navigate through the pages of the GUI Configuration Wizard, use the Tab key to shift the focus to a control you want to use (for example, a button), then press the Spacebar to activate that control.
-
Click to display the license agreement.
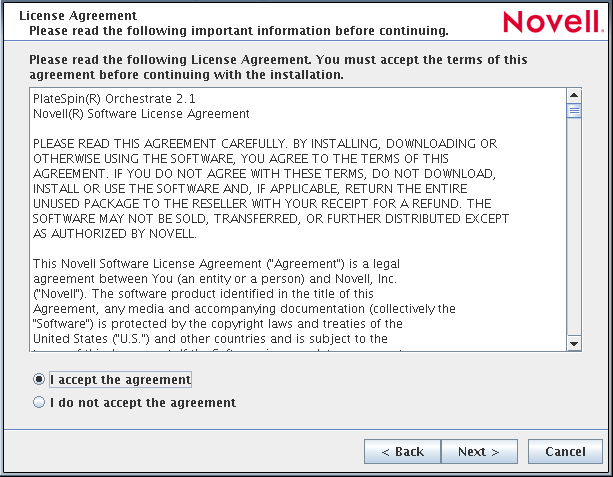
-
Accept the agreement, then click to display the installation type page.
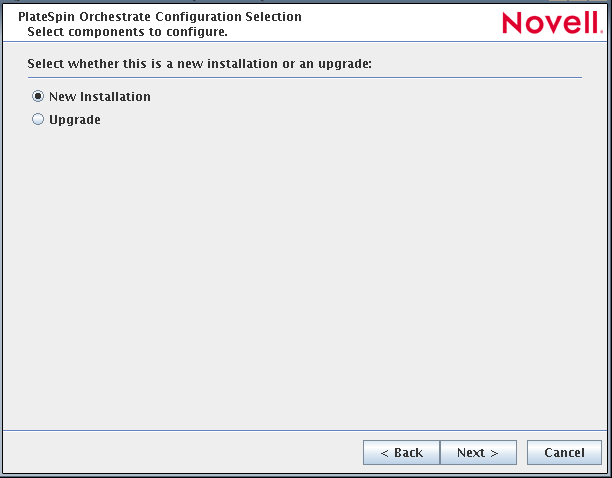
-
Select , then click to display the PlateSpin Orchestrate components page.
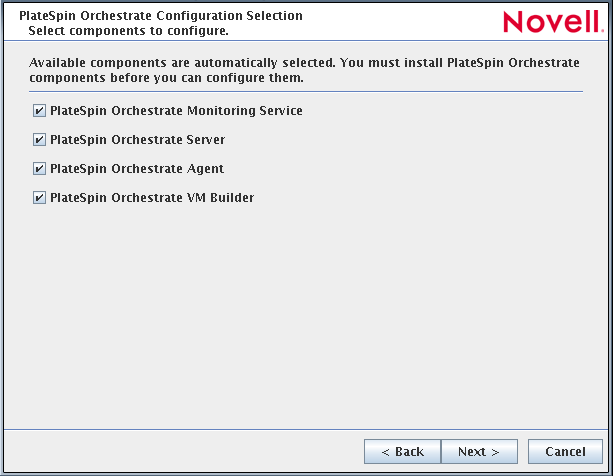
The components page lists the PlateSpin Orchestrate components that are available for configuration. By default, only the installed components (the PlateSpin Orchestrate Server, in this case) are selected for configuration.
If other PlateSpin Orchestrate patterns were installed by mistake, make sure that you deselect them now. As long as these components are not configured for use, there should be no problem with the errant installation.
-
Click to display the Monitoring Services configuration page, then select the options you want.
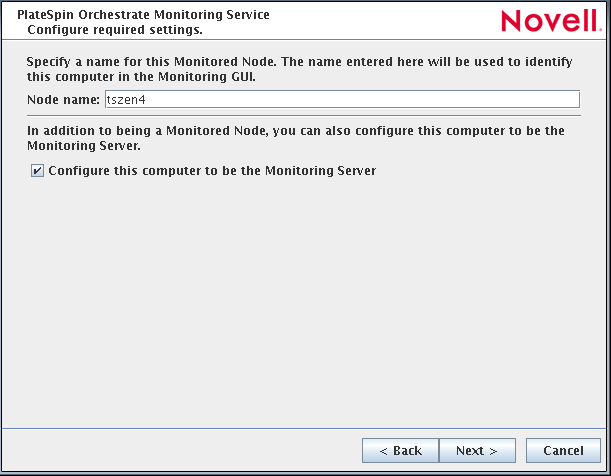
On this page of the wizard, you can change the default node name for this monitored node, and you can also configure this computer to be the Monitoring Server. Make sure that the option to configure as a Monitoring Server is selected.
-
Click to display the high availability configuration page.
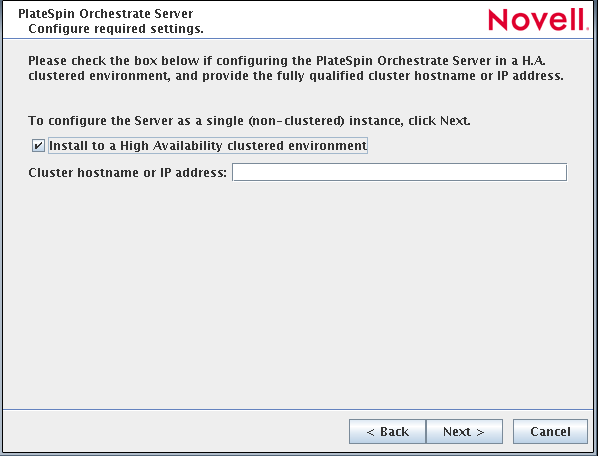
-
Select to configure the server for high availability, enter the hostname of IP address of the cluster in the field, then click to display the configuration settings page.
Refer to the information in Table 1-1, PlateSpin Orchestrate Configuration Information for details about the configuration data that you need to provide. The GUI Configuration Wizard uses this information to build a response file that is consumed by the setup program inside the GUI Configuration Wizard.
HINT:Select to display a page where you can specify various port settings and certificate files. Details for this page are provided in Table 1-1, PlateSpin Orchestrate Configuration Information.
-
Click to display the Xen VNC password page.
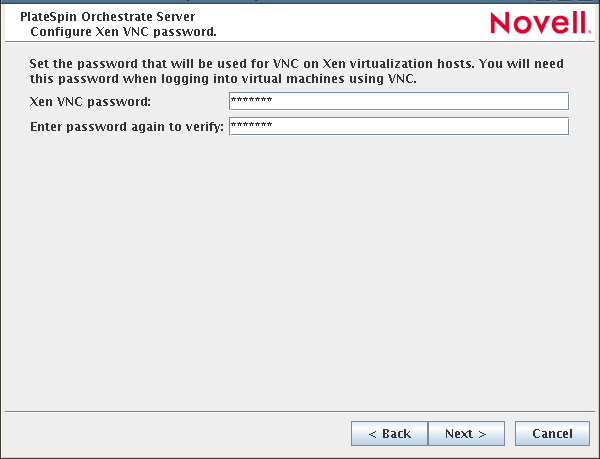
-
Enter the VNC password you intend to use for VNC on Xen virtualization hosts, confirm the password, then click to display the PlateSpin Orchestrate Configuration Summary page.
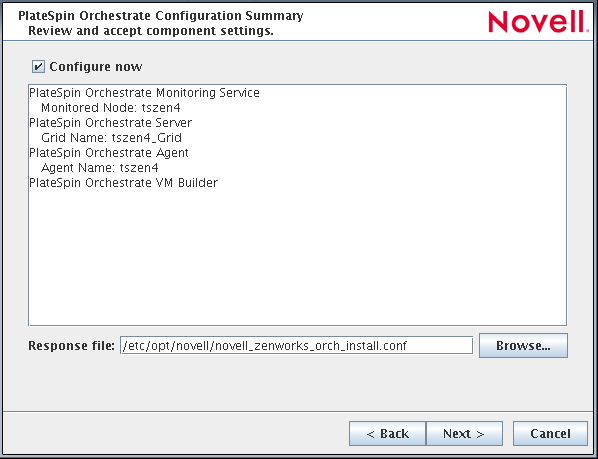
IMPORTANT:Although this page of the wizard lets you navigate using the Tab key and spacebar, you need to use the Shift+Tab combination to navigate past the summary list. If you accidentally enter the summary list, click to re-enter the page to navigate to the control buttons.
By default, the check box on this page is selected. If you accept the default, the wizard starts PlateSpin Orchestrate and applies the configuration settings.
If you deselect the check box, the wizard writes out the configuration file to /etc/opt/novell/novell_zenworks_orch_install.conf without starting PlateSpin Orchestrate or applying the configuration settings. You can use this saved .conf file to start the Orchestrate Server and apply the settings. Do this either by running the configuration script manually or by using an installation script. Use the following command to run the configuration script:
/opt/novell/zenworks/orch/bin/config -rs <path_to_config_file>
-
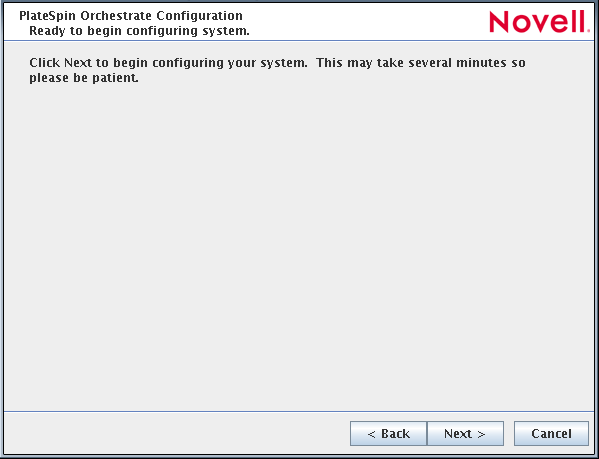
Click to display the following wizard page:
-
Click to launch the configuration script. When the configuration is finished, the following page is displayed:
-
Click to close the configuration wizard.
-
Continue with Checking the Configuration.
PlateSpin Orchestrate Configuration Information
The following table includes the information required by the PlateSpin Orchestrate configuration (config) and the configuration wizard (guiconfig) when configuring the Orchestrate Server component for high availability. The information is organized in this way to make it readily available. The information is listed in the order that it is requested by the configuration script or wizard.
Table 1-1 PlateSpin Orchestrate Configuration Information
|
Configuration Information |
Explanation |
|---|---|
|
Orchestrate Server |
Because the PlateSpin Orchestrate Server must always be installed for a full PlateSpin Orchestrate system, the following questions are always asked when you have installed server patterns prior to the configuration process:
|
|
Orchestrate Server (continued) |
|
|
Configuration Summary |
When you have completed the configuration process, you have the option of viewing a summary of the configuration information.
|
1 This configuration parameter is considered an advanced setting for the Orchestrate Server in the PlateSpin Orchestrate Configuration Wizard. If you select the check box in the wizard, the setting is configured with normal defaults. Leaving the check box deselected lets you have the option of changing the default value.
2 This configuration parameter is considered an advanced setting for the Orchestrate Server in the PlateSpin Orchestrate Configuration Wizard. If you select the check box in the wizard, this parameter is listed, but default values are provided only if the previous value is manually set to no.
Checking the Configuration
When the configuration is completed (using either Running the PlateSpin Orchestrate Configuration Script or Running the PlateSpin Orchestrate Configuration Wizard), the first node of the Orchestrate Server cluster is set up. You then need to check the configuration.
-
Open the configuration log file (/var/opt/novell/novell_zenworks_orch_install.log) to make sure that the components were correctly configured.
You can change the configuration if you change your mind about some of the parameters you provided in the configuration process. To do so, rerun the configuration and change your responses.
The configuration script performs the following functions in sequence on the PlateSpin Orchestrate:
-
Binds the cluster IP on this server by issuing the following command internally:
IPaddr2 start <IP_address_you_provided>
IMPORTANT:Make sure you configure DNS to resolve the cluster hostname to the cluster IP.
-
Configures the Orchestrate Server.
-
Shuts down the Orchestrate Server because you specified that this is a High-Availability configuration
-
Unbinds the cluster IP on this server by issuing the following command internally:
IPaddr2 stop <IP_address_you_provided>
-
1.2.6 Running the High Availability Configuration Script
Before you run the high availability configuration script, make sure that you have installed the PlateSpin Orchestrate Server to a single node of your high availability cluster. For more information, see Section 1.2.5, Installing and Configuring PlateSpin Orchestrate on the First Clustered Node.
IMPORTANT:The high availability configuration script asks for the mount point on the Fibre Channel SAN. Make sure that you have that information (/zos) before you run the script.
The high availability script, zos_server_ha_post_config, is located in /opt/novell/zenworks/orch/bin/ha with the other configuration tools. You need to run this script on the first node of the cluster (that is, the node where you installed PlateSpin Orchestrate Server) as the next step in setting up PlateSpin Orchestrate to work in a high availability environment.
The script performs the following functions:
-
Verifies that the Orchestrate Server is not running
-
Copies Apache files to shared storage
-
Copies gmond and gmetad files to shared storage
-
Moves the PlateSpin Orchestrate files to shared storage (first node of the cluster)
-
Creates symbolic links pointing to the location of shared storage (all nodes of the cluster)
The high availability configuration script must be run on all nodes of the cluster. Make sure that you follow the prompts in the script exactly; do not misidentify a secondary node in the cluster as the primary node.
1.2.7 Installing and Configuring Orchestrate Server Packages on Other Nodes in the Cluster for High Availability
After you have followed the steps to set up the primary node in your planned cluster, you need to set up the other nodes that you intend to use for failover in that cluster. Use the following sequence as you set up other cluster nodes (the sequence is nearly identical to setting up the primary node):
-
Make sure that the SLES 10 SP3 nodes have the high availability pattern. For information, see Section 1.2.2, Installing the High Availability Pattern for SLES 10.
-
Make sure that the SLES 10 SP3 nodes have been configured with time synchronization. For information, see Section 1.2.3, Configuring Nodes with Time Synchronization and Installing Heartbeat 2 to Each Node.
-
Set up OCFS2 on each node so that the nodes can communicate with the SAN, making sure to designate /zos as the shared mount point. For more information, see Section 1.2.4, Setting Up OCFS2.
-
Install PlateSpin Orchestrate Server packages on this node. Use the steps as described in Installing the Orchestrate Server YaST Patterns on the Node.
NOTE:Do not run the initial configuration script (config or guiconfig) on any other node than the primary node.
-
Copy the license file (key.txt) from the first node to the /opt/novell/zenworks/zos/server/license/ directory on this node.
-
Run the high availability configuration script on this node, as described in Running the High Availability Configuration Script. This creates the symbolic link to the file paths of the SAN.
1.2.8 Creating the Cluster Resource Group
The resource group creation script, zos_server_ha_resource_group, is located in /opt/novell/zenworks/orch/bin/ha with the other configuration tools. You can run this script on the first node of the cluster to set up the cluster resource group. If you want to set up the resource group using Heartbeat 2 (GUI console or command line tool), running the script is optional.
The script performs the following functions:
-
Obtains the DNS name from the PlateSpin Orchestrate configuration file.
-
Creates the cluster resource group.
-
Configures resource stickiness to avoid unnecessary failbacks.
The zos_server_ha_resource_group script prompts you for the IP address of the Orchestrate Server cluster. The script then adds this address to a Heartbeat 2 Cluster Information Base (CIB) XML template called cluster_zos_server.xml and uses the following command to create the cluster resource group:
/usr/sbin/cibadmin -o resources -C -x $XMLFILE
The CIB XML template is located at /opt/novell/zenworks/orch/bin/ha/cluster_zos_server.xml. An unaltered template sample is shown below:
<group id="ZOS_Server">
    <primitive id="ZOS_Server_Cluster_IP" class="ocf" type="IPaddr2" provider="heartbeat">
        <instance_attributes>
            <attributes>
                <nvpair name="ip" value="$CONFIG_ZOS_SERVER_CLUSTER_IP"/>
            </attributes>
        </instance_attributes>
    </primitive>
    <primitive id="ZOS_Server_Instance" class="lsb" type="novell-zosserver" provider="heartbeat">
        <instance_attributes id="zos_server_instance_attrs">
            <attributes>
                <nvpair id="zos_server_target_role" name="target_role" value="started"/>
            </attributes>
        </instance_attributes>
        <operations>
            <op id="ZOS_Server_Status" name="status" description="Monitor the status of the ZOS service" interval="60" timeout="15" start_delay="15" role="Started" on_fail="restart"/>
        </operations>
    </primitive>
    <primitive id="Apache2" class="lsb" type="apache2" provider="heartbeat">
        <instance_attributes id="apache_attr">
            <attributes>
                <nvpair id="apache2_target_role" name="target_role" value="started"/>
            </attributes>
        </instance_attributes>
        <operations>
            <op id="Apache2_Status" name="status" description="Monitor the status of Apache2" interval="120" timeout="15" start_delay="15" role="Started" on_fail="restart"/>
        </operations>
    </primitive>
    <primitive id="Gmetad" class="lsb" type="novell-gmetad" provider="heartbeat">
        <instance_attributes id="gmetad_attr">
            <attributes>
               <nvpair id="gmetad_target_role" name="target_role" value="started"/>
            </attributes>
        </instance_attributes>
        <operations>
            <op id="Gmetad_Status" name="status" description="Monitor the status of Gmetad" interval="300" timeout="15" start_delay="15" role="Started" on_fail="restart"/>
        </operations>
    </primitive>
    <primitive id="Gmond" class="lsb" type="novell-gmond" provider="heartbeat">
        <instance_attributes id="gmond_attr">
            <attributes>
                <nvpair id="gmond_target_role" name="target_role" value="started"/>
            </attributes>
        </instance_attributes>
        <operations>
            <op id="Gmond_Status" name="status" description="Monitor the status of Gmetad" interval="300" timeout="15" start_delay="15" role="Started" on_fail="restart"/>
        </operations>
    </primitive>
</group>
The template shows that a cluster resource group comprises these components:
-
The PlateSpin Orchestrate Server
-
The PlateSpin Orchestrate Server cluster IP address
-
A dependency on the cluster file system resource group that you already created
-
Resource stickiness to avoid unnecessary failbacks
When you have installed and configured the nodes in the cluster and created a cluster resource group, use the Heartbeat 2 tools to start the cluster resource group. You are then ready to test the failover of the PlateSpin Orchestrate Server in the high-availability cluster (see Section 1.2.9, Testing the Failover of the PlateSpin Orchestrate Server in a Cluster).
1.2.9 Testing the Failover of the PlateSpin Orchestrate Server in a Cluster
You can optionally simulate a failure of the Orchestrate Server by powering off or performing a shutdown of the server. After approximately 30 seconds, the clustering software detects that the primary node is no longer functioning, binds the IP address to the failover server, then starts the failover server in the cluster.
Access the PlateSpin Orchestrate Administrator Information Page to verify that the Orchestrate Server is installed and running (stopped or started). Use the following URL to open the page in a Web browser:
http://DNS_name_or_IP_address_of_cluster:8001
The Administrator Information page includes links to separate installation programs (installers) for the PlateSpin Orchestrate Agent and the PlateSpin Orchestrate Clients. The installers are used for various operating systems.
1.2.10 Installing and Configuring other PlateSpin Orchestrate Components to the High Availability Grid
To install and configure other PlateSpin Orchestrate components (including the Orchestrate Agent, the Monitoring Agent, the Monitoring Server, or the VM Builder) on servers that authenticate to the cluster, you need to determine which components you want to install, rememberin thse dependencies:
-
PlateSpin Orchestrate components must be installed on platforms where they have been tested, and which are, therefore supported. For more information, see
PlateSpin Orchestrate Requirements
in the PlateSpin Orchestrate 2.6 Installation and Configuration Guide. -
Use YaST2 to install the PlateSpin Orchestrate packages of your choice to the network server resources of your choice. For more information, see
../../pso26_install/data/badvxmn.html#badvxmnInstalling and Configuring All PlateSpin Orchestrate Components Together
orInstalling the Orchestrate VM Client
in the PlateSpin Orchestrate 2.6 Installation and Configuration Guide.If you want to, you can download the Orchestrate Agent or clients from the Administrator Information page and install them to a network resource as directed in
Installing the Orchestrate Agent Only
in the PlateSpin Orchestrate 2.6 Getting Started Reference. -
Run the text-based configuration script or the GUI Configuration Wizard to configure the PlateSpin Orchestrate components you have installed (including any type of installation of the agent). As you do this, you need to remember the hostname of the Orchestrate Server (that is, the primary Orchestrate Server node), and the administrator name and password of this server. For more information, see
Installing and Configuring All PlateSpin Orchestrate Components Together
orInstalling the Orchestrate VM Client
in the PlateSpin Orchestrate 2.6 Getting Started Reference.
It is important to understand that virtual machines under the management of PlateSpin Orchestrate are also highly available—the loss of a host causes PlateSpin Orchestrate to re-provision it elsewhere. This is true as long as the constraints in PlateSpin Orchestrate allow it to re-provision (for example, if the virtual machine image is on shared storage).