13.7 Custom Messages
In this policy, you can customize the error messages, method message and prompt message of a specific language.
For example, you can customize the default logon error message in English to Your login failed. In the Self-Service portal, when the user specifies wrong user name, the customized error message is displayed.
To customize the messages, perform the following tasks:
NOTE:The customized messages are cached in the Advanced Authentication server. The refresh interval for custom messages is one hour. Therefore, when you customize a message or upload a custom localization file, the respective message is displayed on the corresponding Advanced Authentication portals and clients after an hour.
You can also perform the following tasks in the policy:
-
Customize the authentication request message displayed on the app. For more information, see Customizing Authentication Request Message For Smartphone Method.
-
Customize the prompt messages of authentication methods for RADIUS event. For more information, see Customizing Prompt Messages of the Authentication Methods for RADIUS Event.
-
Customize message on the clients. For more information, see Customizing the Messages for Clients.
13.7.1 Customizing Messages in the Custom Localization File
To customize preferred messages using the file, perform the following steps:
-
Click .
-
Perform one of the following action to download the custom localization file on your local drive:
-
Click to save the custom_messages.tar.gz file that contains the default messages.
-
If you have customized the messages, click to save the current_custom_messages.tar.gz file that contains the latest messages.
-
-
Extract the files from the custom_messages.tar.gz file.
-
Navigate to the preferred language folder.
To customize English messages, use the custom_messages.pot file and for other languages use the custom_messages.po file.
-
Open the custom_messages.pot file in the text format.
-
Specify the message in the msgstr "".
-
Save the changes.
-
Compress the custom_messages folder to .tar.gz or .zip format.
-
Click and select the compressed custom_messages file from the local drive.
-
Click .
13.7.2 Customizing a Specific Message on the Portal
To customize a specific message on the portal, perform the following steps:
-
Click .
-
Use the to search for a specific message or you can find the preferred message manually.
-
Use the to search a specific message by group. Options available are , , , and .
-
Click the
 icon next to the preferred message. You can also double-click on the message to edit the content.
 -
Specify the message in the preferred language.
-
Click .
13.7.3 Customizing Authentication Request Message For Smartphone Method
You can customize the authentication request message that is displayed on the NetIQ Auth app when user initiates Smartphone authentication. The authentication can be either to the endpoint or to the Advanced Authentication portals.
To customize the message for smartphone method, perform the following steps:
-
Click .
-
Search for one of the following keys:
-
method.smartphone.authentication_hint to edit the request message specific to endpoint authentication.
-
method.smartphone.authentication_hint_no_endpoint to edit the request message for any authentication that does not use endpoint such as Advanced Authentication portals login.
-
-
Click
 for the preferred key.
 -
Specify any of the following parameters in the preferred language message as per your requirement:
-
{user} to fetch the user name.
-
{client_ip} to fetch the client IP address.
-
{event} to fetch the event name.
-
{tenant} to fetch the tenant name.
-
{endpoint} to fetch the endpoint name.
-
-
Click .
NOTE:The customized authentication request message will reflect on the NetIQ smartphone app after an approximate delay of one hour.
For example, to customize the endpoint specific authentication message for the smartphone method you must search the key method.smartphone.authentication_hint and specify the message {user} requested for authentication request from the client {client_ip} for the {event} to access the {endpoint} in the field corresponding to English language. When the user tries to authenticate to Windows Client using the smartphone method then the customized message is displayed on the NetIQ smartphone app as:
Bob requested for authentication request from the client 10.3.10.5 for the Windows logon to access the Windows-machine-589.
13.7.4 Customizing Prompt Messages of the Authentication Methods for RADIUS Event
You can customize prompt messages of the authentication methods that are configured for the RADIUS event. The customized prompt messages are displayed when a user initiates authentication to the RADIUS event using the configured methods.
To customize prompt message, perform the following steps:
-
Click .
-
Use the to search for a specific prompt message or you can find the preferred message manually.
For example, specify radius.totp.prompt to search the prompt message displayed on RADIUS client for the TOTP method.
-
Click the Edit icon
or double-click on the preferred message to edit the content. -
Specify the message in the preferred language on the page.
-
Click .
For example, consider Thomas, an administrator, wants to customize the default prompt message of the Voice OTP method that is configured for the RADIUS event. Thomas must first search the key radius.voice_otp.prompt and modify the message to Specify the OTP that you heard from the voice call in the text box corresponding to English.
When Mark, an end user tries to authenticate to RADIUS event using the Voice OTP method, the customized prompt message is displayed.
13.7.6 Localizing the Web UI and Messages
To localize the messages and web UI to an unsupported language, perform the following steps.
-
Click .
-
In , click to save the bundle-en.tar.gz file that contains the default messages.
-
Extract the files from the bundle-en.tar file.
-
Navigate to the extracted folder.
To localize core messages, use the AuCore file and to localize the web UI elements, use webui file.
-
Open the AuCore or webui file in the text format.
-
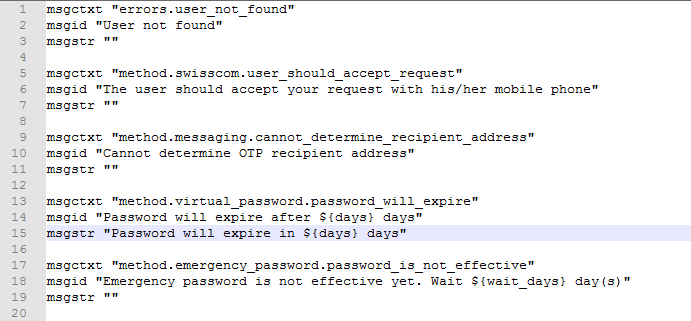
Specify the preferred language message in the msgstr "".
For example, if you need to localize password will expire in $(days) days message to Latin, specify in password erit exspirare $ (dies) dierum in msgstr "" as in the following image.
-
Save the changes.
-
Compress the bundle-<language name> folder to.tar.gz or.zip format.
-
In , click
 to add the template file.
 -
Select the preferred language name in .
-
Click and select the compressed bundle-<language>.tar.gz file from the local drive.
-
Click .