27.8 Configuring Integration with ADFS

This section provides the configuration information on integrating Advanced Authentication with ADFS (Active Directory Federation Services). This integration secures the ADFS connection.

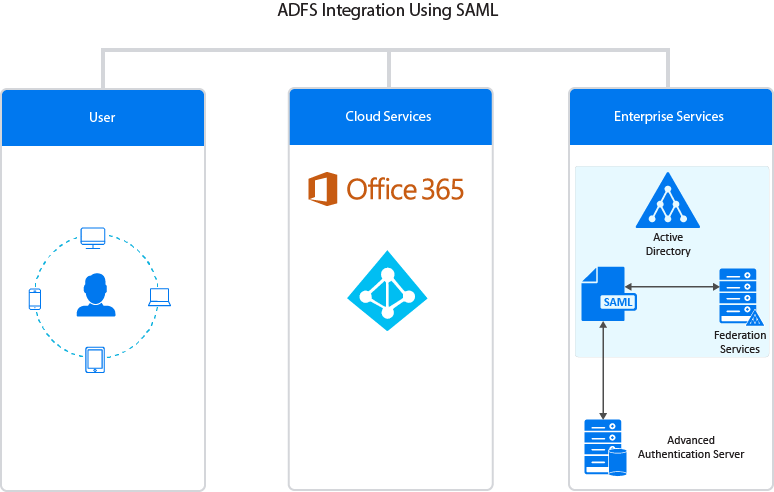
The following diagram represents Advanced Authentication and ADFS integration using SAML.

Figure 27-1

To configure the Advanced Authentication integration with ADFS using SAML 2.0 perform the following configuration tasks:

NOTE:These instructions are valid only for ADFS 3 and 4.

27.8.1 Configuring the Advanced Authentication SAML 2.0 Event

  1. Open the Advanced Authentication Administration portal.

  2. Click Events > Add to add a new event.

  3. Create an event with the following parameters:

    • Name: ADFS_SAML.

    • Event Type: SAML 2.

    • Chains: Select the required chains.

    • Paste the content of the file https://<adfs_hostname>/FederationMetadata/2007-06/FederationMetadata.xml to SP SAML 2.0 meta data.

      You can perform one of the following, instead of pasting the metadata:

      • Click Browse and upload the saved XML file.

      • Get the endpoints including full URLs through powershell using the following command:

        get-adfsendpoint

        For more information, see Get ADFS Endpoint

    • Click Save.

    NOTE:Verify that you can access the file in your browser. If the file is not displayed, you have an issue on ADFS that you must resolve.

  4. Click Policies > Web Authentication.

  5. Set Identity provider URL to https://AdvancedAuthenticationServerAddress/ and replace AdvancedAuthenticationServerAddress with domain name or IP address of your Advanced Authentication server.

    NOTE:To use multiple Advanced Authentication servers with SAML 2.0, you must do the following:

    1. Configure an external load balancer.

    2. Specify the address in Identity provider URL instead of specifying an address of a single Advanced Authentication server.

  6. Click Download IdP SAML 2.0 Metadata.

    You must open the file as an XML file.

    NOTE:If {"Fault":{... ` is displayed, you must verify the configuration.

27.8.2 Making the Corresponding Changes in ADFS

  1. Open the ADFS management console.

  2. Expand Trust Relationships.

  3. Click Add Claims Provider trust.

  4. Paste OSP metadata URL https://<AAF_server_hostname>/osp/a/TOP/auth/saml2/metadata.

    It may not work for self-signed certificate. You can copy metadata from OSP URL to an XML file and provide the file name.

  5. Specify the Display name.

  6. Select Open the Edit Claim Rules dialog for this claims provider when the wizard closes.

  7. In Edit Claims Rules, click Add Rule.

  8. Select Send Claims Using a Custom Rule.

  9. Click Next.

  10. Specify Claim rule name.

  11. Paste Custom rule and click Finish.

    c:[Type == "upn"]=> issue(Type = "http://schemas.xmlsoap.org/ws/2005/05/identity/claims/upn", Issuer = c.Issuer, OriginalIssuer = c.OriginalIssuer, Value = c.Value, ValueType = c.ValueType);