8.9 Configuring Integration with Google G Suite
This section provides the configuration information on integrating Advanced Authentication with Google G Suite. This integration secures the connection.
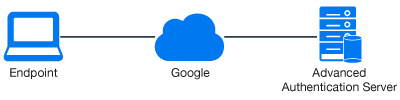
The following diagram represents Advanced Authentication in Google G Suite.
To configure the Advanced Authentication integration with Google G Suite using SAML 2.0, perform the following configuration tasks:
NOTE:As a prerequisite, ensure that you finalize the setup of G Suite by accepting the agreement and clicking Finalize setup.
8.9.1 Configuring Google G Suite
-
Login to the Google’s Administration console.
-
Open the Security section.
-
Expand Set up single sign-on (SSO).
-
Enable Setup SSO with third party identity provider.
-
Specify the following parameters:
-
Sign-in page URL: https://<AdvancedAuthenticationServerAddress>/osp/a/TOP/auth/saml2/sso. Replace AdvancedAuthenticationServerAddress with the domain name or IP address of your Advanced Authentication server.
-
Sign-out page URL: https://<AdvancedAuthenticationServerAddress>/osp/a/TOP/auth/app/logout.
-
Change password URL: https://<AdvancedAuthenticationServerAddress> or Self-Service Password Reset URL.
-
Create a text file and add the Identity Provider Certificate to it.
-----BEGIN CERTIFICATE-----
MIIDkzCCAnugAwIBAgIESsmdMzANBgkqhkiG9w0BAQsFADB6MRAwDgYDVQQGEwdVbmtub3duMRAw
DgYDVQQIEwdVbmtub3duMRAwDgYDVQQHEwdVbmtub3duMREwDwYDVQQKEwhBdXRoYXNhczESMBAG
A1UECxMJQXV0aGFzYXNhMRswGQYDVQQDExJvc3AuYXV0aGFzYXMubG9jYWwwHhcNMTYwNTI2MDUz
NjI0WhcNMjYwNDA0MDUzNjI0WjB6MRAwDgYDVQQGEwdVbmtub3duMRAwDgYDVQQIEwdVbmtub3du
MRAwDgYDVQQHEwdVbmtub3duMREwDwYDVQQKEwhBdXRoYXNhczESMBAGA1UECxMJQXV0aGFzYXNh
MRswGQYDVQQDExJvc3AuYXV0aGFzYXMubG9jYWwwggEiMA0GCSqGSIb3DQEBAQUAA4IBDwAwggEK
AoIBAQCw3YLz03qhSZPXjBc/Ws+cZ2/E5oogqKeJ3p4RR6USOoarjnmvQPq+maRfvexriwQjRDgS
OFRb58cert/misqzsHBVmQDnfMwicFVzuuKjDEbWFp9vL1gRkDzIlpCyl3eNmBWuWXM49Z6mm8XS
fIwlAoydNp5DK0o0Yrk6FNOi0nOrnI5kHGVD0bd5SpDtvXSF1WLfc5YT9UBUpfZneKsVPWSkbeBX
F84hYJWBtdzcTEyjdso9Ra7UtxLIUW0UH3LWTgn9zS97nLkmhetmD1I3mEAeAE9SAmqTRyH1FNXZ
ZOfi/BJF4+sz86f6pBbwYM2KTvXaABgzSpZpJ1pQrZKPAgMBAAGjITAfMB0GA1UdDgQWBBTL8PbA
+e6YkBIk4yELTZ+AbfdA6DANBgkqhkiG9w0BAQsFAAOCAQEAm87lNyAO8CtN5jlLe3CupLAAbUWR
NY6av7LpPail1JRIw+uvddMyOz1vOS1IwpDDNtcPtxGXsaZI1CKgNPBpLvSxePVUXNfFgUCtu+bT
cuUtiQbkiDWwFLmAS6KeA+EBFOeqBiudEfkAZZT87DF9gKvM6VWdzJ7BvWi2YPbH/FRM82fLoyAd
RbphF215we3rvsfeWbwXw70UGNyBUTb3zUcAmB3sHbcZiXJZj3pJYgDaN9Ss60sz/yG1ZLEYluvL
R1T2PPEfEcA1Eij0R1A31Z5hJ3zDlXoCeNYLoMg4522QYekTwvQeWkeYejBXEcxdL7VP6F91zmfZ
bm1A4PY5jw==
-----END CERTIFICATE-----
-
Upload the Identity Provider Certificate.
-
-
Clear Use a domain specific issuer if you have one domain in G Suite or select the option if you have more than one domain in G Suite.
Ensure that you have a user account in a repository that corresponds to a user account in Google. An email address specified in the Contact information for the Google account must be the same as an address from email attribute for the corresponding account of your repository.
NOTE:You cannot use the Google administrator account with SAML.
-
Create a new text file and add the Service Provider metadata to it:
<EntityDescriptor entityID="google.com" xmlns="urn:oasis:names:tc:SAML:2.0:metadata">
    <SPSSODescriptor protocolSupportEnumeration="urn:oasis:names:tc:SAML:2.0:protocol">
        <NameIDFormat>urn:oasis:names:tc:SAML:1.1:nameid-format:emailAddress</NameIDFormat>
        <AssertionConsumerService index="1" Binding="urn:oasis:names:tc:SAML:2.0:bindings:HTTP-POST"
            Location="https://www.google.com/a/mycompany.com" />
    </SPSSODescriptor>
</EntityDescriptor>
Replace mycompany.com in the Location URL to your primary domain from the Domains settings in Google.
NOTE:You must use the Service Provider metadata when one domain exists in the G Suite. If you have more than one domain in G Suite, then every Service Provider metadata for each domain must have google.com as an entityID replaced with google.com/mycompany.com, where mycompany.com is your domain name.
-
Save the text file with a.xml extension.
8.9.2 Configuring the Advanced Authentication Event
-
Open the Advanced Authentication Administration portal.
-
Click Events > Add to add a new event with the following options:
-
Name: Google
-
Chains: select the required chains.
-
Click Browse to upload the XML file.
-
Set Send E-Mail as NameID (suitable for G-Suite) to ON. This is applicable for the G-Suite.
-
Click Save.
-
8.9.3 Configuring to Authenticate on Google G-Suite with SAML 2.0
-
In Policies > Web Authentication, set Identity provider URL to https://AdvancedAuthenticationServerAddress/ and replace AdvancedAuthenticationServerAddress with domain name or IP address of your Advanced Authentication server.
NOTE:To use multiple Advanced Authentication servers with SAML 2.0, you must do the following:
-
Configure an external .
-
Specify the address in Identity provider URL instead of specifying an address of a single Advanced Authentication server.
-
-
Open the Google Sign in page and specify an email address of the user from Basic information of the Google account (email address of Google account). Google redirects to the Advanced Authentication server, where the user must authenticate. After successful authentication, the Advanced Authentication server redirects the user back to Google.