8.5 Configuring Integration with OpenVPN

This section provides the configuration information on integrating Advanced Authentication with OpenVPN virtual appliance. This integration secures the OpenVPN connection.

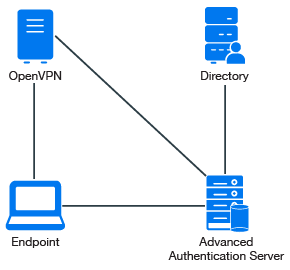
The following diagram represents Advanced Authentication in OpenVPN.

To configure the Advanced Authentication integration with OpenVPN perform the following configuration tasks:

Ensure that the following requirements are met:

  • OpenVPN v2 appliance (version 2.0.10 was used to prepare these instructions) is installed.

  • Advanced Authentication v5 appliance with a configured repository is installed.

8.5.1 Configuring the Advanced Authentication RADIUS Server

  1. Open the Advanced Authentication Administration portal.

  2. Click Events > RADIUS Server.

  3. Set Is enabled to ON.

  4. Move one or more chains from Available to Used list. Ensure that the chains are assigned to the appropriate group of users in Roles & Groups of the Chains section.

  5. Click Client > Add.

  6. Specify an IP address of the OpenVPN appliance.

  7. Specify a secret and confirm it.

  8. Set Enabled to ON.

  9. Click Save in Client.

  10. Click Save in Events.

8.5.2 Configuring the OpenVPN Appliance

  1. Open the OpenVPN Access Server site.

  2. Click Authentication > RADIUS.

  3. Enable the RADIUS authentication.

  4. Select PAP authentication method.

  5. Add an IP address of the Advanced Authentication v5 appliance and specify the secret.

You must specify the <repository name>\<username> or only <username>, if you have set the following configurations:

  • You have selected a chain from the Used section in the RADIUS Server settings for connecting to OpenVPN.

  • You have set the default repository name in Policies > Login options of the Advanced Authentication v5 appliance.

You must specify a Short name of the chain in the username after the <username> and space (you can specify the Short name in the Chains section of the Advanced Authentication v5 appliance), if you have set the following configurations:

  • You have selected multiple chains from the Used section for connecting to OpenVPN.

NOTE: For some authentication methods, the correct time must be configured on the OpenVPN appliance. You can sync the time of the OpenVPN appliance using the following commands:

/etc/init.d/ntp stop
/usr/sbin/ntpdate pool.ntp.org

User Account Locks After Three Successful Authentications with SMS AP to OpenVPN

Issue: While authenticating with the SMS method to connect to OpenVPN, after three successful authentications the user account is locked by OpenVPN.

Workaround: OpenVPN assumes each attempt of the challenge response (request of additional data in chain) as an error.

To resolve the issue, you must change the number of failures that can be accepted. For more information, see Authentication failure lockout policy.