12.4 Configuring Integration with FortiGate
This section provides the configuration information on integrating Advanced Authentication with FortiGate. This integration secures the FortiGate connection.
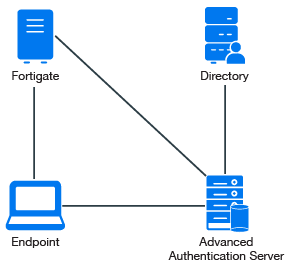
The following diagram represents Advanced Authentication in FortiGate.

To configure the Advanced Authentication integration with FortiGate perform the following configuration tasks:
Ensure that the following requirements are met:
-
Fortinet virtual appliance v5 (Firmware version 5.2.5, build 8542 has been used to prepare these instructions) is installed.
-
Advanced Authentication v5 appliance is installed.
12.4.1 Configuring the Advanced Authentication RADIUS Server
-
Open the Advanced Authentication Administration portal.
-
Click Events > RADIUS Server.
-
Set Is enabled to ON.
-
Move one or more chains from Available to Used list. Ensure that the chains are assigned to the appropriate group of users in Roles & Groups of the Chains section.
-
Click Client > Add.
-
Specify an IP address of the FortiGate appliance.
-
Specify the RADIUS shared secret and confirm it.
-
Set Enabled to ON.
-
Click Save in Client.
-
Click Save in Events.
12.4.2 Configuring the FortiGate Appliance
-
Sign-in to FortiGate configuration portal as admin.
-
Check which Virtual Domain is bound to the network interface.
-
Open the RADIUS Server configuration for an appropriate Virtual Domain and setup the required settings.
-
Click Test Connectivity and specify the credentials of Advanced Authentication administrator to test the connection.
-
Create a user group and bind it to a remote authentication server.
-
Create user and place in the created group.
12.4.3 Authenticating on FortiGate Using Advanced Authentication
-
Specify the user’s credentials and click Login.
-
Specify the OTP and click Login.
NOTE:The Token Code field has a limitation of 16 digits. Therefore, you may face issues when using the YubiKey tokens with 18-20 digits code.