5.3 Manage Incident Views
Manage View allows you to:
-
Add views
-
Edit views
-
Delete views
-
Mark a view as the default
5.3.1 Adding a View
-
Click . Alternatively, click the Display Incident View button on the toolbar.
-
Open the view options by doing one of the following:
-
Click the down-arrow on the button located in bottom right corner of the window and select.
-
Click the down-arrow on the button located in the bottom right corner of the window, select and then click the button.
-
-
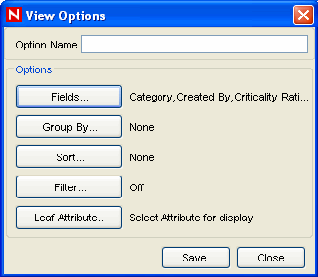
Provide a name in the field. Click the buttons listed below to specify the options.
-
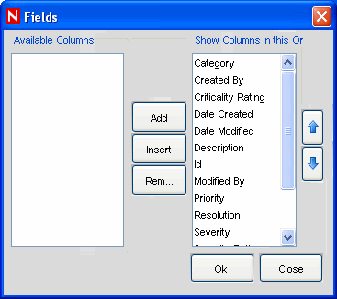
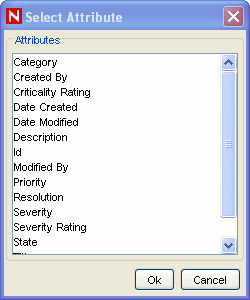
Fields: The variables of the events attached to incidents are displayed as fields. By default, all the fields are arranged as columns in the Incident View. In the Field Options window, you can add or remove columns that display and arrange the order of the columns by using the up-arrow and down-arrow.
-
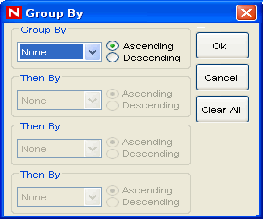
Group By: Set rules to group incidents in the display view.
-
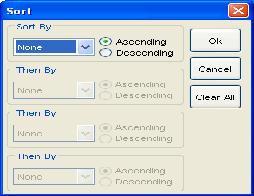
Sort By: Set rules to sort the incidents in the display view.
-
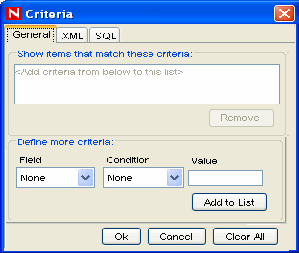
Filter: Set incident filters. Only the incidents that match your filter display in the view.
-
Leaf Attribute: Select an attribute from the list that is displayed as the first column in the incident view.
-
-
Click .
5.3.2 Modifying a View
-
Click or click the button on the toolbar.
-
Open a view by doing one of the following:
-
Click the down-arrow next to the button in the bottom right corner, then select the view you want to edit. Click the down-arrow next to the button located in bottom right corner of the screen and select from the list.
-
Click the down-arrow next to the button located in the bottom right corner of the window, then select . Select a view to edit and click .
-
-
Edit the options as required and click .
5.3.3 Deleting a View
-
Click or click the Display Incident View button on the toolbar.
-
Click the down-arrow next to the button located in bottom right corner of the screen and select from the list. The Manage View window displays. Select a view and click . A confirmation message alert displays.
-
Click to delete.
5.3.4 Default View
To mark a view as the default:
-
Click , or click the icon on the toolbar.
-
Click the down-arrow next to the button located in bottom right corner of the screen and select from the list. The Incident View window displays.
-
Select the incident view you want as the default, and click .