2.2 Configuring RAID 6 for Dell PowerEdge R740xd
On first boot of the PlateSpin Forge R740xd hardware, use the Dell PowerEdge Expandable RAID Controller (PERC) BIOS Configuration Utility to configure the RAID controller for the RAID 6 configuration.
To configure the RAID controller for RAID 6:
-
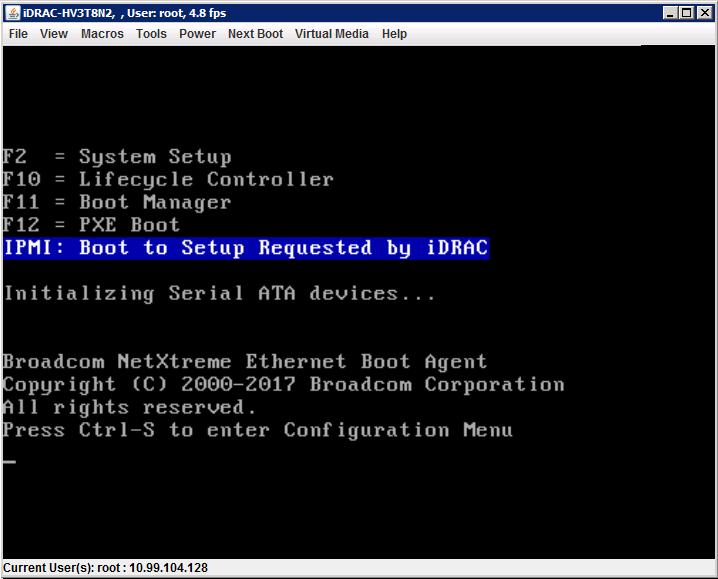
Boot the server hardware.
-
During the boot sequence, press F2 to boot to the System Setup Utility.
-
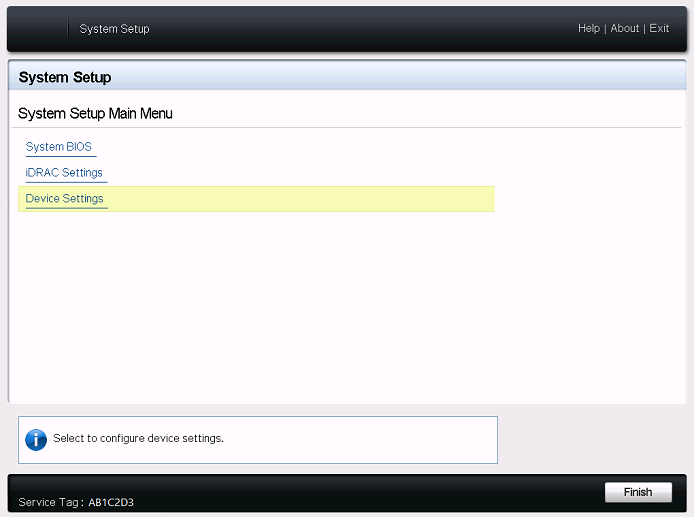
In System Setup Main Menu, select .
-
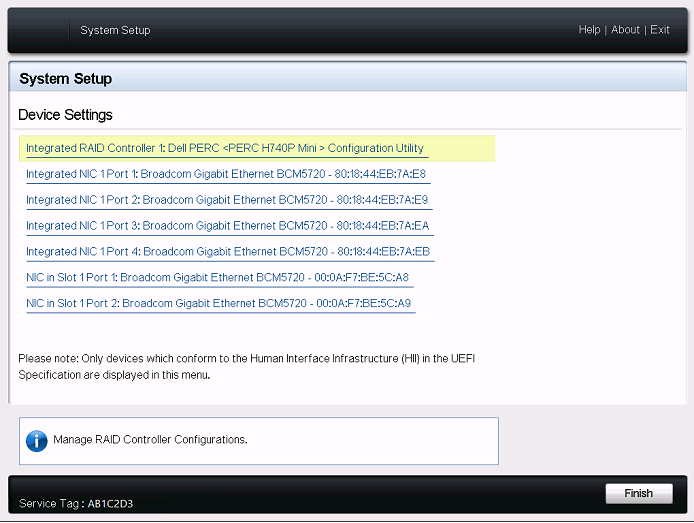
In Device Settings, select .
-
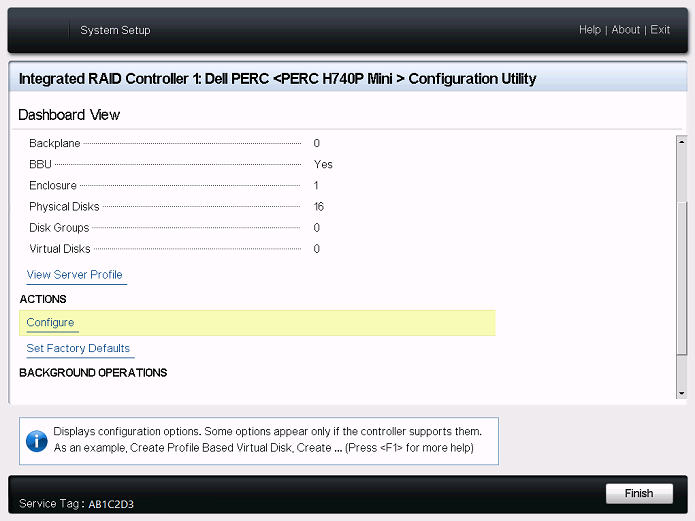
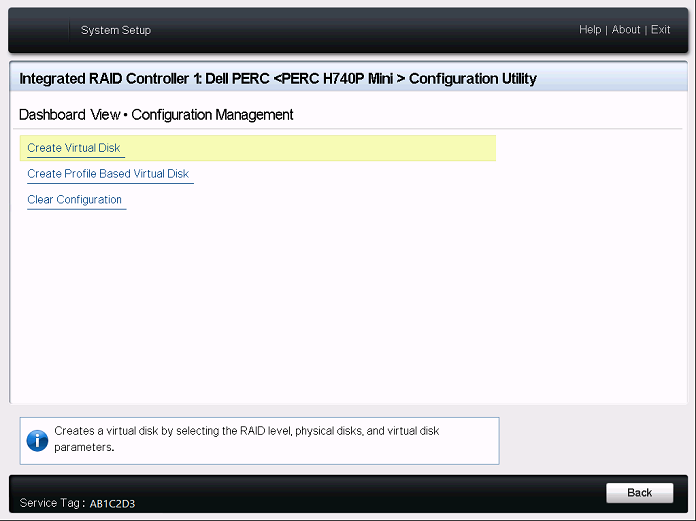
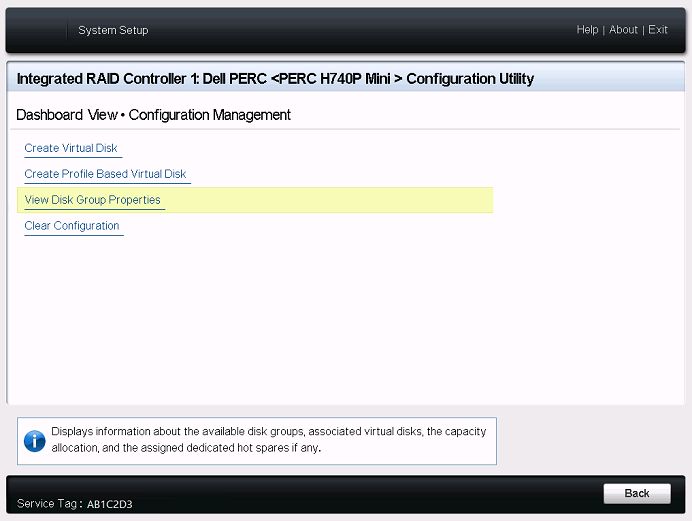
In the PERC Configuration Utility Dashboard View under , click .
-
In PERC Configuration Management, click and confirm to delete existing disk groups and any data on that disk group.
WARNING:Deleting a disk group also deletes the data on that disk group.
-
In PERC Configuration Management, configure the PERC RAID controller with multiple logical disks in a single RAID 6 array that spans all physical SATA disks:
-
Create a virtual disk for the Forge System:
-
In the PERC Configuration Management menu, click .
-
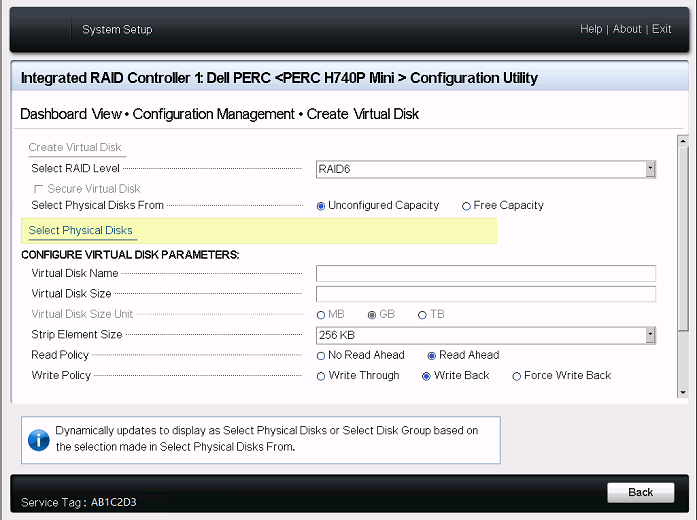
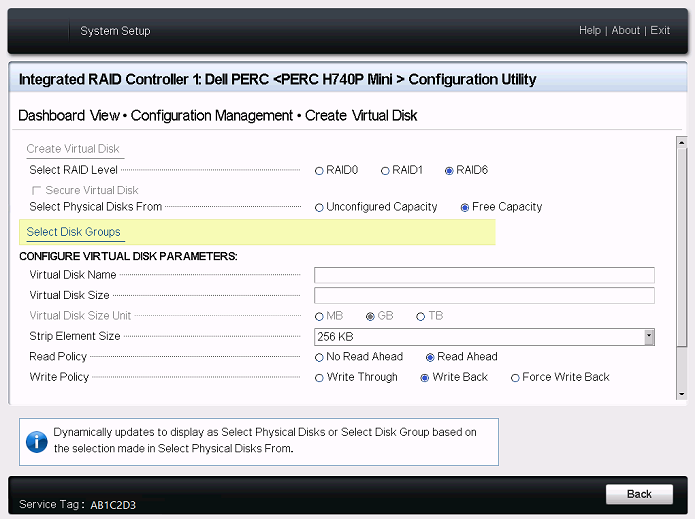
On the Create Virtual Disk page, define the RAID:
Parameter
Description
Select RAID6.
Select Unconfigured Capacity.
-
Click .
-
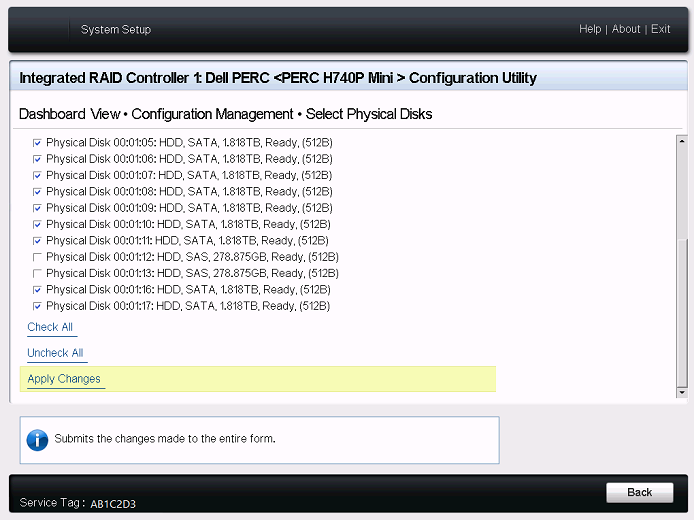
On the Select Physical Disks page, select all available physical SATA disks. Each SATA disk is about 2 TB in size. Do not select the two small SAS hard disks.
-
At the bottom of the page, click .
-
-
After you select the physical disks, configure the following Virtual Disk Parameters:
Parameter
Description
Type ForgeSystem. The virtual disk name is case sensitive.
Specify 300 as the size for the Forge system disk. The recommended size is 300 GB.
Specify GB.
Select 256 KB.
Select Read Ahead.
Select Write Back.
Select Default.
Select Fast.

-
At the bottom of the page, click .
-
Click to dismiss the confirmation for the creation of the virtual disk.
-
-
Create a new virtual disk for the Forge Failover VMs:
-
In the PERC Configuration Management menu, click .
-
On the Create Virtual Disk page, define the RAID:
Parameter
Description
Select RAID6.
Select Free Capacity.
-
Click .
-
On the Select Disk Groups page, select Disk Group #0.
-
At the bottom of the page, click .
-
-
After you select Disk Group #0, configure the following Virtual Disk Parameters:
Parameter
Description
Type FailoverVMs. The virtual disk name is case sensitive.
Use the default maximum size for the remainder of the RAID disk (such as 21533 GB)
Specify GB or TB as appropriate to the size you specified.
Select 256 KB.
Select Read Ahead.
Select Write Back.
Select Default.
Select Fast.
-
At the bottom of the page, click .
-
Click to dismiss the confirmation for the creation of the virtual disk.
-
-
-
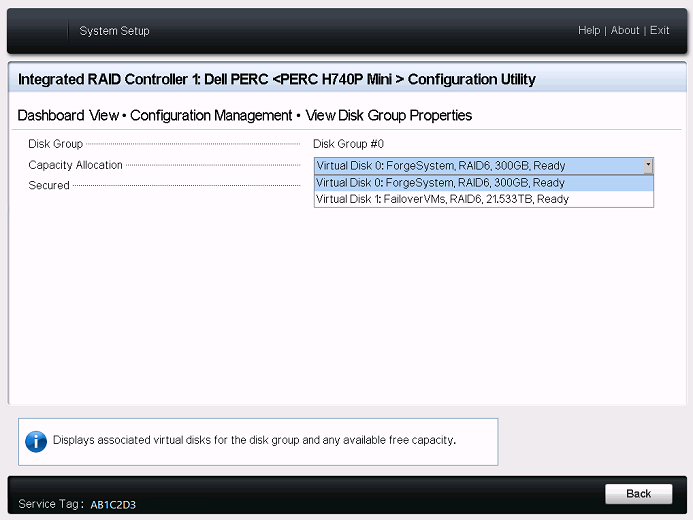
View the disks you created on Disk Group #0.
-
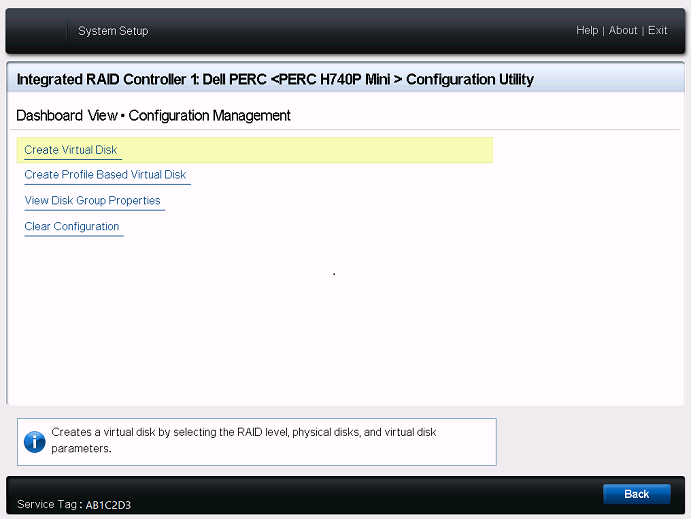
In the PERC Configuration Management menu, click .
-
On the View Disk Groups Properties page, select to view the capacity for the ForgeSystem disk and FailoverVMs disk.
-
-
Return to the System Setup Main Menu, then click in the lower right corner to exit the System Setup Utility, then click to confirm.

-
(Conditional) Press Ctrl+Alt+Del if you are prompted.
The server reboots with the new settings.