A.4 Creating Node Styles for Testing
To create node styles for testing, do the following:
-
Under > > , create a node style named .
-
Edit the node style as follows:
-
Right-click the node style graphic, then select .
-
Change the <default> text to AMBIENT.
-
Add a text label beneath the square and bind the label to the option.
-
Select everything in the drawing, then right-click .
-
Save the drawing.
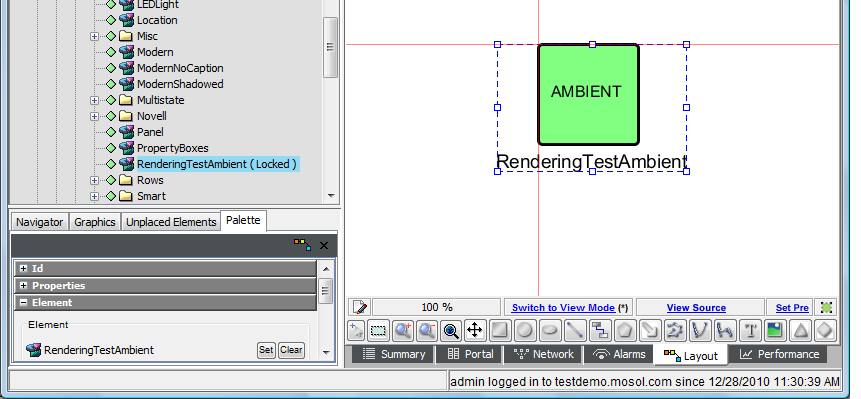
The following illustrates the resulting drawing:
-
-
Create a node style named and edit it as follows:
-
Change the <default> text to CLASS.
-
Add a text label beneath the square and bind that label to the option.
-
-
Create a node style named and edit it as follows:
-
Change the <default> text to ELEMENT.
-
Add a text label beneath the square and bind that label to the option.
-
-
Create a node style named and edit it as follows:
-
Change the <default> text to OVERRIDE.
-
Add a text label beneath the square and bind that label to the option.
-
-
Create a node style named and edit it as follows:
-
Change the <default> text to SPECIFY.
-
Add a text label beneath the square and bind that label to the option.
-