5.2 Creating a Form Fill Policy for the Sample Form
The sample form has ten input fields and five selection options that need to be configured in the Form Fill policy. The following steps explain how to create a shared secret to store the values and use that shared secret to create a Form Fill policy for this sample form. For information on configuring the form fill policy for a complicated form with JavaScript, see Section 5.6, Configuring a Form Fill Policy for Forms With Scripts.
-
In the Administration Console, click > .
-
Select the policy container, then click .
-
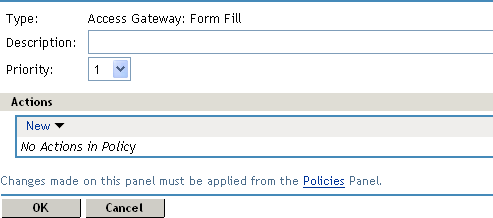
Specify a display name for the policy and select for its type.
-
(Optional) Specify a description for the Form Fill policy. This is useful if you plan to create multiple Form Fill policies.
You might want to specify the name of the HTML page that contains the form this policy is designed to fill.
-
In the section, click then select .

-
In the section, select and specify in the text box. The form name comes from the HTML page. See the following line in the source for the page:
<form name="mylogin" action="validatepassword.php" method="post" id="mylogin"> -
In the section, specify all the input fields and select options. For each new field, click . Specify the fields in the order in which they appear on the form. For items that are not available in the other data types such as an LDAP or Liberty attribute, create shared secrets to store the value. The following table displays the Fill Options selected for each input field.
Form Name
Fill Options
username
Input Field Name: username
Input Field Type: Text
Input Field Value: Credential Profile: LDAP Credentials: LDAP User Name
password
Input Field Name: password
Input Field Type: Password
Input Field Value: Credential Profile: LDAP Credentials: LDAP Password
webserv
Input Field Name: webserv
Input Field Type: Select
Input Field Value: Shared Secret: sampleLogin: webserv
To create this shared secret, click , specify , then click . Select , click , specify webserv, then click .
To add more entries to the same secret store, such as role and mail, you need to manage the secrets from the Identity Server. Save your draft of the policy, then click . Select the name of your secret store (in this example it is sampleLogin). Add the entries you need for role, mail, payroll, and selfservice. These names need to match the form name.
role
Input Field Name: role
Input Field Type: Radio Button
Input Field Value: Shared Secret: sampleLogin: role
mail
Input Field Name: mail
Input Field Type: Checkbox
Input Field Value: Shared Secret: sampleLogin: mail
payroll
Input Field Name: payroll
Input Field Type: Checkbox
Input Field Value: Shared Secret: sampleLogin: payroll
selfservice
Input Field Name: selfservice
Input Field Type: Checkbox
Input Field Value: Shared Secret: sampleLogin: selfservice
-
In the section, fill in the following fields:
Auto Submit: Select this option to submit the form as soon as all the values are filled in. If this option is not selected, even though all the values are filled in for the user, the user must click the button.
Debug Mode: Select the option, which allows you to verify that the information is correct before submitting the form. If values must be filled in, you first see the form to add the values. When the form is submitted, you are presented with a JavaScript that contains all of the name/value pairs. To submit the form, you need to click the button.
Insert Text in Header: Select this option so you can add a static value. In the box, specify the city value.
city = Provo
-
To create a login failure policy, click in the section, then select .

-
In the section, select and specify in the text box. The form name comes from the HTML page.
-
In the section, fill in the following field:
Clear Shared Secret Data Values from Policy: Select this option to clear the data stored in the Shared Secret object when login fails. Select the name you have given to this policy.
-
Use the up-arrow button to move the Form Login Failure policy to the top of the policy list.
You want the failure policy to execute first on login failure.
-
Click .
-
On the Policies page, click .