2.3 Configuring DNS Servers
The DNS servers configured in the SSL VPN are pushed to the client during the connection. When a Linux or Windows client connects to the SSL VPN, the existing DNS entry on the client is pushed as the secondary entry and the DNS entry configured on the SSL VPN is pushed as the primary DNS entry.
However, on a Mac client, the DNS entry configured on the SSL VPN acts as the secondary DNS. After the SSL VPN connection, name resolution is done through the DNS entry configured before the SSL VPN connection. However, when the primary DNS server is not available, the DNS entry configured by the SSL VPN takes care of DNS resolution for the client.
You can configure DNS servers for the Enterprise mode through the Administration Console. The DNS servers can be configured for the Kiosk mode either during the installation if you are installing the Access Gateway and SSL VPN on the same machine, or by using YaST® after the installation.
-
In the Administration Console, click > .
The Server configuration page is displayed.
-
Select from the section.
-
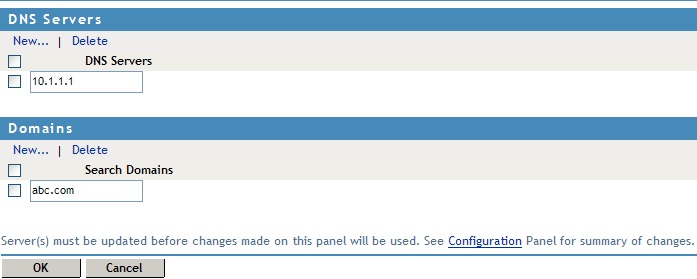
To configure a DNS server, click in the s section, specify the IP address of the server, then click .
-
To configure a domain, click in the section, specify the domain name, then click .
-
To delete a DNS server or a domain, select the check box next to the field and click in the section.
-
To save your modifications, click then click on the Configuration page.