2.6 Deploying Your Authentication Class
-
Create a jar file for your authentication class and any associated classes.
-
Copy the jar file to the following location in the Identity Server:
-
Linux: /opt/novell/nam/idp/webapps/nidp/WEB-INF/lib
-
Windows: C:\Program Files (x86)\Novell\Tomcat\webapps\nidp\WEB-INF\lib
If the Identity Server is in a cluster, the file needs to be copied to all members of the cluster.
-
-
(Conditional) If you created a custom JSP page for your authentication class, copy it to the /opt/novell/nids/lib/webapp/jsp directory of the Identity Server.
If the Identity Server is in a cluster, the file needs to be copied to all members of the cluster.
-
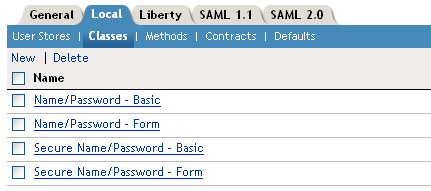
In the Administration Console, click > > > > .

-
From this page, click .

-
Fill in the following fields:
Display name: Specify a name that the Administration Console can use to identity this class.
Java class: For a new class, select . This allows you to specify the path name of your Java class.
Java class path: Specify the name of your Java class.
-
Click , and specify any needed properties of your class.
This is dependent upon your class. You need to specify properties only if your class requires them.
This information is returned to your class in the props parameter when your class is called.
-
Click .
-
To configure a method for your class, click >, and select your class for the field.
When you configure a method, you specify which user stores can be used for authentication. This information is returned to your class in the uStores parameter when your class is called.
For more information, see “Configuring Authentication Methods” in the NetIQ Access Manager 3.2 Identity Server Guide.
-
Click .
-
To configure a contract for your class, click > , and move your class to be a value in the list.
For more information, see “Configuring Authentication Contracts” in the NetIQ Access Manager 3.2 Identity Server Guide.
-
(Optional) Default contracts can be specified for each authentication type that might be required by a service provider. These contracts are executed when a request for a specific authentication type comes from a service provider.
For more information, see Supported Authentication Class Types and “Specifying Authentication Defaults” in the NetIQ Access Manager 3.2 Identity Server Guide.
-
Click > .
-
On the Identity Servers page, click .
-
Update any associated devices (Access Gateways, SSL VPN servers, or J2EE* Agents) that are using this Identity Server configuration.