6.2 Controlling Browser Caching
Webmasters control how browsers cache information by adding the following cache-control directives to the HTTP headers:
Cache-Control: no-store
Cache-Control: no-cache
Cache-Control: private
Cache-Control: public
Pragma: no-cache
You can configure how the proxy service responds to these directives in the HTTP header.
-
In the Administration Console, click Devices > Access Gateways > Edit > [Name of Reverse Proxy] > [Name of Proxy Service] > HTTP Options.

-
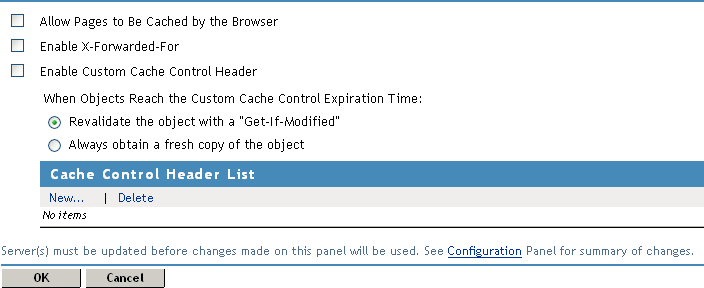
To mark all pages coming through this host as cacheable on the browser, select Allow Pages to be Cached by the Browser.
When this option is enabled, the no-cache and no-store headers are not injected into the HTTP header.
You need to select this option if you have a back-end application that updates the data in the Last-Modified or ETag HTTP headers. These changes are forwarded from the Web server to the browser only when this option is enabled.
You need to select this option if you want the Expires HTTP header forwarded from the Web server to the browser.
If this option is not selected, all pages are marked as non-cacheable on the browser. This forces the browser to request a resend of the data from the Access Gateway when a user returns to a previously viewed page.
-
For the Access Gateway Service, it is always enabled. For information about this option, see Section 3.10, Configuring X-Forwarded-For Headers.
-
By default, the Enable X-Forwarded-For option is disabled for the Access Gateway Appliance. For the Access Gateway Service, it is always enabled. For information about this option, see Section 3.10, Configuring X-Forwarded-For Headers.
-
(Access Gateway Appliance) To configure custom caching instructions, see Section 6.3, Configuring Custom Cache Control Headers.
-
Click OK.
-
To apply the changes, click the Access Gateways link, then click Update > OK.