3.4 Working with Queries
The Queries node allows you to define commonly used LDAP searches that you can execute from a request or approval form by using the DNQuery control or by calling the globalQuery() method. To define the query, you specify the directory abstraction layer entity, the search root, the number of rows to retrieve, and the conditions for retrieving the source entity. You can hard-code the conditions (for example, Where LastName contains s) or specify one or more parameters that are supplied by the user on the request or approval form.
To create a query:
-
Launch the New Query Wizard in any of these ways:
From Designer’s menus:
-
Select . Choose , then click .
-
Select .
From the Provisioning view:
-
Right-click , then select .
From the directory abstraction layer editor:
-
Click the button.
-
Right-click , then select .
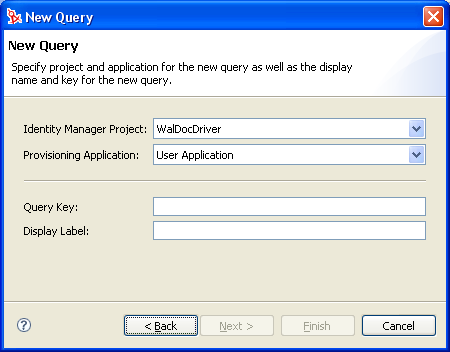
The New Query dialog box displays.
NOTE:When launched from the menu, the dialog box contains fields not displayed when launched in other ways.
-
-
Fill in the fields as follows:
-
Click .
The editor creates the query and opens the property page for editing.
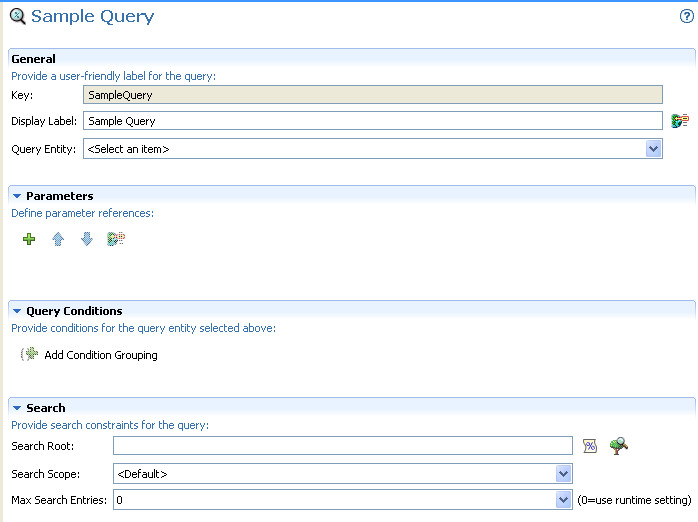
-
Select a . If the entity you want to use is not displayed, make sure it is defined in the Entities node.
-
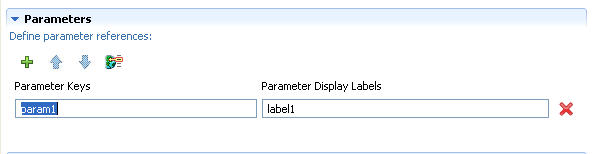
In the section, define one or more parameters for the query. To add parameters:
-
Click .
-
Specify a unique key and a display label for the parameter. You pass this key when calling the globalQuery() method on a form. For more information on globalQuery(), see globalQuery(fieldname, key, param).
-
Add additional parameters by repeating these steps.
-
-
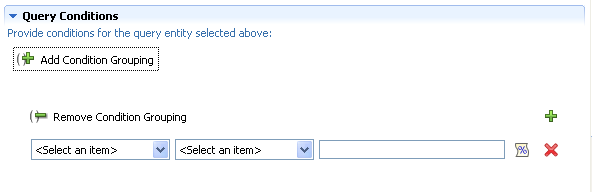
To further refine the query, add .
-
Click (a must be selected to enable ).
-
Use the drop-down list on the left to select an attribute. The attributes in this drop-down are the attributes on the selected .
-
Use the drop-down in the middle to select a comparison operation to perform against your chosen attribute.
-
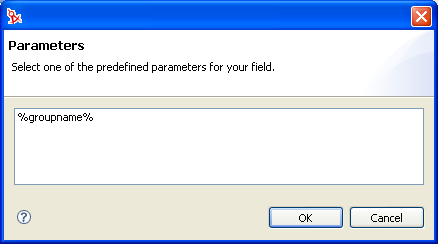
Use the entry on the right to specify a value to compare against your chosen attribute. You can select a variable name by clicking to launch the Predefined Parameters dialog box.
If the query needs to filter on more than one attribute or condition and you want to control the order in which the conditions are evaluated, you can define multiple conditions or condition groups. Within a condition grouping, you specify each criterion that you want and connect them by using the logical operations: and, or.
-
-
To specify multiple condition groupings, click and make your selections from the drop-down list boxes.
-
Define the query’s LDAP Search properties if you want to narrow the search further than already defined for the selected entity. The query’s search root, unlike the entity search root, does not support the use of predefined parameters. For more information, see Section 3.7.3, Queries Properties.
-
Click .
-
the query to make it available to the User Application.