1.3 Migrating the User Application
This section provides an overview of the process for migrating the User Application. The installation steps described below are required for migration.
1.3.1 Installing the User Application
IMPORTANT:You must have the correct JDK installed before you start the installation program. See Section 2.5, “Installing the Java Development Kit” in the Install Guide.
You can migrate your User Application by launching the installation program in one of three modes:
-
Graphical user interface. Depending on which application server you’re running, you should look at one of the following sections:
-
Console (command line) interface. See Section 8.1, “Installing the User Application from the Console”.
-
Silent install. See Section 8.2, “Installing the User Application with a Single Command”
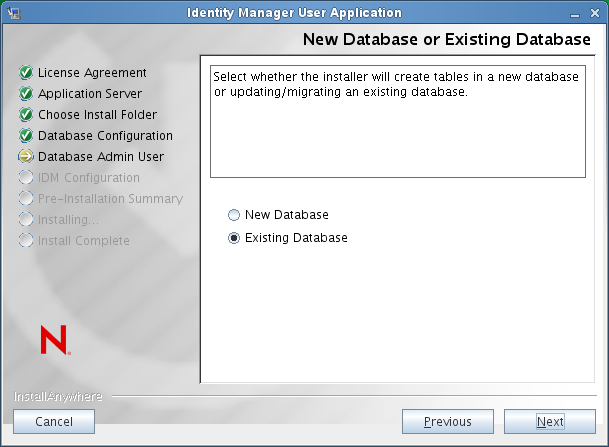
When you run the User Application installation program, you must use the same User Application database that you used for the previous installation (that is, the installation from which you are migrating). You can use a different User Application context name.
When you run the User Application installation program, you need to specify an install location that is different from the one you used in 3.7 (or 3.6.1). Also, be sure you point to a supported version of the application server (such as JBoss 5.1).
During the installation program, when asked if you want to update your database data from a previous installation, make sure that is selected.
IMPORTANT:Be sure not to use case-insensitive collation for your database. Case-insensitive collation is not supported. If you use case-insensitive collation, you might encounter duplicate key errors during migration. If a duplicate key error is encountered, check the collation and correct it, then re-install the User Application.
1.3.2 Post-Installation Steps
This section provides information about User Application migration steps required after installation. Topics include:
Updating the Shared Library Configuration for WebSphere
For RBPM 4.0.2, the setup procedure for WebSphere has changed. Specifically, you need to change the way the shared library is configured for your environment.
-
The serializer.jar file should no longer be included in the list of JARs for the shared library definition.
-
The shared library should not be applied to the IDMProv application, but instead be applied to a new class loader created on the server.
For more information, see Section 6.0, “Installing the User Application on WebSphere”.
Flushing the Browser Cache
Before you login to the User Application, you should flush the cache on the browser. If you do not flush the cache, you may see some runtime errors.
Updating the SharedPagePortlet Maximum Timeout Setting
If you have customized any of the default settings or preferences for the SharedPagePortlet, then it has been saved to your database and this setting will get overwritten. As a result, navigating to the Identity Self-Service tab may not always highlight the correct Shared Page. To be sure that you do not have this problem, follow these steps:
-
Login as a User Application Administrator.
-
Navigate to > .
-
Expand and click on in the portlet tree on the left hand side of the page.
-
Click on the tab on the right hand side of the page.
-
If is not set to 0, set it to 0, and click .
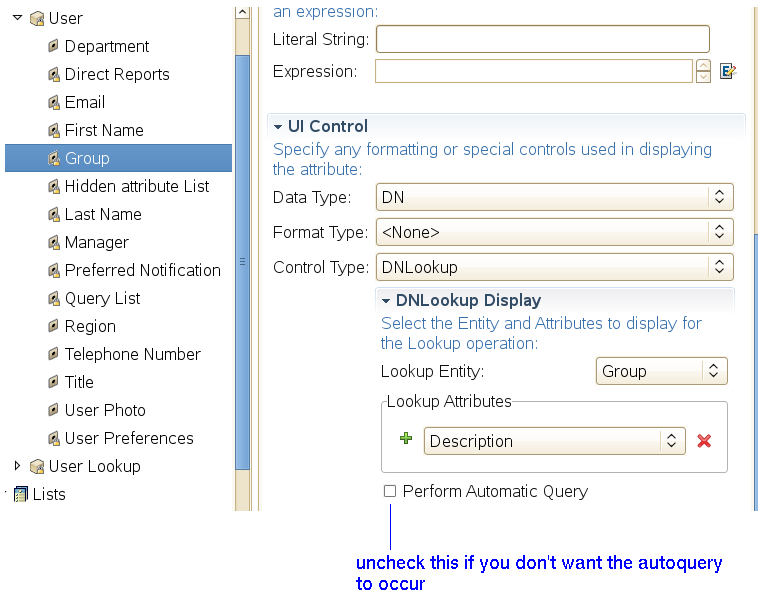
Turning Off the Automatic Query Setting for Groups
By default, the DNLookup Display for the Group entity in the Directory Abstraction Layer is turned on. This means that whenever the object selector is opened for a group assignment, all the groups are displayed by default without the need to search them. You should change this setting, since the window to search for groups should be displayed without any results until the user provides input for search.
You can change this setting in Designer by simply unchecking the Perform Automatic Query checkbox, as shown below: