5.1 Installing and Configuring the User Application WAR
NOTE:For JBoss 5.1.0, the installation program requires the Java 2 Platform Standard Edition Development Kit version 1.6 (JRE or JDK) from Sun (Oracle). If you use a different version, the installation procedure does not successfully configure the User Application WAR file. The installation appears to succeed, but you encounter errors when trying to start the User Application.
-
Launch the installer for your platform from the command line.
To launch the installer, you need to start the IdmUserApp.jar file with the JRE. The installer JAR file can be found in products/RBPM/user_app_install within the .iso image file for Identity Manager 4.0.2.
Be sure to use the correct version of the Sun JRE (as outlined in the Section 1.3, System Requirements) to start the User Application installer.
Depending on where the JRE is installed, the command you use to launch the installer would be one of the following:
Linux/Solaris
$ /opt/novell/jre/bin/java -jar IdmUserApp.jar
or
$ /opt/novell/idm/jre/bin/java -jar IdmUserApp.jar
Windows
C:\Novell\InstallFiles\> "C:\Program Files\Java\jdk1.6.0_31\bin\java.exe" -jar IdmUserApp.jar
The commands shown above are examples. You may need to adjust the path to the JRE. For example, if you installed into /opt/novell/idm on Linux, then the command would be:
/opt/novell/idm/jre/bin/java -jar IdmUserApp.jar
If you used the JBossPostgreSQL utility provided with the Roles Based Provisioning Module to install JBoss, you can use the JRE that it provided to launch the User Application installer.
NOTE:SLES users: Do not use the IBM* JDK that comes with SLES. This version is incompatible with some aspects of the installation and can cause master key corruption errors.
When the installation program launches, you are prompted for the language:
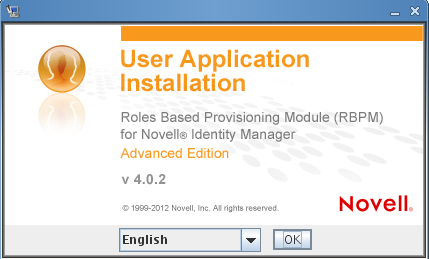
-
Use the following information to choose the language, confirm the license agreement, and select the Application Server platform:
Installation Screen
Description
User Application Installation
Select the language for the Installation program. The default is English.
License Agreement
Read the License Agreement, then select.
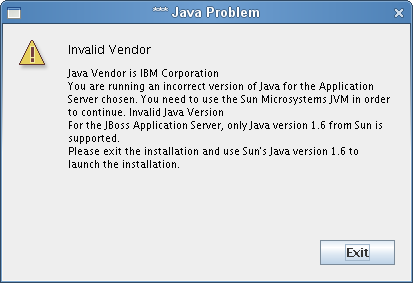
Application Server Platform
Select .
When you’re installing on JBoss, you need to launch the installation program by using Sun’s Java environment. If you select JBoss as the application server, and do not use Sun’s Java to launch the installation, you will see a pop-up error message, and the installation will terminate:
-
Use the following information to choose an install folder and configure the database:
Installation Screen
Description
Choose Install Folder
Specify where you want the installer to put the files.
Database Platform
Select the database platform.
The database and JDBC driver must already be installed. For JBoss, the options include the following:
-
MySQL
-
Microsoft SQL Server
-
Oracle
-
PostgreSQL
Database Host and Port
: Specify the database server’s hostname or IP address. For a cluster, specify the same hostname or IP address for each member of the cluster.
: Specify the database’s listener port number. For a cluster, specify the same port for each member of the cluster.
Database Username and Password
(or SID): For PostgreSQL, MySQL, or MS SQL Server, provide the name of your database. For Oracle, provide the Oracle System Identifier (SID) that you previously created. For a cluster, specify the same database name or SID for each member of the cluster. The default database name is idmuserappdb.
: Specify the database user. For a cluster, specify the same database user for each member of the cluster.
: Specify the database password. For a cluster, specify the same database password for each member of the cluster.
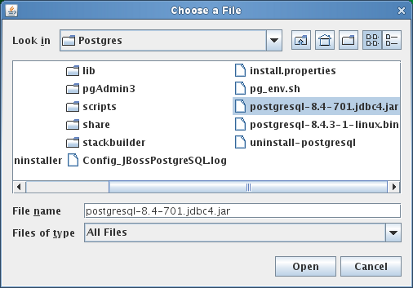
: Provide the Thin Client JAR for the Database Server. This is required. You need to specify a driver JAR file that has been provided by the database vendor for the particular database you are using. Driver JAR files provided by third-party vendors are not supported.
For PostgreSQL, choose the postgresql-8.4-701.jdbc4.jar file:
Database Administrator
This screen is pre-populated with the same username and password from the Database Username and Password page. If the database user that was specified earlier does not have enough permissions to create tables in the Database Server, then a different user ID that has the necessary rights needs to be entered.
Create Database Tables
Specify when the database tables should be created.
The Create Database Tables screen gives you the option to create tables at installation time or at application startup. Alternatively, you can create a schema file at installation time, which the Database Administrator would use to create the tables later.
If you want to generate a schema file, select and provide a name for the file in the field.
New Database or Existing Database
If the database that will be used is new or empty, then select the button. If the database is an existing one from a previous installation, select the button.
Test Database Connection
To confirm that the information provided in the previous screens was correct, you can test the database connection by selecting .
The installer needs to connect to the database both for creating tables directly and for creating the .SQL file. If you test the database connection and it fails, you may still continue with installation. In this case, you will need to create the tables after installation, as described in the User Application: Administration Guide.
-
-
Use the following information to configure Java, the JBoss installation, and Identity Manager, as well as audit settings and security.
Installation Screen
Description
Java Install
Specify the Java root install folder. The Java Install provides the path to Java based on your JAVA_HOME environment variable and gives you the option to correct it.
At this point, the Installation program also validates that the Java selected is the correct one for the Application Server selected. In addition, it validates that it can write to the cacerts in the JRE that was specified.
You are then prompted for information about where your JBoss application server is installed.
JBoss Configuration
Tells the User Application where to find the JBoss Application Server.
This installation procedure does not install the JBoss Application Server. For directions on installing the JBoss Application Server, see Installing the JBoss Application Server and the PostgreSQL Database.
: Specify the location of the JBoss application server.
IDM Configuration
Select the type of application server configuration:
-
Select if this installation is on a single node that is not part of a cluster
If you select and decide you need a cluster later, then you must reinstall the User Application.
-
Select if this installation is part of a cluster
: The name of the application server configuration, the name of the application WAR file, and the name of the URL context. The installation script creates a server configuration and by default names the configuration based on . Make a note of the application name and include it in the URL when you start the User Application from a browser.
: Each server in a cluster must have a unique Workflow Engine ID. The Workflow Engine ID is only valid for cluster installs, and only if you are installing the provisioning WAR. The engine ID cannot exceed 32 characters. Workflow Engine IDs are described in the User Application: Administration Guide in the section on configuring workflows for clustering.
Select Audit Logging Type
To enable logging, click . To disable logging, click .
The next panel prompts you to specify the type of logging. Choose from the following options:
-
: Enables logging through a Novell client for the User Application.
-
: Events are logged to your OpenXDAS logging server.
For more information on setting up logging, see the .
Novell Identity Audit or Novell Sentinel
: If you enable logging, specify the hostname or IP address for the server. If you turn logging off, this value is ignored.
: Specify the directory for the logging cache.
Security - Master Key
: Allows you to Import an existing master key. If you choose to import an existing encrypted master key, cut and paste the key into the install procedure window.
: Creates a new master key. After you finish the installation, you must manually record the master key as described in Section 9.1, Recording the Master Key.
The installation procedure writes the encrypted master key to the master-key.txt file in the installation directory.
NOTE:If you install the User Application from the console, the installation program does not automatically create the master-key.txt file. Instead, you must manually copy the master key from the /opt/novell/idm/jboss/server/IDMProv/conf/sys-configuration-xmldata.xml file.
Reasons to import an existing master key include:
-
You are moving your installation from a staging system to a production system and want to keep access to the database you used with the staging system.
-
You installed the User Application on the first member of a JBoss cluster and are now installing on subsequent members of the cluster (they require the same master key).
-
Because of a failed disk, you need to restore your User Application. You must reinstall the User Application and specify the same encrypted master key that the previous installation used. This gives you access to the previously stored encrypted data.
-
-
If you would like to configure RBPM now, select and click .
(If you are not prompted for this information, you might not have completed the steps outlined in Section 2.5, Installing the Java Development Kit.)
The default view of the Roles Based Provisioning Module Configuration panel shows these fields:
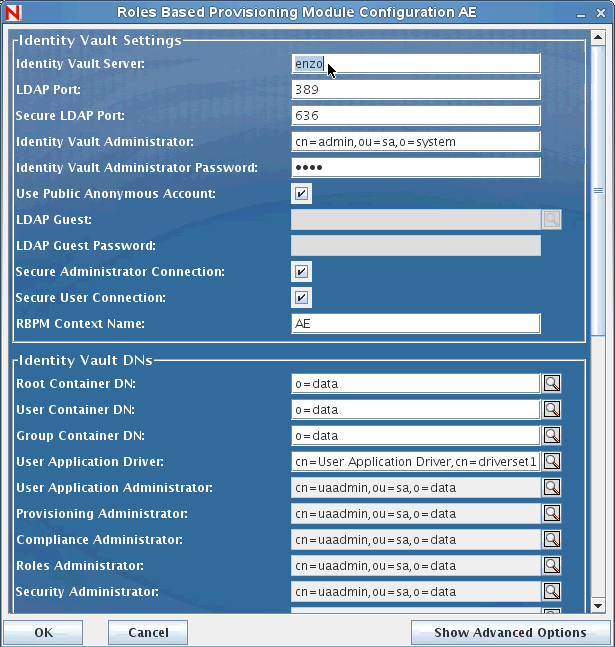
The Installation program will take the value from the Root Container DN and apply it to the following values:
-
User Container DN
-
Group Container DN
The Installation program will take the value from the User Application Administrator fields and apply it to the following values:
-
Provisioning Administrator
-
Compliance Administrator
-
Roles Administrator
-
Security Administrator
-
Resources Administrator
-
RBPM Configuration Administrator
If you want to be able to specify these values explicitly, you can click the button and change them.
The User Application install enables you to set User Application configuration parameters. Most of these parameters are also editable with configupdate.sh or configupdate.bat after installation; exceptions are noted in the parameter descriptions.
See Section A.0, User Application Configuration Reference for a description of each option.
The default view for Standard Edition shows a subset of the security fields, as shown below:
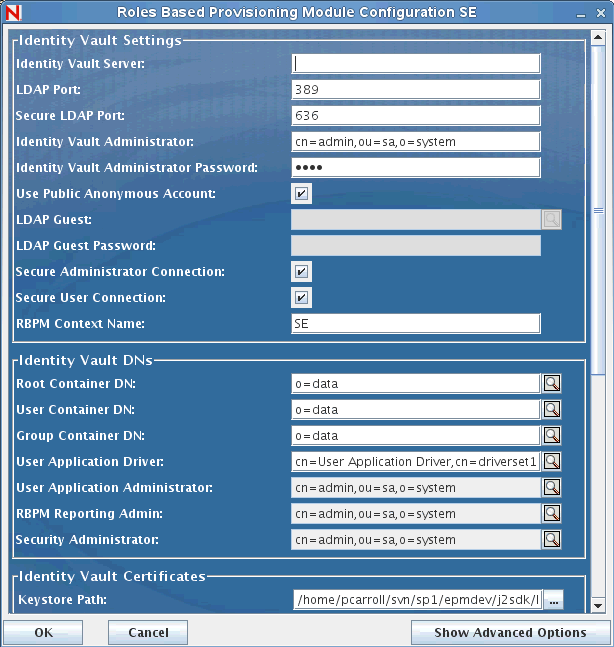
In Identity Manager 4.0.2 Standard Edition, only the following administrators need to be assigned:
-
User Application Administrator
-
RBPM Reporting Administrator
-
Security Administrator
NOTE:For testing purposes, Novell does not lock down the security model in Standard Edition. Therefore, the Security Administrator is able to assign all domain administrators, delegated administrators, and also other Security Administrators. However, the use of these advanced features is not supported in production. In production environments, all administrator assignments are restricted by licensing. Novell collects monitoring data in the audit database to ensure that production environments comply. Furthermore, Novell recommends that only one user be given the permissions of the Security Administrator.
-
-
Use the following information to complete the installation.
Installation Screen
Description
Pre-Installation Summary
Read the Pre-Installation Summary page to verify your choices for the installation parameters.
If necessary, use to return to earlier installation pages to change installation parameters.
The User Application configuration page does not save values, so after you re-specify earlier pages in the installation, you must re-enter the User Application configuration values. When you are satisfied with your installation and configuration parameters, return to the Pre-Install Summary page and click .
Install Complete
Indicates that the installation is finished.
Installer creates the novlua user The installer creates a new user with the name novlua. The jboss_init script runs JBoss as this user and the permissions defined in the JBoss files are set to this user.