16.9 Exporting a Project
Designer’s export feature allows you to export Projects and Driver Configuration files to a local, removable, or network directory.
-
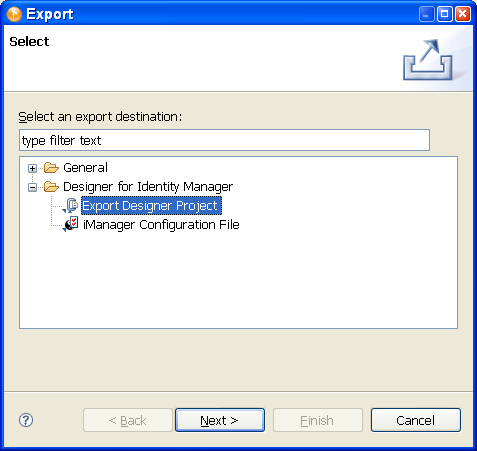
Click File > Export.
You use the Export window to export an existing Identity Manager Project to an archive file or to an iManager configuration file.
-
Select Designer for Identity Manager > Export Designer Project, then click Next.

-
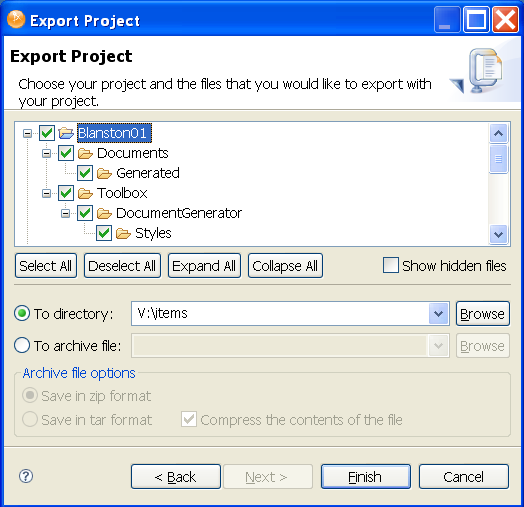
In the Export File System window, select the projects you want to export.

-
Click Select All to select all projects in the designer_workspace directory (for Windows, the default location is C:\Documents and Settings\user's_login_name\designer_workspace).
or
Click Deselect All to clear the selections. You can then select the projects you want to export. Use the Expand All or Collapse All icons to expand or collapse the objects under each project. You can also select Show hidden files to display any files that have a period (.) at the beginning of the filename.
IMPORTANT:You must select all items relating to a project for an export of the project to work.
You can also browse to the directory location where you want to select the resources.
-
After you designate the directory to which to export the projects, click Finish.
You can also export projects to an archive file:
-
Click File > Export.
You use the Export window to export an existing Identity Manager Project to an archive file or to an iManager configuration file.
-
Select Designer for Identity Manager > Export Designer Project, then click Next.
-
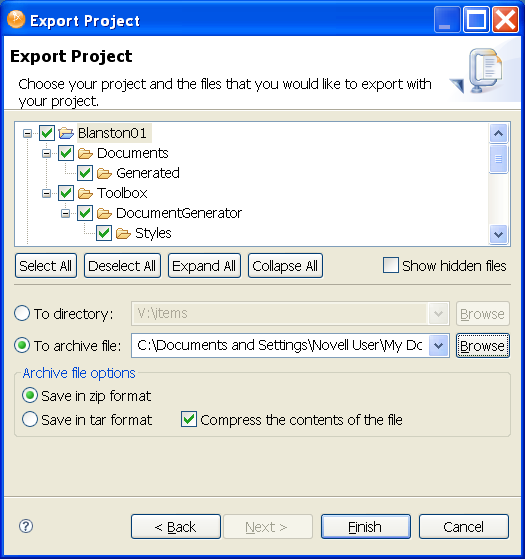
Select the To archive file option in the Export window.

-
Select the projects you want to archive.
-
Designate where you want the archive file saved. You can browse to an already existing file, or type an archive filename.
-
Select the archive format (zip or tar).
-
Select whether you want to compress the contents of the file, then click Finish.
With the Project Export Wizard, you don’t need to select the model files that are necessary for the project to work, because these files are exported automatically. You can choose to not export any extra files that are included in a project by deselecting them under the project in the Export Project window.