4.1 Creating a Template in Designer
-
Open your project.
-
In the Outline view, right-click > click to display the Add Notification Template dialog box.
-
In the field, type a name for the template.
-
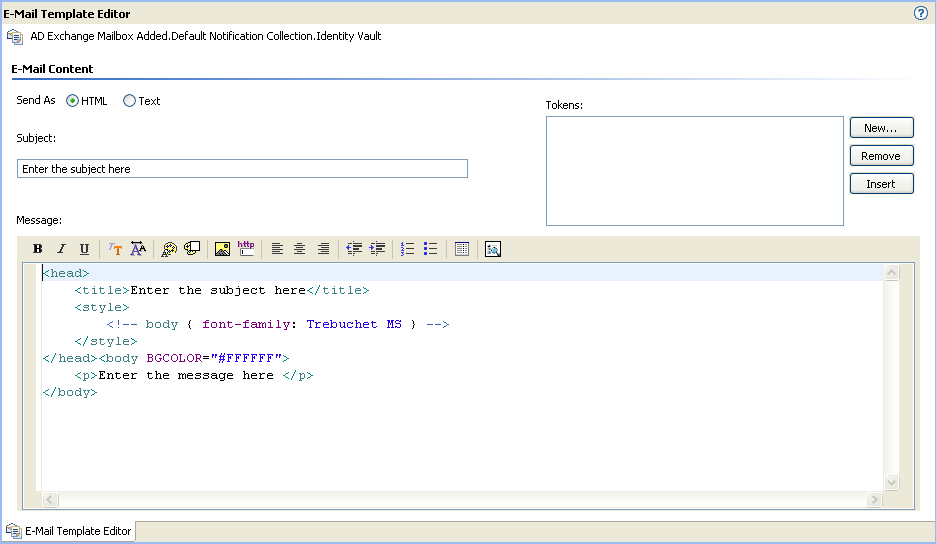
Make sure the option is selected, the click to create the template and display the template editor.

-
In the field, select whether to send the e-mail in HTML format or in text format.
-
In the field, type the text that you want users to see in the e-mail’s Subject line.
You can use tokens in the Subject field. To do so, click where you want to insert the token, select the token from the list, then click . For information about adding new tokens, see Section A.0, Tokens and Replacement Tags.
-
In the box, type the message you want.
-
To format text, use the toolbar.

-
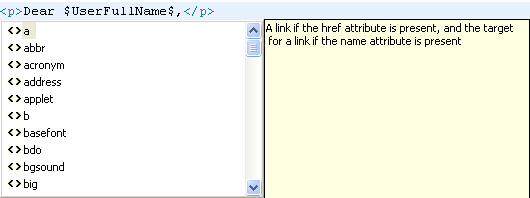
To insert HTML tags, place your cursor in the Message box at the location where you want to insert a tag, then press Ctrl+Spacebar or type < to display a list of HTML tags to choose from.

-
To insert a token, place your cursor in the Message box at the location where you want to insert the token, select the token in the Tokens list, then click . For information about adding new tokens, see Section A.0, Tokens and Replacement Tags.
-
To preview the message, click the icon
 .
.
-
-
Click to save the template.
-
To deploy the template into your live system, right-click the template, click > .