5.4 Deploying the Schema into the Identity Vault
After the Identity Manager driver is tested with the new schema, you can deploy the modified schema into the Identity Vault.
-
In the Modeler, select the Identity Vault.
-
Select .
-
Specify the .

The host name can be the server’s IP address or the DNS name of the server.
-
Specify the in LDAP format, which must be a user with administrative rights to the schema.
-
Specify the user’s password, then click .
While connecting to the live Identity Vault, Designer prompts you to ensure that the certificate that you are accepting is valid. You can choose to accept the certificate temporarily for the session or accept it permanently. You can instruct Designer to remember this setting for future authentication to the Identity Vault.
-
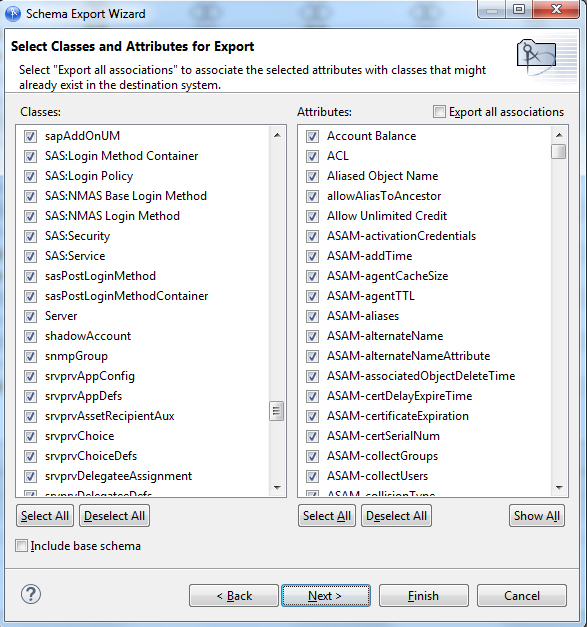
Select the classes and attributes to deploy into the Identity Vault schema, then click .
-
Review the summary of classes and attributes to be deployed, then click .
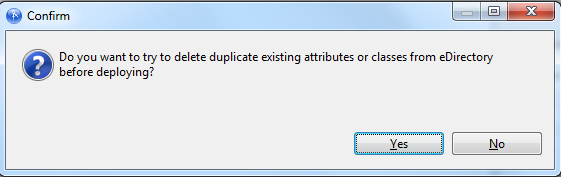
If you have selected duplicate attributes or classes, a warning box appears
-
Select or , depending upon whether you want to resolve the duplicate classes or attributes.
-
Review errors or warnings, then click .
