18.3 Configuring a Provisioning Request Definition
Before configuring a provisioning request definition, you need to select the User Application driver that contains the definition. Having selected the driver, you can create a new provisioning request definition or edit an existing definition. You can also delete provisioning request definitions, change the status of a request definition, or define rights for a request definition.
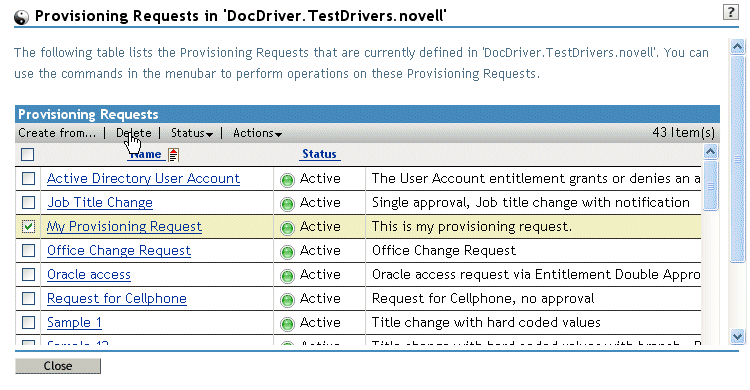
18.3.2 Deleting a Provisioning Request
To delete a provisioning request:
-
Select the provisioning request you want to delete by clicking the check box next to the name.
You are not permitted to delete a provisioning request that is a template.
-
Click the command in the Provisioning Request Configuration panel.
18.3.3 Filtering the List of Requests
To filter the list of requests:
-
Click the command in the Provisioning Request Configuration panel.
-
Click the command on the menu.
Specify the filter characteristics:
Choice
Description
Turn off filtering
Disables any existing filtering for the list.
Filter for status equals
Filters based on the status. You can filter the list based on any of the following status codes:
Filter for category equals
Filters based on category. Select any of the defined categories.
Filter for description contains
Allows you to search for text in the request description. Type the string you want to search for.
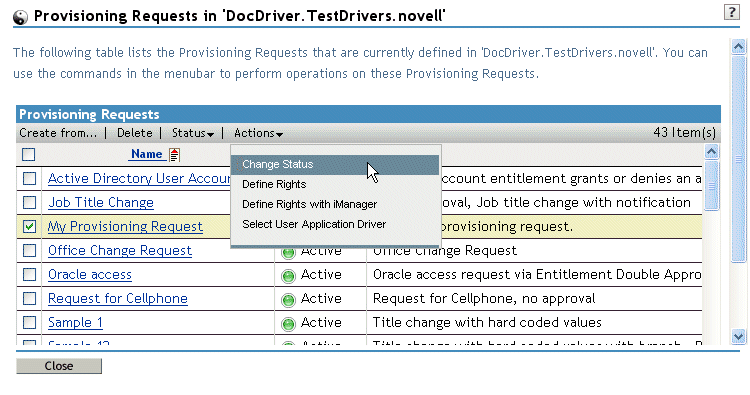
18.3.4 Changing the Status of an Existing Provisioning Request
To change the status of an existing provisioning request:
-
Select the provisioning request for which you want to change status by clicking the check box beside the name.
-
Click the command in the Provisioning Request Configuration panel.
-
Click the command on the menu.
-
Click the status in the menu:
Status
Description
Active
Available for use.
Inactive
Temporarily unavailable for use.
Retired
Permanently disabled.
-
Click the button for the correct action ( or ).
-
Click .
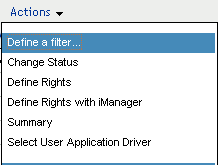
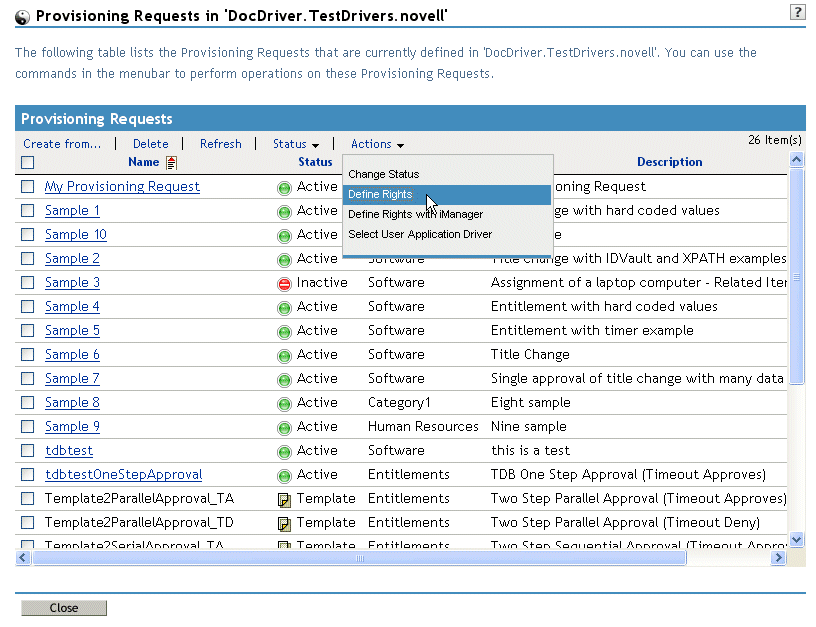
18.3.5 Defining Rights on an Existing Provisioning Request
To define rights on an existing provisioning request:
-
Select the provisioning request for which you want to define rights by clicking the check box beside the name.
-
Click the command in the Provisioning Request Configuration panel.
-
Click the command on the menu.
-
Specify the rights for the request.
To define rights on a provisioning request with iManager:
-
Select the provisioning request for which you want to define rights by clicking the check box beside the name.
-
Click the command in the Provisioning Request Configuration panel.
-
Click the command on the menu.