2.3 Understanding Scheduled Events
Scheduled events allow you to initiate a work item at a specific date and time. For example, if your company sets up, manages, and maintains servers for multiple customers, you can create a workflow that:
-
Starts at the beginning of a maintenance period for a particular set of servers.
-
Places the servers in maintenance mode.
-
Performs routine maintenance, such as performing a backup or rebooting a server.
-
Waits until the maintenance period ends.
-
Puts the servers back into production mode.
2.3.3 Understanding Timetables and Time Ranges
A is a collection of one or more time ranges. For example, a timetable called National Holidays has a time range for each holiday in the year, such as New Years Day.
Using Time Ranges to Restrict an Event Schedule
You can use time ranges to restrict when an event schedule generates events.
- Positive Constraints
-
The event schedule generates an event only if the scheduled occurrence is within a specified time range. For example, if you want a scheduled event to occur every day except for weekends, you can add a timetable called Business Days, which has a time range for each weekday, as a positive constraint. The scheduled event occurs Monday through Friday, but not on weekends.
- Negative Constraints
-
The event schedule does not generate an event if the scheduled occurrence is within a specified time range. For example, if you want a scheduled event to occur every Friday except for holidays, you can add a timetable called National Holidays, which has a time range for each holiday in the year. The scheduled event does not occur on any Friday that is a holiday.
Using Time Ranges in Workflows
Time ranges allow the Check Time Against a Time Range activity to check whether a specified time falls within one or more pre-defined time ranges. The activity’s output parameter is either TRUE or FALSE. Process Authors can use the output parameter in another activity at a later point in the workflow or in a conditional connector to determine the path of the workflow immediately after the Check Time Against a Time Range activity.
For example, a Process Author places a Check Time Against a Time Range activity immediately after a Start of Workflow activity and configures it to retrieve the current time and check it against a timetable that contains time ranges related to national holidays. The Process Author configures a conditional connector to connect the Check Time Against a Time Range activity to a Pause for Specified Time activity. When an event triggers the workflow, the Check Time Against a Time Range activity checks the current time against the specified time range and finds that the current time is on New Year’s Day. The Pause for Specified Time activity delays the flow until the next business day.

2.3.4 Scheduled Event Example
The following example provides an overview of the major steps involved in setting up a scheduled event and associating it with a trigger:
-
Create a Timetable
-
Create a Time Range
-
Create an Event Schedule
-
Create a Named Event
-
Create a Trigger
-
Create a Process
1. Create a Timetable
Create a timetable called Maintenance Periods that contains a time range for each client’s maintenance period, such as Exchange Servers - Customer A, which is the same name your environment uses for the resource group that contains the computers.
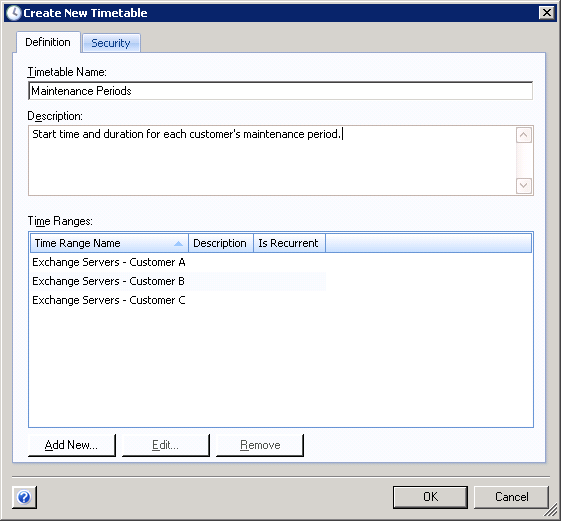
2. Create a Time Range
Create the Exchange Servers - Customer A time range, and specify when the maintenance period starts, how long it lasts, and how often it recurs.

3. Create an Event Schedule
Create an event schedule called Server Maintenance, and configure it to generate an event at the start and end of each time range in the Maintenance Periods timetable.

The event schedule generates an event by adding a task to the Task Scheduler in Microsoft Windows, which sends the event to Workflow Automation at the appropriate date and time.
4. Create a Named Event
Create a named event called Start of Server Maintenance with the following settings:
Has event type of Scheduler.Event and All of the following
Event attribute Event Schedule Name is equal to Server Maintenance
Event attribute Scheduled Event Type is equal to Start of Time Range

For more information about named events, see Understanding Named Events.
5. Create a Trigger
Create a trigger called Scheduled Server Maintenance.
On the Initiate New Work Item If tab, use the One event of a specific type expression template to match the Start of Server Maintenance named event.

On the Custom Attributes tab, create a custom attribute that retrieves the attribute from the event that initiates the work item. Ensure the following values are set:
|
Custom Attribute |
|---|---|
|
Name |
TriggeringEventTimeRange |
|
Display Name |
Time Range of Triggering Event |
|
Type |
String |
|
Value |
Use the Input Builder to retrieve the attribute from the event that initiates the work item. For more information about using the Input Builder, see Understanding the Input Builder. |
For more information about triggers, see Understanding Triggers. For more information about custom attributes, see Understanding Trigger Custom Attributes.
6. Create the Process
Create a new process and open the Workflow Designer.
-
In the Library Browser, drag the following activities from the specified activity libraries to the design grid:
Activity
Library
Start of Workflow
Basic Workflow Control
Find All Computers in a Resource Group or Business Service
Resources Management
Set Ad Hoc Maintenance Mode
NetIQ AppManager
Wait for Scheduled Event
Times and Dates
Clear Ad Hoc Maintenance Mode
NetIQ AppManager
End of Workflow
Basic Workflow Control
-
In the Start of Workflow activity, add the trigger you created.

-
In the Find All Computers in a Resource Group or Business Service activity, for the Resource Name parameter, use the Input Builder to retrieve the custom attribute you created on the trigger.

The activity retrieves a list of all computers in the resource group with the same name as the time range associated with the triggering event. The list of computers is available in an output parameter. For more information about resource groups, see the NetIQ Workflow Automation Administrator Guide.
-
In the Set Ad Hoc Maintenance Mode activity, for the Computers parameter, use the Input Builder to retrieve the output parameter from the Find All Computers in a Resource Group or Business Service activity.

-
In the Wait for Scheduled Event activity, create a filter with the following rules:
-
Events where Event Schedule Name is equal to Server Maintenance
-
Events where Scheduled Event Type is equal to End of Time Range
-
Events where Time Range Name is equal to {Trigger Custom Attribute.Time Range of Triggering Event}
NOTE:The brackets represent a portion of the filter for which you must use the Input Builder to specify the custom attribute you created previously. For more information about using the Input Builder, see Understanding the Input Builder.

The activity pauses the workflow until the event schedule sends an event to indicate the end of the maintenance period.
-
-
In the Clear Ad Hoc Maintenance Mode activity, for the Computers parameter, use the Input Builder to retrieve the output parameter from the Find Resource Groups activity.

-
Ensure the workflow has an End of Workflow activity, and then connect the activities with unconditional connectors.
For more information about connectors, see Understanding Workflow Connectors.