13.7.1 Customizing Messages in the Custom Localization File
NOTE:The messages customized using the Custom localization file does not reflect on the new Enrollment Portal. However, to customize messages for the new Enrollment Portal, see Customizing the Login Page of Web Authentication Events.
To customize preferred messages using the file, perform the following steps:
-
Click .
-
Perform one of the following action to download the custom localization file on your local drive:
-
Click to save the custom_messages.tar.gz file that contains the default messages.
-
If you have customized the messages, click to save the current_custom_messages.tar.gz file that contains the latest messages.
-
-
Extract the files from the custom_messages.tar.gz file.
-
Navigate to the preferred language folder.
To customize English messages, use the custom_messages.pot file and for other languages use the custom_messages.po file.
-
Open the custom_messages.pot file in the text format.
-
Specify the message in the msgstr "".
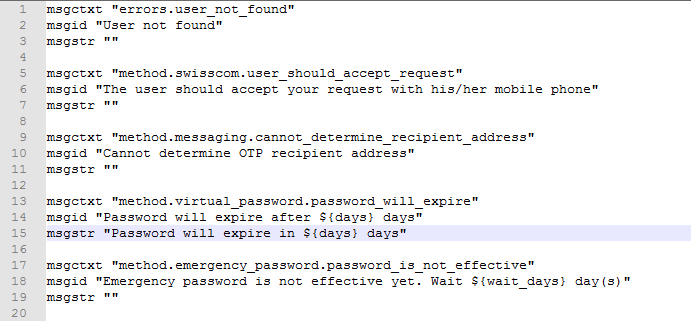
-
Save the changes.
-
Compress the custom_messages folder to .tar.gz or .zip format.
-
Click and select the compressed custom_messages file from the local drive.
-
Click .
IMPORTANT:English is the default language and administrator cannot upload or delete the English language file.